Not a Self-build, but a Tweaker

wildebus

Forum Member
Hmmm, I thought they were supposed to pull more on initial start then drop to or below rated watts. No can they call that an 800W model?
They seem to use the term "800W Microwave Power". I guess the conversion from Input to Microway Energy is pretty inefficient? I haven't done so, but I think I will look on the back to see what power rating is on the label on the back - that is meant to show consumption.

I bet most people think 800W means it uses 800W though. And a very reasonable assumption to make.
 

wildebus

Forum Member
My first real alteration was carried out today in the Motorhome :D

I forgot to take a photo before the dismantling of the standard fitting at the top, so there is the cabling, plus some pen markings added lower down
1600625032431.png


This pillar is right at the side of the kitchen with a sofa on the other side of the upstand. I needed to add some USB Sockets to plug in Phones and Tablets to charge (this is fairly urgent for usability so needed to get done!).
I also wanted to add another 240V Socket on a different circuit to the one in the top block (I plan to make one of them a little "intelligent" and live depending on battery SOC, and the other one normal).
So a bit of work with my Bosch Multitool (couldn't risk using the hole saw as cables were running behind where I will be cutting), then some wiring and we end up with this ....
1600625487006.png

So at the top it is still standard, with a 240V socket plus a dimmer control for the 240V lighting.
And the bottom set is the new 240V at the bottom, a Twin USB in the middle, and a pair of switches at the top - the left turning the USB on and off, and the right turning the 240V on and off.

Pleased with this as it does look like it could have been a factory install (I really like the interior so trying to do stuff within that style where possible)
 

wildebus

Forum Member
Hmmm, I thought they were supposed to pull more on initial start then drop to or below rated watts. No can they call that an 800W model?
So I looked at the back ....
1600695833812.png

The input power measured matches very well the label input power (y)
But I don't recollect EVER seeing the real power consumption quoted on any microwave specs quoted by on-line vendors such as Amazon or Argos :(

I bet if you went to a shop and asked the staff "how much power does that 800W microwave use", I bet they would look at you as if you were an idiot and say "800W of course. There's the label" pointing to the front.
 

wildebus

Forum Member
Well, no point in having alarms if they are not fitted :)

So one task for today was to do just that!
First was the CO detector. Understand these are meant to be fitted fairly low down, so chose a place that is also fairly close to the fire and fridge (hope it is not TOO close?)
1600790479332.png


Next was the Smoke Alarm. Just used the same place as the old one. Fairly close to the sleeping area.
1600790554417.png

Did a test and it is extremely loud! Could be heard in the house which could be handy as well :)
 

wildebus

Forum Member
Just getting a bit familiar with the Motorhome and checking out the Fridges automatic energy switchover from Mains to Gas.... nope :( Goes to try gas and the light just flashes and little spanner comes up.
So being a gas virgin, thought I would just check if there is gas still! (although everything seemed to work fine at the Kelso meet). Gas knob off; Undid bottle connection and turned knob back on. Empty! No idea how much started with though.

Plan is to switch to refillable anyway so at least I won't be wasting any part-filled Calor Bottles :D
Thought I may as well do the first step and put the Gaslow bottle in seeing as there is some gas in there (again, no idea how much).
1600791335381.png

The External Gaslow filler kit is arriving tomorrow and need to decide if I fit it tomorrow or wait until the weekend. Might be an idea to fit seeing as a) I don't know how much gas I have; and b) I am going away on Thursday for an overnighter and not 100% sure the pitch on the campsite has hookup (I would expect so, but good to have a backup plan).
I do have the small Calor bottle there still which has gas when I open the valve, but just like the two bigger ones, no idea how much so a bit of an unknown backup plan on that one.
 

Nabsim

Forum Member
Too late for you now Dave but did you remember to ask Charlie for price for Gaslow bits? He can usually supply cheaper than anyone else
 

wildebus

Forum Member
Didn't think to ask Charlie about this one either ....
Made up the pipe so I can use the Cadac Safari Chef on the outside BBQ point.
1600882664710.png

Bullfinch Connector for the Motorhome side and I got the Cadac Quick-Release connector kit for the other end.
For some reason they come with two device and one pipe fittings - so you could set up two different BBQs to use Quick-Connect and so chose which to use from the BBQ Gas Point.
Do many people carry two different Cadac BBQs? To me, it would make a lot more sense to have one Device and TWO Pipe fittings, so you can use the BBQ either BY the van with the plumbed in Gas Point OR AWAY from the Van with its own bottle.

Hopefully will get some use out of this before Winter!
 

wildebus

Forum Member
Back to doing some power tests to check on what I need for the Electrics update in terms of Inverters ....

Something I do want to have in the Motorhome is an Electronic Breadbin. "What is that?", I hear you ask" Why do you want an 'electronic breadbin'?"
Well... they seem to be a 'breadbin' for many folk when in their Motorhome, but they usually go by the alternative name of 'Microwave Oven' :)
......

So I have installed the Microwave in the Motorhome
1600977934238.png


Or have I? When I come to open it, it has turned into an Electronic Breadbin!
1600977999827.png


:D :p :geek: :D 🦓
 

RAW

Forum Member
Didn't know you were getting a new Van dave, have you sold the old one ? Thanks for the information on the new one, she looks good though more coachbuilt than your old one
 

wildebus

Forum Member
It was not really a long-planned purchase. More a consequence of knowing 'regular' holidays are out the window due to Coronavirus for (In Mine and OHs opinion) quite a few years so decided to get a "hotel on wheels" :)
 

wildebus

Forum Member
First significant tweak in terms of how I will be using it made to the Motorhome today :D

Installed the Gaslow Filling system to go with the Gaslow bottle I put in the locker last week (y)

This is the Kit I am installing

Gaslow FIller Kit
by David, on Flickr

And bought a 70mm Hole Saw specifically for this installation

70mm Hole Saw
by David, on Flickr

Starting Point of the installation

Before
by David, on Flickr
My original thoughts were to install the Filler in the door, but when I looked at the Gas Locker more closely and the options available, I found fitting in the skirt would be a better option.

Chose an area to the rear of the Locker in the flattest part of the skirt

70mm Hole Cut
by David, on Flickr
This is equidistant between two rear skirt supports so should be a pretty strong area to take the gas filler hose.

The Filler Moulding and has two protrustions top and bottom to stop it turning when the filler hose is inserted (there is a black sharpie mark on the notch in this photo)

Gaslow Filler Moulding
by David, on Flickr

So a corresponding pair of notches must be made in the hole

Prepped Hole for Filler
by David, on Flickr


The filler was assembled, pipe fitted and positioned in place

Filler in Place
by David, on Flickr

This is the rear view with the rear cap on place, sandwiching the skirt between the two parts

Filler Rear
by David, on Flickr
You can see the two skirt supports either side of the filler

I then ran the pipe through to the locker. Now the pipe is very strong and steel braided, but I decided to add a bit of foam lagging where the pipe rests against the entrance to the locker and also on the skirt support as a bit of extra protection

Foam Protection
by David, on Flickr

And this is the finished setup :p

Gas Setup for Cheyenne
by David, on Flickr
All fits in very neatly in fact and pleased with this :D
I watched a few Youtube videos on this kit to check if there are any 'Gotchas' I should make a note of and it seems some people put a bead of sikeflex or silicon on the filler where it goes against the skirt. I found no reason to do that and on my install it is nice and tight all around :)

Something I also added into the setup is a Gas Gauge

Gas Gauge
by David, on Flickr
Looks a neat little jobby :) Something that caught me out with this is that when the gas pressure is first applied, you need to push the gauge front in to release the valve. I didn't do that after I opened the bottle valve and wondered why I was getting no gas :unsure:

And closing the door, job's a good un 🦓 :geek: :) :p :D


After
by David, on Flickr
 

Squiffy

Forum Member
Looks like your new "flimsy" has enjoyed a cossetted, loved, life Dave, mind you I'm a bit worried about you going down the "flimsy" route as the next thing we will all be seeing are details about some kind of 'A' frame and a small car to tow behind :ROFLMAO:

Phil
🤣🤣
 

wildebus

Forum Member
Do you have a YT channel now ? If so where is it and I will subscribe ?
I have my Wildebus channel but only a few old videos on there, and only video of stuff, non of me in short or talking. I was thinking of creating a new Channel for my "tweaking" but not fully sure (I'm camera-shy :D )
 

wildebus

Forum Member
Well, I hope the new Poweroad Lithium Batteries from Alpha Batteries are available soon!
Just looked at my battery data after turning on the GAS Heater and switching the fan on to circulate the air ... that extra 0.5A is a killer!
1601287231207.png

Batteries down to 12.02V - so under 50% effectively, but should be (if they still had the quoted capacity) at over 90% with the total Ahs drawn since last full charge.
I think I should have kept hold of that 100Ah Lithium Battery I had a couple more months longer instead of selling it a couple of weeks ago :(
 

wildebus

Forum Member
Found the Overcab bed mattress quite firm despite having the feather topper I used on the Camper on it. Found a well-reviewed Memory Foam topper on Amazon that had a "unique construction of varying hills and valleys to minimize motion transfer for better pressure-point relief and whole-body relaxation". Looked like these hills and valleys would stop the usual problem I have with memory foam of getting too hot , so went for it (y)
Seemed to work, so time to adapt it :)

As can be seen, the mattress is a particular shape to fit the overhead section.

Topper - Original
by David, on Flickr
Ends curved in and the widest part is a few cm slimmer than a standard double, so needed to trim to fit.

A few minutes with my trusty Electric Carving Knife ....

Topper - Trimmed
by David, on Flickr

And back in the cover ready to go back in the Motorhome

Topper - Covered
by David, on Flickr
 

wildebus

Forum Member
Few little more tweaks to make the Cheyenne 'easier' to use and suit myself...

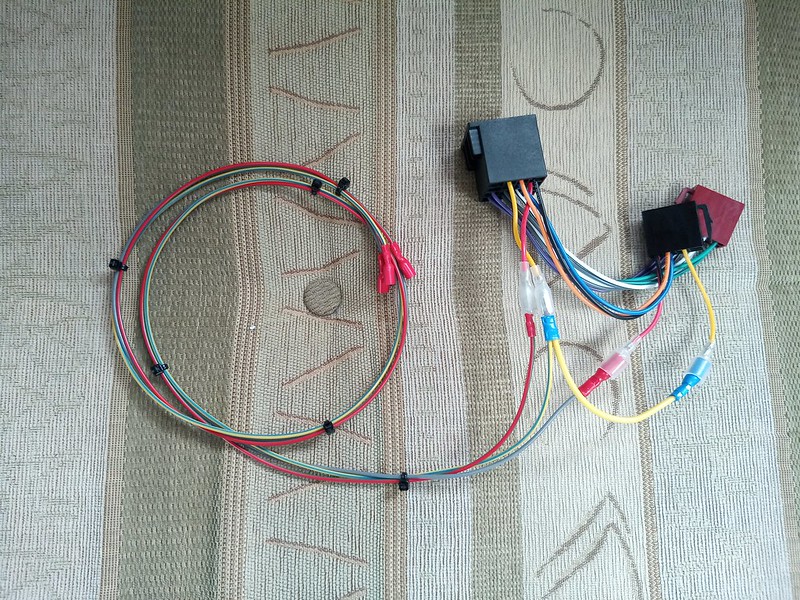
I had previously fitted a Victron BMV-712 Battery Monitor and just left in in the battery box for simplicity as I just wanted a quick way to be able to keep an eye on the battery bank, and did so via the phone or web.
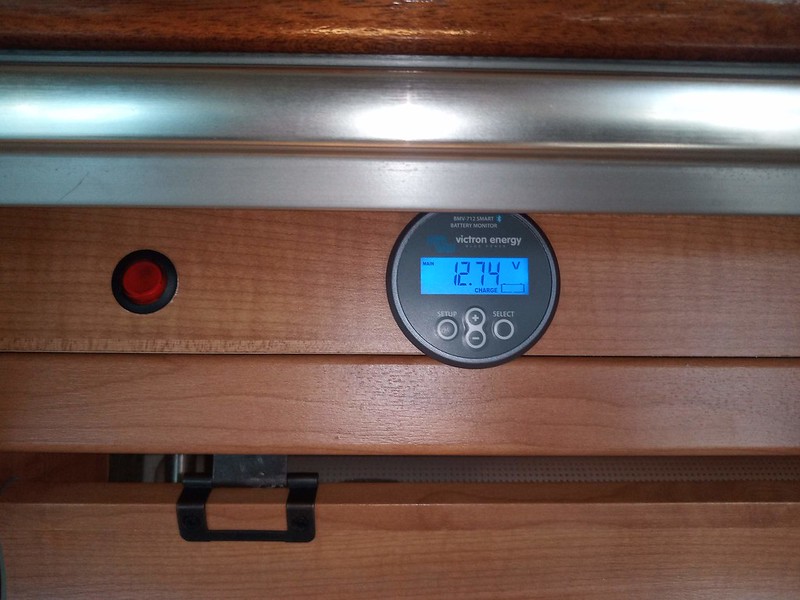
I had always planned to move this into the living space to be able to just look directly and did this a few days ago

BMV-712 Installation
by David, on Flickr
I chose this location as it is easy to see by just dropping down a flap, and when that is closed up, the interior looks standard again

Flap Closed
by David, on Flickr

Unfortunately whilst doing this bit of work, I broke a glass lamp frontpiece for which spares have been obsolete and unobtainable for many years :( . Came up with a replacement option however - more information on what I did is here: Replacement Light Glass - An Option.


Something that I found a bit of a pain is the Overcab Bed Bedding when driving.
Now I specifically wanted an Overcab Bed, and it is a great place to keep all the bedding stuff out the way when not needed. But when the sliding base is pushed forward, to give the regular cab headroom, with the mattress (and new topper), plus duvet and pillows also pushed forward, there was a fair amount of bulk that wanted to drop back down.
What I did was simply to use a couple of straps to keep everything in place :)

Overcab Bedding - Secured
by David, on Flickr
Using these means I can keep the mattress half vertical rather than having to fold it all the way over, which is likely also better for the topper I would think? Then the duvet, etc are just between the mattress and the front of the overcab moulding and nicely out the way :D

Then to make it look a bit tidier, simply put a fleece over the mattress and tucked the bottom of the fleece into the bed base.

Overcab Bedding - "Fleeced"
by David, on Flickr

Minor little thing but this thread is about tweaks to make my Motorhome more enjoyable to use and this is one that has proved its worth even in the two days since doing this :)


On a similar theme of not really making a change, but improving the 'experience' was to replace the knobs on the Cooker.
I noticed one was a bit loose and when looking at the back where it pushes in there was a bit broken off. Looking at the other knobs, they all had similar problems, but the part that was broken off on the first was just cracked and would likely break at some time. I think this is basically just a heat/age related thing.
I decided to replace all the knobs (5 done, 1 still due to arrive) and the difference in the positivity when pushing them back on and using them was quite remarkable! Maybe an expense that was not essential but I think worth it personally.
You may be able to see in the photo below which one is still waiting to be replaced (It is one of the two that were actually broken in fact)

Spinflo Replacement Knobs
by David, on Flickr
 
Last edited:

wildebus

Forum Member
Got the final knob (for the Electric Hob) yesterday, so now with that fitted, the controls are fully refreshed :)


Something that I have fitted to all my Campervans, and also have sold literally hundreds of is my Drive/Camping Radio Loom (click here for info on that).
Basically it is a kit that allows you to chose if the radio comes on with the Ignition (the "Drive" bit), or if you turn it on manually and don't need the key in (the "Camping" part).
I built this kit as I didn't like the idea of leaving the key in the ignition when you wanted to listen to the radio when parked up.
I also don't like having to turn the radio on and off manually as too used when driving for the radio to just come on when you start up. That dislike was reinforced with the new Motorhome as the radio had been rewired to work (either by the previous owner or by Autotrail in the factory) without the key.
So now it was time to "eat my own dog food" as they say and fit one of my kits :D

First step was work out where to fit the switch that selects between "Drive" and "Camping".

Decided on my van (a Ducato X250 model) that the side of the central bin would be a good place

Drive/Camping Kit
by David, on Flickr
It is not a switch you need to access when driving; that location is easily accessible and won't be knocked by anything accidently

Drilled the hole for the switch. I use a 20mm Forstner Bit (the type that is used to make the holes for recessed hinges) as they by design make a very clean hole and don't need to go deeper than the hole being made (say in comparision with a Step-bit which needs a pretty clear area behind)

Drive/Camping Kit
by David, on Flickr

Now I usually supply these kits to VW Owners and the switches are typically fitted in a Dash Blank, and the kits are sized accordingly. This switch is quite low down, so I made a 'special' one for myself - basically same as normal, just twice as long wiring :)

Drive/Camping Kit
by David, on Flickr
The photo above also shows some ISO Plugs. ISO Plugs are the 8-pin rectangular plugs used as a pretty universal standard. They don't come with the kit, but I decided to use an ISO-ISO adapter as a simple way to connect the kit up to the radio wiring (some radios have bullets already on the red and yellows; mine doesn't and I decided to just used the adapter instead of adapting the supplied radio wiring (lots of ways to achieve same results ;) ))

Switch is now in place. I positioned it so if it is clicked forward (I) it is the "Drive" position and in the backwards (II) position, it is the "Camping" position.

Drive/Camping Kit
by David, on Flickr

And final step ... connecting it up.
Very Simple - just separate the ISO plugs which connect the vehicle wiring to the radio wiring, and plug in the ISO-ISO adapter in-between.

Drive/Camping Kit
by David, on Flickr

Very simple to add this feature and makes using the Dash Radio so so much more flexible IMO :D

Oh, and it is totally removable so if changing vehicle you can just take it off to make vehicle standard and use it on the next one :)
 
Last edited:

Users who viewed this discussion (Total:0)

Top