You are using an out of date browser. It may not display this or other websites correctly.
You should upgrade or use an alternative browser.
You should upgrade or use an alternative browser.
New build Sis-in-Laws Motorhome
- Thread starter Squiffy
- Start date
Squiffy
Forum Member
I have got the air nibbler that I had in the garage, I took all my hand tools when I sold the garage, but the compressor I have now hasn't got the cfm to run the air tools. However I find the jigsaw far more convenient and accurate. PhilSome people swear by using the "nibblers" for making the cutouts. I bought one but chickened out and reverted to using the Jigsaw again
SquirrellCook
Forum Member
The sharp half moons they spray everywhere are just horrible. And as mentioned they need a lot of air. The electric ones are heavy and expensive.Some people swear by using the "nibblers" for making the cutouts. I bought one but chickened out and reverted to using the Jigsaw again
Squiffy
Forum Member
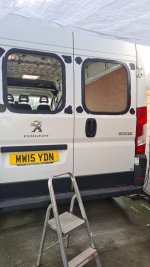
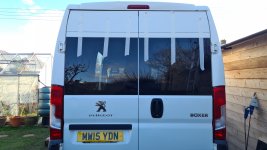
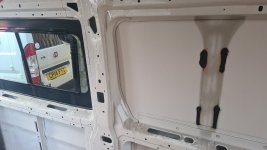
All windows now fitted and water tested, all pass muster, now for the insulation on Monday. Phil
Attachments


Squiffy
Forum Member
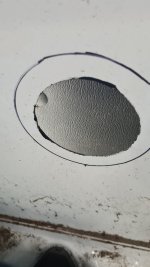
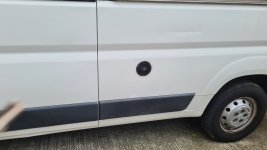
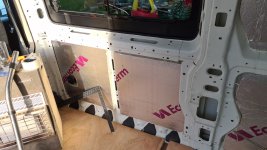
OK so today I marked out and fitted the EHU and the Water filler. Just a tip that if you have fitted bonded windows the primer that comes with the kit makes a brilliant antitrust barrier when you cut out apertures. Just two more holes to cut into the o/s for the fridge vents then the worst is over, after that it's working in the warm inside the van and fun things like producing the furniture and generally fitting out.  Phil
Phil
PhilAttachments


Last edited:
SquirrellCook
Forum Member
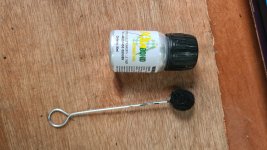
It’s such a shame that the very expensive window primer has such a short life once opened.
Squiffy
Forum Member
Not ever kept it longer than what I'm upto at the time, to be honest I wasn't aware it had a life span. Do you mean it dries out in the can or does it become none volatileIt’s such a shame that the very expensive window primer has such a short life once opened.
After a period?
SquirrellCook
Forum Member
I have used two brands, one type turned to jelly in about a week from opening. The other I haven't checked on, but was thickening. Despite this it does seem to work well. I've even used it to blacken windows. Paints just peel if you paint glass.Not ever kept it longer than what I'm upto at the time, to be honest I wasn't aware it had a life span. Do you mean it dries out in the can or does it become none volatile
After a period?
Squiffy
Forum Member
I have been busy on the build but over the last 3 days I have been having Solar panel arrays fitted to my house roof, ( Even though it's cloudy our electric usage from the grid has been halved over the last two days).
However I have been working on the van and here are a few photos of the progress.
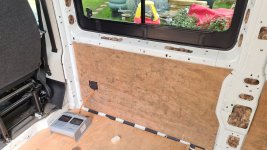
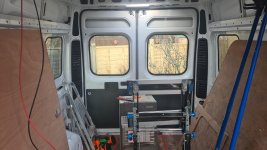
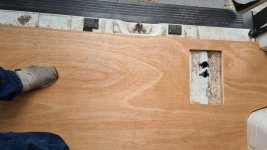
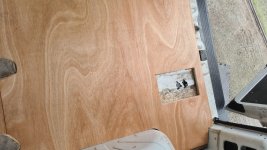
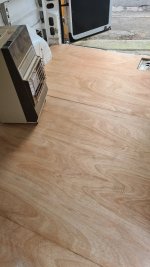
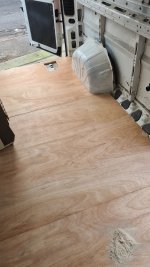
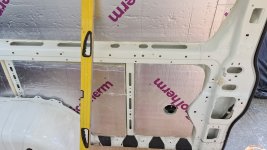
Insulation of the floor has been completed but I did chicken out and put 25mm stringers down at the door edges and the joints of the 12mm floor boards. I have also today installed rear view and reverse cameras and TFT mirror style monitor all hard wired, I did play with the thought of wireless but again decided to play safe and go for dedicated High line brake light lense replacement dual cameras. Following are a few updates of progress so far. There is now 25mm insulation under the 12mm floor ply. The oblong cut out at the floor rear is for the fitting of a chinese diesel heater.
However I have been working on the van and here are a few photos of the progress.
Insulation of the floor has been completed but I did chicken out and put 25mm stringers down at the door edges and the joints of the 12mm floor boards. I have also today installed rear view and reverse cameras and TFT mirror style monitor all hard wired, I did play with the thought of wireless but again decided to play safe and go for dedicated High line brake light lense replacement dual cameras. Following are a few updates of progress so far. There is now 25mm insulation under the 12mm floor ply. The oblong cut out at the floor rear is for the fitting of a chinese diesel heater.
Attachments
-
 20220202_113356.jpg937.4 KB · Views: 405
 -
 20220202_113252.jpg845.9 KB · Views: 397
 -
 20220202_113247.jpg1.3 MB · Views: 427
 -
 20220202_113245.jpg1 MB · Views: 407
 -
 20220202_113230.jpg833.1 KB · Views: 410
 -
 20220202_113225.jpg556.4 KB · Views: 419
 -
 20220126_101501.jpg2 MB · Views: 409
 -
 20220126_101454.jpg2.2 MB · Views: 421
 -
 20220126_101435.jpg1.7 MB · Views: 429
 -
 20220126_101430.jpg1.8 MB · Views: 407
Last edited:
Squiffy
Forum Member
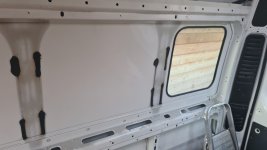
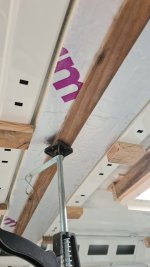
No Mark, I've used 25mm as this gives me head height and also a gap between the ceiling and the insulation so as I can run wires across the top for lighting etc. PhilSuch rapid progress. Makes me feel tired just watching!
You putting 50mm insulation on the roof? That’s what I have on ours and I think it’s def worth the effort in the ceiling.
Squiffy
Forum Member
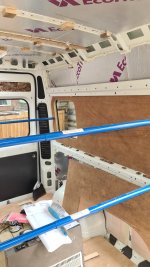
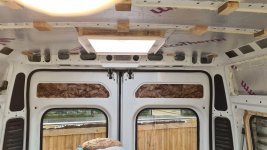
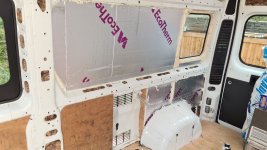
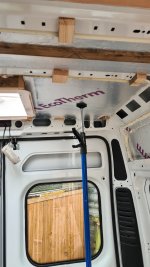
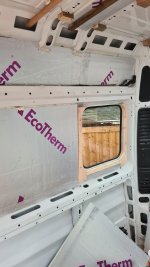
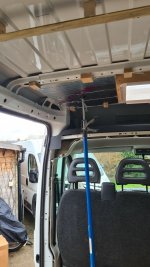
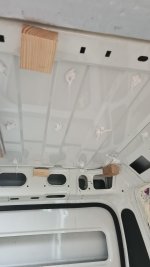
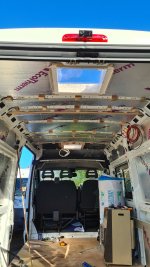
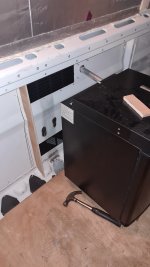
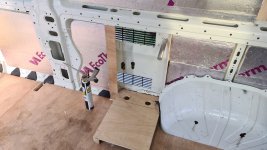
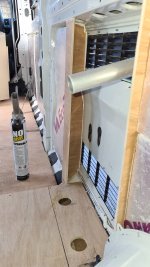
All roof and mid side sections now insulated and reverse/rear view cameras and mirror monitor fitted. Today I'll be dry fitting the fridge so that I can cut the vent and exhaust holes in the van sides fit the grills before I insulate the bottom section with 50mmm insulation. Fridge is going here as in the last photo. Phil
Attachments

Millie Master
Forum Member
Going well Phil
Squiffy
Forum Member
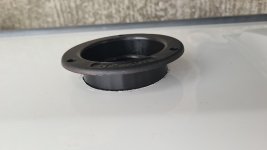
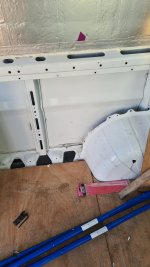
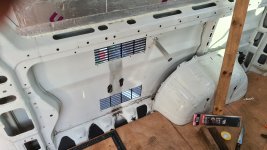
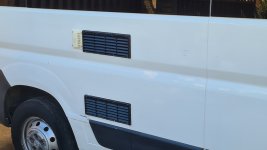
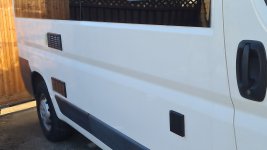
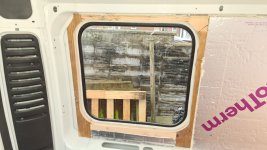
Right now I'm well into the fridge mounting area, because it's a cheap Chinese 3 way fridge the exhaust exits opposite to conventional European 3 ways, so I've had to offset the vents to allow for a proper exhaust through to the atmosphere the Dometic top vent LS 100 is no good for this fridge. You will see in the photos I've had to start making a small dog leg box section to allow the full use of the vents, it will become more obvious as to what I'm talking about as the work progresses. Phil
Attachments

SquirrellCook
Forum Member
Do think about where the water goes that comes in through the fridge vents.Right now I'm well into the fridge mounting area, because it's a cheap Chinese 3 way fridge the exhaust exits opposite to conventional European 3 ways, so I've had to offset the vents to allow for a proper exhaust through to the atmosphere the Dometic top vent LS 100 is no good for this fridge. You will see in the photos I've had to start making a small dog leg box section to allow the full use of the vents, it will become more obvious as to what I'm talking about as the work progresses. Phil
Squiffy
Forum Member
Very little comes through in ordinary circumstances Squirrell a dribble that soon drys out without any damage, but if your jet/washing with a hose that is the time to be careful. Admittedly this is based on the Dometic L100 & L200 vents but these I've used now should be no different, in the photos it makes it look although the vanes are quite far apart but they are similarly produced to the Dometic ones. Phil.Do think about where the water goes that comes in through the fridge vents.
Squiffy
Forum Member
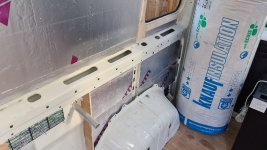
Well Sunday dawned with rain in the offing, but now I've completed all the outside work on the van I concentrated on the finishing off of the fridge mount and boxing in and the bottom panels of 50mm insulation, all now in place ready to be glued in and foamed around the edges and gaps tomorrow, I've had enough today so the wife has been instructed on her shopping outing to bring a bottle of Red back ( Pity she doesn't like Red wine  ) Phil.
) Phil.Attachments
Squiffy
Forum Member
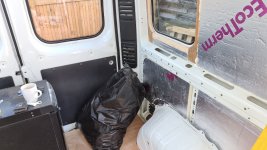
The latest, all insulation in place electric hook up lead fitted ready for the consumer unit and all but one ply side glued in place ready for carpeting, the fridge mount area done but will get better photo tomorrow to show how I've had to offset the grills etc. Phil