New build Sis-in-Laws Motorhome

Squiffy

Forum Member
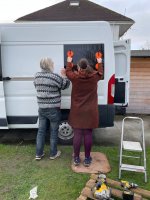
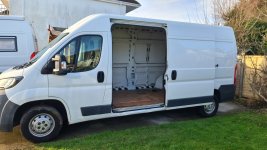
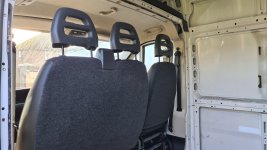
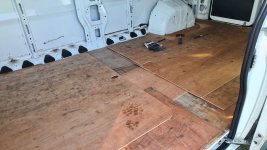
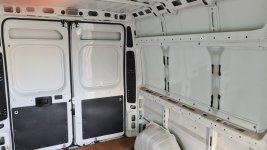
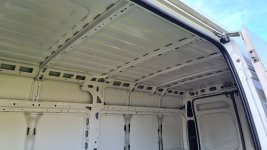
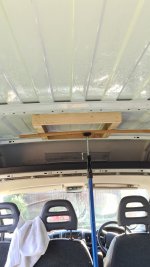
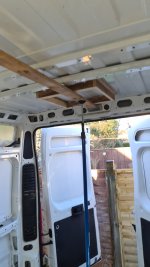
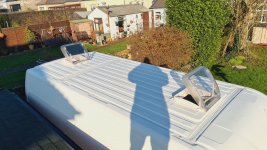
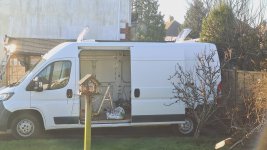
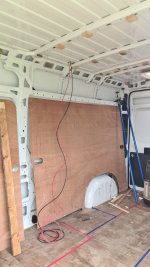
As mentioned in another post this morning I am about or rather have started a new build on a Peugeot Boxer, as I promised Millie here are a few photos of the start.

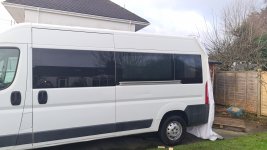
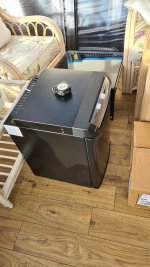
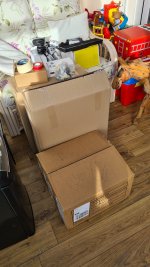
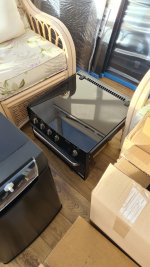
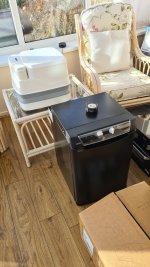
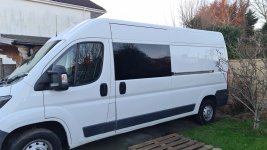
First few are some of the goodies to go in, I'm doing something different on this one I'm fitting full privacy glass sides and rear doors so that should be Interesting, I bought the full package with free fitting kit from "Van Pimps" with free delivery for £780.

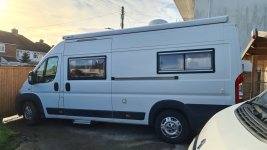
The van In the background is my last build.
 

Attachments

  • 20220109_113643.jpg
    20220109_113643.jpg
    1.4 MB · Views: 261
  • 20220109_113649.jpg
    20220109_113649.jpg
    1.6 MB · Views: 229
  • 20220109_113654.jpg
    20220109_113654.jpg
    1.1 MB · Views: 238
  • 20220109_113659.jpg
    20220109_113659.jpg
    1.2 MB · Views: 216
  • 20220109_113711.jpg
    20220109_113711.jpg
    1.5 MB · Views: 231
  • 20220109_113753.jpg
    20220109_113753.jpg
    2.2 MB · Views: 218
  • 20220109_113802.jpg
    20220109_113802.jpg
    2.2 MB · Views: 227
  • 20220109_113810.jpg
    20220109_113810.jpg
    1.9 MB · Views: 222
  • 20220109_113819.jpg
    20220109_113819.jpg
    2.3 MB · Views: 222
  • 20220109_113834.jpg
    20220109_113834.jpg
    1.6 MB · Views: 222
  • 20220109_113849.jpg
    20220109_113849.jpg
    1.8 MB · Views: 227
  • 20220109_113906.jpg
    20220109_113906.jpg
    1.8 MB · Views: 217
Last edited:

MarkJ

Forum Member
I admire people who do multiple builds. My first (and so far, only) build took me lots longer than I thought and gave me very painful knees!

But I do miss the buzz of achieving something interesting.
 

Squiffy

Forum Member
I admire people who do multiple builds. My first (and so far, only) build took me lots longer than I thought and gave me very painful knees!

But I do miss the buzz of achieving something interesting.
Trust me Mark the van in the background took me 6 months of full time work sometimes till 10 at night though on weekends in the main we went off in our Swift which we still had at the time. I'm hoping to complete this next one in about 3 months so we shall see it won't be as comprehensive as the last one as my Sister in law is working on a bit of a budget, ie there is not going to be a shower/toilet room ( Porta potti instead) or microwave and probably fewer overhead lockers not lot of tech going in either. We'll that's the initial plan anyway. 😆.Phil
 

Millie Master

Forum Member
As I have often said, I would so love to build another one, but my most beloved keeps telling me "over her dead body"!

However Phil, budget or not, I honestly can't understand people with even the tightest budget not fitting insulated windows, as, and as we both know, it can get darned hot or indeed freezing cold and without either openable windows for ventilation or insulation for when it gets cold to very cold added to which there is always the problems of condensation.

As for the loo, well in my build this is one place where I saved money by buying a 2nd hand fitted loo from a breakers yard.

I will be watching your brave efforts my friend, fingers crossed that it all goes well.

Phil
 

Squiffy

Forum Member
Just a bit further on, had some problems with family properties to sort out loft mounted bathroom fan for one and various other jobs only to come home yesterday evening to a leak from upstairs bathroom bath waste "Hmmmmm" anyway just a few picks of fitting the two mini Heki's.

And one after I'd cleaned all the verdigris of the roof. Phil
 

Attachments

  • 20220112_151545.jpg
    20220112_151545.jpg
    904.7 KB · Views: 208
  • 20220112_151526.jpg
    20220112_151526.jpg
    675.1 KB · Views: 201
  • 20220112_124735.jpg
    20220112_124735.jpg
    2 MB · Views: 208
  • 20220112_111726.jpg
    20220112_111726.jpg
    1.6 MB · Views: 202
  • 20220112_111656.jpg
    20220112_111656.jpg
    1 MB · Views: 193
  • 20220112_111650.jpg
    20220112_111650.jpg
    961.5 KB · Views: 210

Squiffy

Forum Member
One day further on, ceiling fitting blocks stuck on, and second Heki now fitted. One picture shows my solution to the roof corrugation which is foam water proof fillers from Atlantic Cladding near us. They are used on corrugated tin roofs to stop water ingress under the eaves cut down to fit the roof Profile. Plus TV and radio aerial fitted and ready to go. 😁 Phil

Might try fitting sliding door glass if the weather warms up enough today
 

Attachments

  • 20220113_140037.jpg
    20220113_140037.jpg
    808.3 KB · Views: 192
  • 20220113_135834.jpg
    20220113_135834.jpg
    2.2 MB · Views: 183
  • 20220113_125817.jpg
    20220113_125817.jpg
    1.4 MB · Views: 183
  • 20220113_125655.jpg
    20220113_125655.jpg
    3.3 MB · Views: 190
  • 20220113_125635.jpg
    20220113_125635.jpg
    976.7 KB · Views: 182
  • 20220113_125524.jpg
    20220113_125524.jpg
    2.4 MB · Views: 185
  • 20220113_125451.jpg
    20220113_125451.jpg
    1 MB · Views: 194

Millie Master

Forum Member
Phil; does that foam force/push under the Heki once it is in-place or do you lay it in place then clamp the rooflight down?

I presume it is some kind of closed cell foam, or is it something else and quite magical, because if it works it could be the answer to the needs of the self builder.

Phil
 

Squiffy

Forum Member
Yes Phil it's very closed formed foam, stuck together in two halves causing a further barrier in the center of the foam.
Yes you lay a bead of sealant into the corrugation making sure the bead starts on the top of one corrugation and continues along the negative corrugation to the top of the next positive corrugation, then you place the foam cut outs into each negative corrugations onto of your bead of sealant then you put a generous bead all around the Heki base and place the whole thing into its hole push down so the sealant starts to squeeze out, go below and fit the base unit and screw up tightly. Of course there should have been a wood frame constructed to the depth you require the ceiling to be. Simples.

I use this method all the time and only had one failure on my sons toilet Heki and I think that was because he was being mean on the sealant.😆. Phil

P.s. yes the foam has to stand proud of the corrugation and is pressured down by screwing the base unit up
 

Millie Master

Forum Member
Yes Phil it's very closed formed foam, stuck together in two halves causing a further barrier in the center of the foam.
Yes you lay a bead of sealant into the corrugation making sure the bead starts on the top of one corrugation and continues along the negative corrugation to the top of the next positive corrugation, then you place the foam cut outs into each negative corrugations onto of your bead of sealant then you put a generous bead all around the Heki base and place the whole thing into its hole push down so the sealant starts to squeeze out, go below and fit the base unit and screw up tightly. Of course there should have been a wood frame constructed to the depth you require the ceiling to be. Simples.

I use this method all the time and only had one failure on my sons toilet Heki and I think that was because he was being mean on the sealant.😆. Phil

P.s. yes the foam has to stand proud of the corrugation and is pressured down by screwing the base unit up

One exceptionally important one for all of us self builders to learn........... many thanks Phil
 

Squiffy

Forum Member
Didn't get chance to bond some windows but spent most of the day marking out the floor plan with different coloured electrical tape so I can get a better feel as to space and where is best to put various appliances. As it's glazed all round the 3 way fridge proved a difficulty, but I've now sorted that. She wanted 3 way as she did not want to rely on the (Battery and solar power) alone. Talking of solar power the 120w solar kit arrived from ebay today and I also dry fitted it to the roof (See pic)
Tomorrow I'll glue that down as I have to 4 different vans and fingers crossed never had a problem with just glueing (Don't want to get involved in arguments over this as my views on it are well known). I didn't glue it down this afternoon as time was getting on and I didn't want the glue going off in frosty night air. There is plenty of space on the roof for further solar in the future. Phil
 

Attachments

  • IMG-20220114-WA0003.jpeg
    IMG-20220114-WA0003.jpeg
    1.6 MB · Views: 197

Squiffy

Forum Member
Well today saw the glueing on of the solar panel and gland box for the cables.
Also a frustrating day trying to sort out where and how to cut the apertures for the rear side windows, be aware if you go down the fully glazed route that the cutting of the rear apertures is not like the sliding door or the o/s front window where by they can be cut around the lips of the panel strengtheners, if you do that for the center and rear windows not only will it look awful when viewed from the outside and inside but you could be in serious trouble if not worked out correctly. It's defo one of those situations where you measure 20 times and measure again before you cut, because you can't replace what you've taken away better to cut small and the widen out by making a second cut.
Then I wanted to move the van to get better access to the back and Hey Ho the cab starter battery is knackered, so out with the booster to start the engine, so a big blow to her budget as from experience I just know the battery will require changing.
Just a few photos of today's work.
The Dive weights are there to hold the glandbox down while the glue sets, and the solar wiring will be tied down once the gland and solar panel adhesive has set. Phil

P.s.
Checked the solar panel and giving 19.75v with total overcast day light.
 

Attachments

  • 20220115_141802.jpg
    20220115_141802.jpg
    1.9 MB · Views: 180
  • 20220115_141811.jpg
    20220115_141811.jpg
    1,011 KB · Views: 171
  • 20220115_142151.jpg
    20220115_142151.jpg
    1.4 MB · Views: 175
  • 20220115_142155.jpg
    20220115_142155.jpg
    980.3 KB · Views: 180

Squiffy

Forum Member
I thought I'd google " How to fit full glazing to Renault boxer van and equivalent " just to make my life easier, bit of a Forlorn Hope, I can't find anything on the Web on how to fit the rear side windows, plenty of tutorials on n/s and o/s front windows and on rear door windows but I've fitted those on 4 vans in the past so no problem on those. It would seem that I'm on my own on fitting the rear side windows unless one of you has either done it and would be willing to part with info or knows of a utube video of it being done. 🤪Phil
 

Millie Master

Forum Member
Phil, I know your feelings and thoughts about gluing on major items and respect your thoughts on the matter......... However, my major concern with using any of these adhesives in the current weather conditions is that surely don't most of the user instructions on them suggest they are for using in temperatures above a certain figure?

Phil
 

Squiffy

Forum Member
Phil, I know your feelings and thoughts about gluing on major items and respect your thoughts on the matter......... However, my major concern with using any of these adhesives in the current weather conditions is that surely don't most of the user instructions on them suggest they are for using in temperatures above a certain figure?

Phil
Yes Phil,
This is why I left it to the next day when the sun was shining and the temp here was around 10C, but to be honest I was sticking stuff up inside the van I.e. ceiling supports and the "Sticks like shit" was going off beautifully all be it over a two day period to fully cure. I can literally hang of the pieces of wood now. I think the main problem with low temp is frost and stiff application if you don't store the tubes at room temp, but really low temps above 0C just means longer cureing time. Phil
 

wildebus

Forum Member
I thought I'd google " How to fit full glazing to Renault boxer van and equivalent " just to make my life easier, bit of a Forlorn Hope, I can't find anything on the Web on how to fit the rear side windows, plenty of tutorials on n/s and o/s front windows and on rear door windows but I've fitted those on 4 vans in the past so no problem on those. It would seem that I'm on my own on fitting the rear side windows unless one of you has either done it and would be willing to part with info or knows of a utube video of it being done. 🤪Phil
Not fully sure what the difference would be between fitting a front side window and rear side window?
What you could do is have a look at the VW Forum (vwt4forum.co.uk) where I am sure you will find quite a few build threads which include the fitting of bonded windows on T4s and T5s. I can't imagine the process of a Boxer will be much different?
There will also be quite a few examples on Youtube I have no doubt.
 

Squiffy

Forum Member
Not fully sure what the difference would be between fitting a front side window and rear side window?
What you could do is have a look at the VW Forum (vwt4forum.co.uk) where I am sure you will find quite a few build threads which include the fitting of bonded windows on T4s and T5s. I can't imagine the process of a Boxer will be much different?
There will also be quite a few examples on Youtube I have no doubt.
The difference is on the sliding door and the o/s you are guided by the strengtheners all that is needed is to drill a hole big enough for your jigsaw blade to go through beside the panel strentheners then jig all around the strengthener lip, after which you knock on the trim around aperture you have just made and go outside prep the glass and van panel for bonding slap on the glass and the glass aperture ( Clear glass is in exactly the right place. However the rear windows do not follow that procedure, if you cut all around the strengthener lip the aperture in the van sides would be far to big and would not correspond to the Clear glass aperture of the window.
I have now sorted the problem by making up a template to draw around which will give me the exact sized aperture in the van rear quarter panel so that it neatly shows the Clear glass of the window and not all the black surround. It is externally the dimensions of the window glass and the inner aperture is to be cut out of the van panel corresponds to the Clear section of the glass. Bit of a faf but much better than free handing the cut. 😁Phil
P.S Dave I feel sure the VW van is the same as the Sliding door and O/S front windows on the Sevel, as I remember putting some in for my son on his T4 years ago, but the Sevel rear side windows seem to be peculiar to the Sevel van. As I'm pretty sure on the Ford Transit you can just follow the strengthener lip on the rear side windows too. It maybe why there are no utubes of it on the net because professionals don't want to give away trade secrets and diyers have either not tried it or have tried it and made a pigs ear of it 🤷‍♂️
 

Attachments

  • 20220116_124825.jpg
    20220116_124825.jpg
    2 MB · Views: 179
Last edited:

wildebus

Forum Member
the cutting needed sounds like exactly you would do as standard on a VW Transporter or a Sprinter. I'd check that forum I linked to ....
 

Squiffy

Forum Member
All n/s windows bonded on and water tested this morning 👌
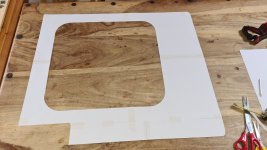
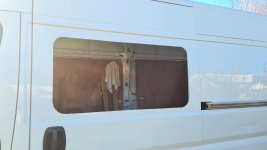
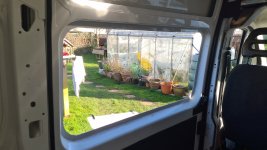
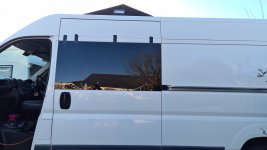
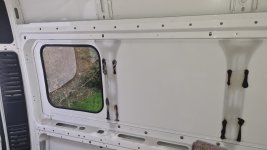
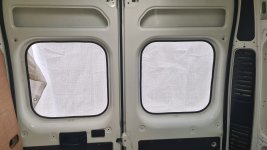
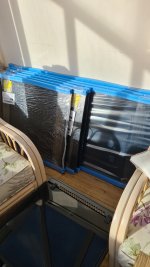
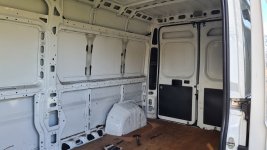
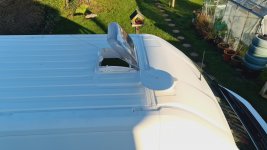
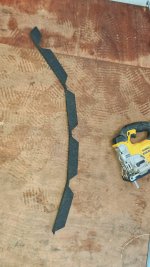
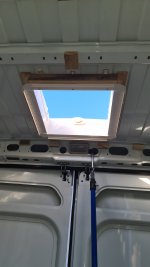
. The rear door apertures are cut out and outer skin was attached to strengtheners before trim was knocked into place, the factory bonding between outer skin and the strengtheners had failed making it difficult to cut with the outer skin vibrating with jigsaw, had to get the wife to come out and steady the outer skin. You will notice that the centre window the aperture has not been cut out, the glass is for aesthetic purposes on the outside as the Sis in law did not want to feel she was in a fish bowl and cooker and cupboards are going there in anycase.
For those that have not put bonded windows in before I've found the best way to cut out those apertures that follow the inner strengtheners is to remove the jigsaw foot and use the roller guide as the foot. The apertures that are smaller than the strengtheners are best done from the outside with the foot replaced and a very carefully produced template mimicking the particular clear glass aperture of the particular window.
The first photo is Eileen holding the rear quarter window up so that I can mark where the beginning is from the end of the centre window will end.
 

Attachments

  • IMG-20220118-WA0002.jpg
    IMG-20220118-WA0002.jpg
    146.8 KB · Views: 179
  • 20220119_095447.jpg
    20220119_095447.jpg
    1.3 MB · Views: 174
  • 20220119_095452.jpg
    20220119_095452.jpg
    1.8 MB · Views: 195
  • 20220119_095504.jpg
    20220119_095504.jpg
    1.9 MB · Views: 191
  • 20220119_095555.jpg
    20220119_095555.jpg
    2 MB · Views: 217

Users who viewed this discussion (Total:0)

Top