New van build ( Again )

Squiffy

Forum Member
Phil, haven't you missed one exceptionally important thing out of your description of the work schedule, or am I wrong?

Surely after cutting the metal, surely the next vitally important job is to smooth the cut edges and then to thoroughly paint the edges?

But otherwise, I love all of your descriptions.

Phil
Evening Phil, I did mention that in my post.
"The next job is gluing the premade wood frame to the back of the cut out, once the glue has gone off at this stage most folk would paint the raw edges of the cut out steel but my view is that I put enough adhesive sealant on the window seat so that it squeezes through over the top of the raw edge and covers it in anycase."

I used to religiously paint the edges. Then I was putting a window into a T5 and suddenly thought why am I doing this the sealant makes it waterproof from outside and the over spill from the adhesive sealant squeezes over the raw edge anyway and protects it from possible condensation from inside.
Only time will tell if my thoughts hold out😜. Phil.
 

Squiffy

Forum Member
And to continue:-
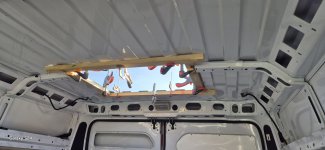
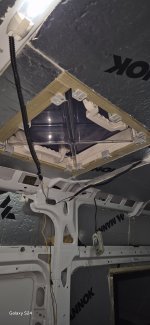
The next job is to put a midi heki into the rear section of the roof, this one I bought from Magnum motorhomes and have to say the quality of it including Led lights incorporated is exceptionally good especially for the price.
The booklet that comes with it gives the cutout size. My way is to mark out the cut out size on top of the roof in a rectangle then get a compass and in this case radius the corners 50mm
Same as the windows, drill two or three holes on the inside of the marked line so you can enter the jigsaw and start to cut around the mark. It's beneficial to have a helper inside the van to support the steel roof plate as you cut making sure they don't look up as hot shards of swarfe are constantly falling while your cutting, I'm not a health and safty geek but goggles and leather gloves should be used.
I did forget to remove the middle section of the rear roof support and snapped a jigsaw blade as it wasn't long enough to penatrate the roof support. So we had to stop operations until I'd cut the centre section out of this support with a disc cutter, making very sure the roof was not hit by the cutter.
With this removed I continue round and complete the cut out, which was recieved into the van by my helper eldest Son.
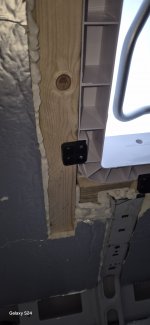
Now a confirmation fitting of the skylight to make sure it fits, having tested this I cut strips of foam and cut and disc sanded them to the shape of corrugation of the roof, in my case I had to make up 10 these are to fill the gaps caused by the skylight sitting on top of every other corrugation. Dont worry the fact its only Styrofoam as all your doing is filling the gaps the skylight actually sits on the up corrugations.
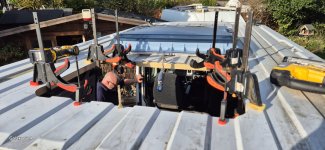
Now turn the skylight upside down and gloop adhesive sealant around the fitting flange, don't spare the tar as its better to have too much than to little. Making sure the roof area is comparatively clean. Then glue the Styrofoam into down corrugations, then with the skylight flange with a good bead of sealant turn the skylight the correct way up and introduce it into the cut out the sealant will sqidge out especially on the up corrugations and down the sidesI personally leave this as its on top of the roof and out of sight, but some like to smooth it down with wet wipes.
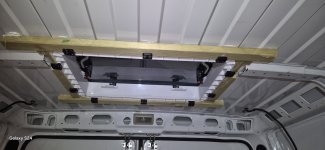
Next its down inside the van, where I cut two lengths of 25x50 batten that pass either side of the sides and another two lengths for the shorter sides.
Start with one of the longer lengths and apply adhesive to each corrugation and then place the longer length up against the skylight and fit your fixing clamps to the skylight and gently pull the skylight down but not tight 'Yet'. Continue around doing the same for all four sides. When this is completed slowly tighten all fixing screws so that it squeezes the skylight between the roof and the wood batten, don't over tighten just enough to squidgy out the adhesive on the roof all round.
Now is the time to get back on the ladder and complete the sealing front and back, the sides won't require any sealant but the corrugations will require some more to make sure that water can not enter. You will probably have to remove the plastic hinge pins and lift the front of the acrylic dome so that you get a complete view of the front corrugations, when done just replace the plastic hinge pins.
And Bob's your Aunty you now have a lovely midi Heki.
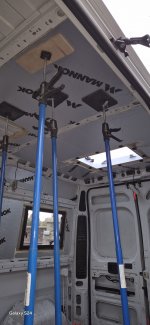
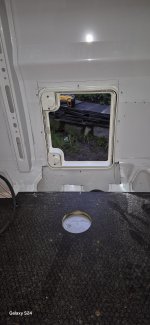
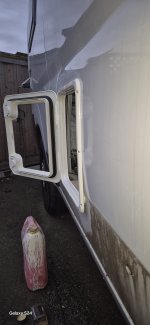
The following photos are a depiction of following work, have to admit I forgot to photo the cut out although it's the same principle as the windows.
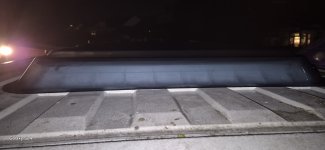
The first two photos show that I intended to glue them in place first but time was of the essence and I decided to fit the skylight then put the batten around as I explain in the text. The next two were taken at night and are not particularly complimentary as the dew had covered the acrylic and my head torch didn't help but I think it showes the corrugations. The gorilla is my eldest 😆. Phil
 

Attachments

  • 20241115_130739.jpg
    20241115_130739.jpg
    2.3 MB · Views: 72
  • 20241115_130816.jpg
    20241115_130816.jpg
    2.5 MB · Views: 59
  • 20241115_202016.jpg
    20241115_202016.jpg
    2.1 MB · Views: 56
  • 20241115_201805.jpg
    20241115_201805.jpg
    2.2 MB · Views: 55
Last edited:

Pudsey Bear

Forum Member
Once more into the breech dear friends, after a few days of doing odd jobs about the house and garden I'm back onto fitting these windows.
After I had marked up and measured the cut outs and measured them again the horrifying business of actually removing great swarths of panel from the van sides has started.
In the first three pictures on the sliding door it shows where I've marked it out on the inside for the cut out size and drilled an 1/8th inch hole through each corner so that from outside I can using a permenat marker draw a line from corner to corner.
I then lay in my case 2.1/2 inch gaffer tape along the outside of the line to stop the jigsaw foot scrapping the paintwork.
Then in various areas along the lines just inside them I drill holes large enough for the blade of the jigsaw to pass through. If your right handed put the hole closer to the right side of the top and bottom line and vise verse if your left handed.
Then continue to insert the jig saw and make the first cut along the top, having completed that put two pieces of tape across the cut and continue to cut up the left or right side putting another strip of tape on either side once the side is cut this is to hold the cut piece of steel in place once cut out and to stop vibration while cutting the bottom line. Now all cuts are completed remove the side tapes and swing the panel outwards on the top two tapes hold the panel and remove the hanging tapes, voile! You now have a rectangular hole in you sliding door.
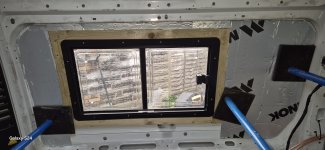
The next job is gluing the premade wood frame to the back of the cut out, once the glue has gone off at this stage most folk would paint the raw edges of the cut out steel but my view is that I put enough adhesive sealant on the window seat so that it squeezes through over the top of the raw edge and covers it in anycase.
This is one occasion now where another person is required to press against the outside of the window once it's in place, so as to allow you to screw through the backing plate and pull the window snugly up against the outside skin, holding the window firmly in place. Once you have a screw in each corner your helper can leave the window and get you a large brandy to calm your nerves 😆. Go around the outside of the window frame with a paint cleaning wet wipe and wipe away any surplus sealant.
I see someone was bright enough to use proper truck barn door catches on the new van Phil, I always fit them to the vans Hab doors as the MoHo oen are really not fit for purpose.


1731741349594.png
 

Millie Master

Forum Member
Evening Phil, I did mention that in my post.
"The next job is gluing the premade wood frame to the back of the cut out, once the glue has gone off at this stage most folk would paint the raw edges of the cut out steel but my view is that I put enough adhesive sealant on the window seat so that it squeezes through over the top of the raw edge and covers it in anycase."

I used to religiously paint the edges. Then I was putting a window into a T5 and suddenly thought why am I doing this the sealant makes it waterproof from outside and the over spill from the adhesive sealant squeezes over the raw edge anyway and protects it from possible condensation from inside.
Only time will tell if my thoughts hold out😜. Phil.
Knowing now what I didn't know when I did my build all those years ago and that is that with structural vibration, the effects of UV and the general ravages of the weather along with other such matters, whereas the flexible adhesive I had used had hardened and in places cracked, on removing tone of the windows I was very relieved to find that my exceptionally thorough rust treatment and paint were still as good as the day I had done them almost 9 years ago.

Oh and yes, I didn't read your excellent article slowly enough to see totally what you had written!!

Phil
 

Pudsey Bear

Forum Member
By the by when I first put a 1100X450 window into a Ducato sliding door 11years ago I was told by the commercial builders at varius shows that it couldn't be done as it was too big to fit into the space but I went ahead and did it, i noticed a few years later at shows that 1100X450 windows were appearing in commercially built vans, not saying i was the first but certainly one of the first. Now for the the top skylights which I hope to do today.Phil
I may have beat you to it Phil, this was in 2010/11, no way to get bigger on ein there, a real bargain too, brand new off their own ebay site £150 delivered

1731741677307.jpeg
1731741703756.jpeg
 

Squiffy

Forum Member
I may have beat you to it Phil, this was in 2010/11, no way to get bigger on ein there, a real bargain too, brand new off their own ebay site £150 delivered

View attachment 6421View attachment 6422
Well done Kev, I think maybe it was a marketing decision on behalf of the commercial builders, of course when talking to the reps at shows they in the main are sales persons and are not involved in the actual build so would say it's not possible, as the time and extra cost would significantly increase the price of an already expensive van. 👌Phil.
 

Squiffy

Forum Member
Morning all,
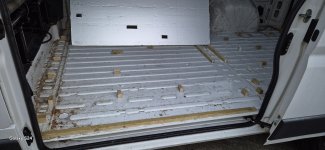
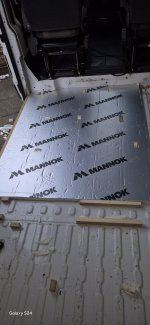
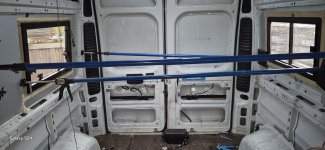
Over the last few days I have started on the floor, my original intention was to have a complete floating floor i.e. 19mm original floor boards layed over 25mm insulation board, but I chickened out in the end and went with shorts blocks of batten sawn down to correct sized hieght to match the hieght of the insulation board when sat on top of the raised mouldings of the floor. I glued these blocks down and when set used the original floor board to cut the insulation to size, then layed the insulation in place over the blocks and gently palmed the top over where a block was and used the transfered imprint to cut out the area where the blocks were. This saves using loads of batten and weight.
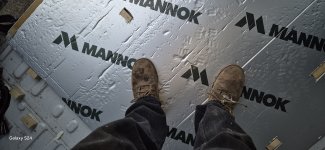
As you can see the insulation board can be stood on without problem while doing other sections of the floor.
Once all the insulation board is cut and shaped and layed down, I'll then lay across the center duct that I've created in the floor soft copper 8mm gas pipe hot and cold 12mm john guest piping and several lines of parachute cord to pull through various electrical cables later on when the floor has been glued down permanently to the support blocks.
Here are some photos of work so far and I'll put up more later of the finished floor laying.
 

Attachments

  • 20241116_160054.jpg
    20241116_160054.jpg
    2.4 MB · Views: 50
  • 20241116_160005.jpg
    20241116_160005.jpg
    1.1 MB · Views: 50
  • 20241116_160017.jpg
    20241116_160017.jpg
    1.3 MB · Views: 50

Millie Master

Forum Member
It is truly amazing how strong the foil faced insulation boards are. Because of the dangers associated with lying on very cold, bone numbing concrete floors, I have been using a large section of this amazing and very lightweight material to insulate my bones from the cold when working on any of my cars. I even had a shorter/smaller piece in the Millie garage for lying on when lying under her on sites. Quite amazingly it is all in perfectly acceptable condition!
 

Squiffy

Forum Member
It is truly amazing how strong the foil faced insulation boards are. Because of the dangers associated with lying on very cold, bone numbing concrete floors, I have been using a large section of this amazing and very lightweight material to insulate my bones from the cold when working on any of my cars. I even had a shorter/smaller piece in the Millie garage for lying on when lying under her on sites. Quite amazingly it is all in perfectly acceptable condition!
Brilliant idea Phil, I've got those jigsaw together foam rubber floor mats but thinking about it a large piece of 25mm insulation board would be an excellent idea which would actually be better than my mats. Phil
 

st3v3

Forum Member
Brilliant idea Phil, I've got those jigsaw together foam rubber floor mats but thinking about it a large piece of 25mm insulation board would be an excellent idea which would actually be better than my mats. Phil

25 will be quite easy to snap on an uneven surface, not sure what you're working on...
 

Squiffy

Forum Member
25 will be quite easy to snap on an uneven surface, not sure what you're working on...
I'm working on a flat concrete drive at rear of my house, I used some 25mm yesterday and have to say it's brilliant as not only 25mm insulation against the concrete but you can also slide around on it as though your on wheels, really is a great idea.
As for brittleness I'm not so sure on roughshod ground as the tin foil stretches quite a bit before it finally tears so it would have to be really uneven ground I'd have thought. The rubber fit together mats that I've used in the past have a habit of coming apart even on flat surfaces and water seeps up in between the joints when it's raining or has rained, were as the 25mm insulation is totally water proof 😁. Phil
 

Millie Master

Forum Member
25 will be quite easy to snap on an uneven surface, not sure what you're working on...
I used my smaller 25mm pads of approx. size of 50 x 40 cms. on all types of uneven ground throughout the UK and Europe, even using it as a kneeling pad and it was in almost as good a condition after 9 years of use as it was when I first started using it! As for the 1 mtr. x 50 cms. sheet I use in and around home, in the garage and out on the drive, it is still immaculate and as my old mate Squiffy says, it is so easy to slide around on.

Phil
 

Squiffy

Forum Member
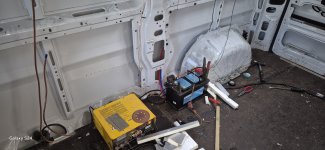
Ok back again, since my last post I have installed the eberspacher heater as it was getting a little parky over the last few days. It's rained heavily as well so this has proved the water tighness of the skylight and windows that have been fitted so far.
As you may or may not notice the original marine ply floor has been relayed over 25mm insulation, this before I fitted the heater of course. As can be deduced in the photos there has been temporary lighting fitted up as well, as not only has it been cold and damp but with cloudy skies it also got too dark to see inside the van by about 1500hrs.
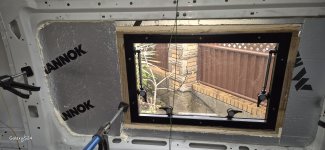
Also visible is that I've started to insulate around the rear windows with 25mm insulation. After this has been completed and the gun foam has been cut back flush
I'll be removing the inner window frames to fit/glue 3mm ply wall around the windows, I'm hoping that the windows have been bonded in well enough not to fall out when I remove the inner window frames. Once the ply is in place I'll temporary refit the inner frame till I start the stretch carpet installation, but that's for another episode to come.
You will also notice that the red and blue 12mm john guest water pipes and the 8mm soft copper gas pipe has also been layed under the floor ready for "T" section fittings for water heater/toilet/bathroom taps/ shower and HP water pump on the O/S and kitchen taps on the N/s.
It has been a little slow last week as I had to do some fiddly bits under the van and also had to wait for the glue/adhesive to go off on the floor.
So hopefully this week I'll been bonding the rear door privacy glass windows in and if the weather is kind and fit the shower room Quad skylight. Until the next one speak to you all again then. Phil
 

Attachments

  • 20241125_135007.jpg
    20241125_135007.jpg
    2.5 MB · Views: 46
  • 20241125_135015.jpg
    20241125_135015.jpg
    2.5 MB · Views: 42
  • 20241125_135026.jpg
    20241125_135026.jpg
    2.4 MB · Views: 45
  • 20241125_135201.jpg
    20241125_135201.jpg
    2.5 MB · Views: 44
  • 20241125_135209.jpg
    20241125_135209.jpg
    2.2 MB · Views: 45
  • 20241125_135219.jpg
    20241125_135219.jpg
    1.7 MB · Views: 44
Last edited:

Squiffy

Forum Member
Still going at it will post some more pictures shortly, I've been held up with various things over the last two weeks. Christmas lights, changing over my Sons diesel heater from underneath on the chassis to under the drivers seat repairing the fan on a brand new Chinese diesel heater that he bought and went wrong after a weeks use. ( I might run another thread on that ).
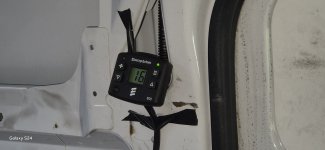
All in all I've only had chance to add some more insulation and fit the EC155 unit in since my last post. But now I'm back on to it. Phil
 

Squiffy

Forum Member
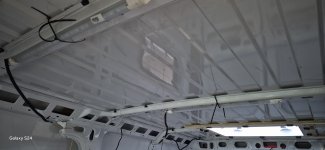
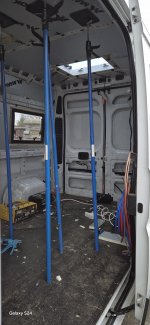
Ok I've now put all the insulation into the roof.
One thing I will say is don't be anal about getting the fit exact around skylights and windows, you don't want to spend hours cutting and fitting insulation to a fine tolerance as the amount of thermes you save is not worth the time taken and trust me you will save very little thermic tolerance, besides the foam gun from screwfix fills these inconsistencies really well. Besides which all this is going to be covered by 3mm ply ceiling eventually.
Another controversial thing that I have never done is put a so called condensation sheet on. I've built 5 conversions over 11 years and the oldest one mine shows no sign of problems, but if you wish to do so it's only my choice but it's another time consumer and in my opinion it might even be more detrimental actually holding moisture in place and not allowing it to evaporate naturally. ( Vans should always be well aired when stored for periods over a couple of weeks, my van always has the hekies open on the first catch permanantly).
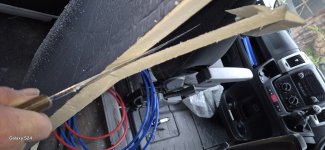
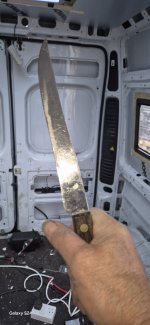
In the following photos I show my trusty old fashioned kitchen carving knife that to be honest I couldn't do without, from slicing through glue holding panel stiffener to cutting and carving insulation to shape.
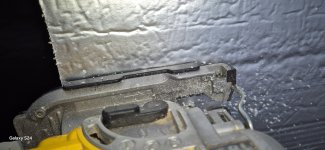
You will also see that I used a fine metal cutting blade on a jigsaw saw to cut out large sections of insulation, an ordinary wood hand saw is just as good but not as fast.
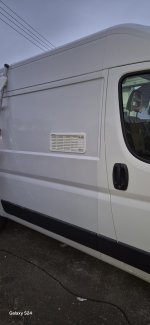
I'm waiting for a slightly warmer day before I cut out the roof panel for the 400x400 bathroom heki the wood surround is in place and ready to go and the rear privacy glass for the back doors will also have to wait for more of a sunny day. Phil.
 

Attachments

  • 20241212_115059.jpg
    20241212_115059.jpg
    717.5 KB · Views: 34
  • 20241212_115829.jpg
    20241212_115829.jpg
    993.2 KB · Views: 31
  • 20241212_115039.jpg
    20241212_115039.jpg
    1.1 MB · Views: 30
  • 20241212_115118.jpg
    20241212_115118.jpg
    1.2 MB · Views: 32
  • 20241212_115156.jpg
    20241212_115156.jpg
    999.4 KB · Views: 31
  • 20241212_115614.jpg
    20241212_115614.jpg
    1.2 MB · Views: 34
Last edited:

Millie Master

Forum Member
I totally agree with you about thermal barriers Phil, IMHO a total waste of time most especially in my case when I was using closed cell spray foam.

The conversion is coming on well, you will be allowing yourself a few days off over Christmas I presume?

Phil
 

Squiffy

Forum Member
I totally agree with you about thermal barriers Phil, IMHO a total waste of time most especially in my case when I was using closed cell spray foam.

The conversion is coming on well, you will be allowing yourself a few days off over Christmas I presume?

Phil
Indeed Phil, I'm going to put up the Christmas lights for the back garden over the weekend (Front garden was done over a week ago).
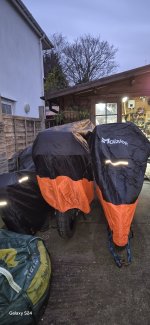
Tomorrow I'm hoping to install the bathroom heki, today I've been busy putting my motorbikes out under waterproof covers from my work shed so I've got space to move around the furniture boards when cutting and dicing.
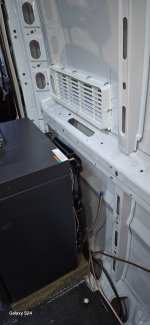
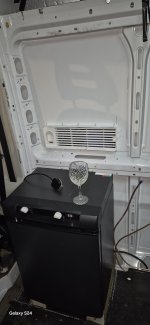
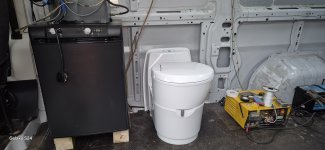
I also had a frustrating couple of hours jigging around the fridge and water heater into a space that isn't big enough. I've now finally made a decision on that jigsaw and spent another hour or so swapping the opening hand of the fridge, as its a Chinese one and to swap the opening around is horrendous compared to a Dometic or Thetford, but I finally accomplished that too. So it's onwards and upwards as they say. Phil.
 

Squiffy

Forum Member
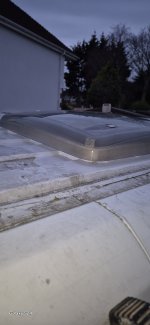
Today I put the bathroom heki in which is a forced fourway directional opening, for whichever way the wind is blowing.
I also decided on where the fridge would go and installed the top vent, will have to wait for the bottom vent installation till my order from Magnum motorhomes arrives on Monday or Tuesday. I had a bottom vent sent from a company on Ebay but when it arrived it did not include the back mounting plate, what a rip off seeing as Magnums sell the bottom vent LS200 that comes complete with winterisation cover too for only £ 7 more than that of the Ebay company, so be aware, Magnums is usually my first go to and this has proved the point. In the following photos it shows that after a day of frustrations and labour, yes as glass of wine is in order. The others show how I've had to move my bikes out to make room in my workshop for the inevitable furniture board. Phil.
 

Attachments

  • 20241214_161325.jpg
    20241214_161325.jpg
    1,015.3 KB · Views: 29
  • 20241214_161307.jpg
    20241214_161307.jpg
    1 MB · Views: 31
  • 20241214_161257.jpg
    20241214_161257.jpg
    1 MB · Views: 30
  • 20241214_161354.jpg
    20241214_161354.jpg
    943.8 KB · Views: 31
  • 20241214_161515.jpg
    20241214_161515.jpg
    1.3 MB · Views: 34
  • 20241214_161527.jpg
    20241214_161527.jpg
    1.6 MB · Views: 34
  • 17341937397464770095819033551146.jpg
    17341937397464770095819033551146.jpg
    1.1 MB · Views: 37

Squiffy

Forum Member
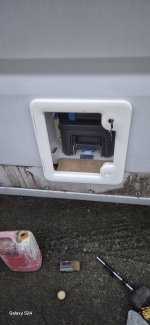
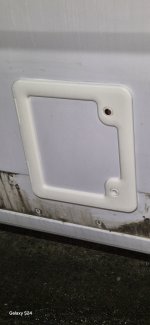
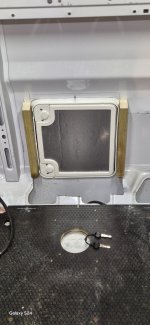
Today I cut the hardest hole in the side of a van that I've ever cut, the toilet door aperture.
I spent a couple of hours contemplating wether to turn the shower tray round and have the door openings into the van as I've done on all Ducatos that I've built in the past, mainly because I wanted to avoid raising the shower floor to mis the outer trim panel as this would have to raise the floor by 100mm and inturn ones head would scrape the roof.
The major difficulty is finding the position of the aperture in relation to the toilet bearing in mind that the strengthener is in the way and some of this has to be cut out. I don't think there is much strength lost in cutting some of it as there is heavy chassis members and the box of the cill adds strenght let alone the heavy box section running along the length of the van a couple of feet higher.
Another slight problem was how to remove the outer trim panel as nowhere on the net could I find any thing relating to how. Eventually I realised that you have to try mostly unsuccessfully to leaver out the trim fixings with initially a trim removal tool but they still in the main break. I started from the rear end and half way down realised that half way down the trim can be slid to the rear and off the forward trim clips, but you have to remove the rear clips up to half way as the cut outs for the trim clips in the trim point towards the rear and so if not removed will not allow the trim to move backwards off the front set of clips, if you understand what I mean. Luckily I have plenty of trim clips suitable to refit the trim.
After measuring once and then measuring again and again I marked out where the hole should be on the inside down to where the outside trim starts. The disc cutter was then employed to cut away the necessary part of the strengthener.
At this stage a small drill was put through on the inside of each vertical line and each side of the top horizontal line which then gave me the datum to work from on the outside, which meant that I could now measure easily from the top horizontal line down to the bottom horizontal line, once this was marked out I used a compass to radius the four corners as per the door fitment.
After cutting out the aperture from the outside the main part of the door was offered up and screw holes drill through,
adhesive sealant copiously applied to the door flange and then pushed into place and screwed down with some 50x25mm wood held in place by the screws and more adhesive sealant.
Because of the bow in the side panel the bottom screws were not tightened fully or it would cause the door to distort too badly, this bottom section will be filled with adhesive sealant and hidden by the trim once the trim has been cut out where the door sits and replaced on the vehicle.
The last job was to cut out the door skin from some of the steel panel cut out from fitting the windows this was sealed in with adhesive and 25mm insulation.
The following photos show some of the prep and the finished article. Phil.

Ahh I thought I'd taken some prep photos but for some reason they didn't take or have gone missing, sorry.
 

Attachments

  • 20241216_153513.jpg
    20241216_153513.jpg
    1.3 MB · Views: 27
  • 20241216_153343.jpg
    20241216_153343.jpg
    1.1 MB · Views: 26
  • 20241216_153426.jpg
    20241216_153426.jpg
    1.4 MB · Views: 25
  • 20241216_172638.jpg
    20241216_172638.jpg
    1.1 MB · Views: 27
  • 20241216_172619.jpg
    20241216_172619.jpg
    1,005.9 KB · Views: 30
Last edited:

Squiffy

Forum Member
A few photos of the finished toilet door and the fridge vents. Phil
 

Attachments

  • 20241218_112547.jpg
    20241218_112547.jpg
    1.5 MB · Views: 21
  • 20241218_112535.jpg
    20241218_112535.jpg
    1.8 MB · Views: 20
  • 20241218_112613.jpg
    20241218_112613.jpg
    2.2 MB · Views: 23

Users who viewed this discussion (Total:12)

Top