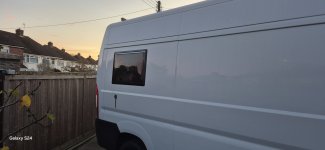
New van build ( Again )

Squiffy

Forum Member
Not a New van ( Secondhand ) but a new build. I said my Sis in laws would be the last one but my daughter now wants one so it's back to hacking and hewing and cutting out window panels again.
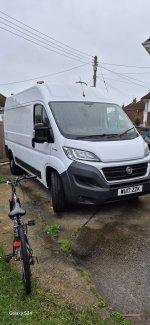
We are going up to Derbyshire tomorrow to a place call " BaseVans " I'm fairly impressed by them so far by their communication and helpfulness and their reviews are good so we shall see, we have chosen the van we're going to see, which seems to have a good history on MoTs and has only done 39thou miles.
So I'll keep folk informed about BaseVans
and how the build goes. 😬 Phil
 

Duckato

Forum Member
@Squiffy
Rupert tends to sell lots of ex Ambulances I bought my first from him, paid way too much for it and it was delivered with a mil light on and some interior damage, if you are looking at an ex Ambulance or any form of minibus check two things

First if the vehicle type on the V5 says M1 check how much VED will cost, the most polluting 3500kg vans are in the top £710 band this is set in stone on the V5 at time of first registration and can not be changed

Second check the revenue weight online and on the V5 that's the source of truth not what it may say in the vans weight plate if different many of his vans will have been uplated and things like SVtech stickers can go missing to deceive buyers too lazy to check properly, not saying Rupert has been noted as doing this but I know of some dishonest traders have done do!

One poor extremely nieve or gullible sod that came to me for some electrical work turned up in a van he wasn't licenced to drive, with fake SVtech stickers, no tax no mot and no insurance the trader had told him it had been downplated and everything was in the post! It was also a death trap, it left here on a flatbed!
 
Last edited:

Squiffy

Forum Member
As promised and update to my visit to Basevans in Derbyshire.
Rupert the owner/manager kindly gave us details of a Pub stop over 5 mins drive from his site, the pub has a little hard standing taking about five caravans/motorhomes with electrical hookup for £20 per night. The pub it's self is a great little country local and all the patrons that evening were very friendly and excepted us as part of the in crowd.
The food was also good.
Next morning early we set off for BaseVans and arrived literally 5 mins later, we were met with a friendly gesture of a cup of tea or coffee which was a nice touch. Rupert introduced himself and gave us a form to fill in with details of address and phone nr etc, we were then introduced to Robert who was to be our guide and sales person, he took us round to see the vehicle that we had come up to see this being a bright red Fiat Ducato 2.3 mwb with only 39000 miles on the clock, when we got over to it it was in the jet washed bay having just been jet washed, it would seem inside and out.

I started to look around the vehicle testing and looking at the usual things that you do and as I've been in the trade probably some things that vendors would not expect you to check. Unfortunately I have to say that the body condition was not as expected from Ruperts description ofcourse vendors will always be positive in description of sales, I then negotiated a drop in price of £2000 which was agreed by Rupert and Robert on the provisos of a test drive to my satisfaction.
Again Unfortunately on reversing back to start my test drive the dashboard lit up with one fault code after another at which time I halted the test drive and decided to not purchase this vehicle, Robert tried to convince me they could sort it out with their electronic engineer who they use but I know that it would take many hours if not days to sort out especially as the engineer they use was not an employee and so was not on site. In point of fact it was possibly the jet washing that had caused the problems but I was not prepared to take the chance.
The whole point of arranging this visit was to purchase and drive away that day as its a 5 hour drive from where we live.
Robert bless him then went into sales mode and took us to other mwb Ducatos that were available but in all honesty they were very high milage and not what I was looking for.
We had paid £100 deposit on viewing the Red Ducato which was returnable if it was not purchased due to unvoiced description and give credit where credit s due Rupert did return the £100 back to my bank account on Monday ( Today ) so I can say that Basevans are not sharks but an honourable organisation.
They have many many vans up there for sale and many different makes, they also have a sizeable workshop which seems to be staffed by 4 or five people who were working on several vans on our visit.
In conclusion I would say that in general Basevans would be a fair bet if you know what your doing and what your looking for, they are friendly and appear to be an honest business but they are certainly as Duckato says not the cheapest and beware they only give a 30 day guarantee not that any guarantee is worth much now a days. So all in all if you live fairly close to Basevans it's certainly worth a visit.

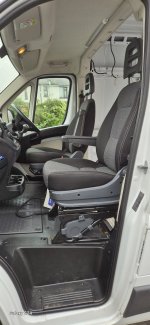
Now, would you believe my wife was searching on Facebook for possible private sales when she came across a mwb 2017 90k milage Ducato at a commercial sales site only 10 miles from our home. I stopped of at the services on our way home on Sunday and phoned them asking if we could come and see it on our way through, he said yes so long as we got there before 5:30, so off we went and duly arrived at 5:25 they were still there and had the van standing ready for me to inspect it, there is a saying of chalk and cheese and this is the only description I can use, this van was immaculate in every respect and ex BT service van the cab interior was like new with two captain chairs ( Passenger and driver ). The bodywork was unmarked and undamaged, the tyres were practically new, the engine sounded sweet and the test drive was as far as I could determine faultless and to top it off it has an espacher heater plumbed in and an inverter with several plug sockets around the walls to top it off the floor was covered with marine rubber coated anti slip ply, they were asking £7900 I said £7500 and we'll have it this was agreed a £200 deposit was paid with vat recieipt and because it only had an MoT till March 25 they said they would get a years mot on it and change the oil, we hopefully pick it up on Wednesday. There is obviously VAT to be paid on top of the £7500 but VAT was due on the Basevan Ducato as well. So for the same asking price at Basevans we had cheese at this place 10 miles from us.
I'll continue on with this thread as and when we get this vehicle home and I start on the conversion. Phil
 
Last edited:

Duckato

Forum Member
@Squiffy
That sounds like a reasonable purchase, often welfare vans have modified sine wave inverters so check that, ok for resistive loads like heating water etc but usually not much else

Being a welfare van double check the V5 if the vehicle type is M1 and it plated up to 3500kg check the VED as I mentioned previously
 

Squiffy

Forum Member
@Squiffy
That sounds like a reasonable purchase, often welfare vans have modified sine wave inverters so check that, ok for resistive loads like heating water etc but usually not much else

Being a welfare van double check the V5 if the vehicle type is M1 and it plated up to 3500kg check the VED as I mentioned previously
Hi, not sure what you mean by welfare van? To tell the truth I've been using mod sign wave for 20years with laptops and tvs and never had a problem, I know alot of discussions on the net of this can happen and that can happen, but I can only go on experience and say never had a problem yet?
The AA HPI has stated that DVLA records say N1 👍. Phil
 
Last edited:

Duckato

Forum Member
@Squiffy
I was just assuming it might be a welfare van!

Modified sine wave inverters tend to be less efficient with inductive loads.

I did a comparison video a few years ago running a fridge on a Cotek pure sine wave inverter compared to a Sterling quasi sine wave inverter, the current difference the inverter drew whilst running the fridge was significant.
 

Squiffy

Forum Member
@Squiffy
I was just assuming it might be a welfare van!

Modified sine wave inverters tend to be less efficient with inductive loads.

I did a comparison video a few years ago running a fridge on a Cotek pure sine wave inverter compared to a Sterling quasi sine wave inverter, the current difference the inverter drew whilst running the fridge was significant.
Ahh yes I can see current consumption of the inverters could be different, it's the nay sayers that say it will destroy your Tv's and laptops/PC that I have a difference of opinion with 😁.
The van in question is an ex British telecoms van Mwb. Phil
 

Squiffy

Forum Member
Well, yesterday we went to pickup the 2017 mwb Ducato from netcars Wales,
Years MoT and oil filter and oil change having been done over the last two days.
The van had passed with no advisories and the drive home was fantastic it drove like a new vehicle.
Once back at home I checked out the espacher as it and the inverter were hidden under a screwed down box area and not able to check it out when inspecting it first at netcars. When I removed the lid, inside was the espacher, a 1500watt Cotex pure sign wave inverter and a plethora of relays used for various items around the van workshop and a 110mah Exide gel liesure battery, wow!!! almost £2000 pounds worth of equipment if bought new.
I then switched on the espacher by the led controller in the cab ( Which I had not bothered with on my inspection ). After a short start up sequence of about a minute it roared into life ( No silencer is fitted on the exhaust ) within 5 mins the inside of the van was toasty.
I'll put up some photos of the van and interior shortly. If anyone wants the racking and workbench that's inside let me know as I'm going to have take it out and throw it away but you would have to come and pick it up from South Wales.
All in all I could not be more happy with the van. So today the interior strip out starts and moving the espacher to the position in the van where it will finally reside. 😄 Phil.
 

Squiffy

Forum Member
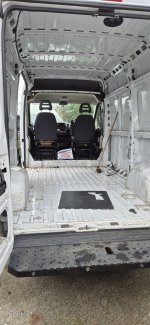
Day 2 and 3, wow it's taken me two whole days to strip out the bench,shelving, workbench and multitude of wiring in professional ducting. It was very difficult to assess which wiring was ultimately used to run the van from the factory and which had been added by BT to run the day to day use of the workshop as it was so professionally added, it's now completed and nothing seems to be at odds with the general running of the van electrics. I am now left with more than enough wiring and conduit to complete the build 😁.
Tomorrow ( Sunday ) I have someone coming around to buy the work station shelving and work bench for £150 so that's a bonus in it's self. At least it relieves me of loading it up and taking it down to the council skip yard, the bulkhead I'll get the local Gipsys that are constantly coming around for scrap metal to take that away.
I am now about to order three windows off Ebay from Shield Auto care which look to be copies of the Dometic cassette windows but much cheaper. A 1100X450 opening top hing for the sliding door and 1X700X450 sliding for the n/s rear and 700X450 top opening hinge for the rear o/s,
Bearing in mind of course that this is a medium wheelbase van.
While I await the arrival of these I'll take up the marine ply floor and put down the framework and thermal celotex with ducts to allow wiring and gas pipes to pass from on side to tuther, then glue back the original marine ply floor which is 19mm.
I've also just taken delivery of a second hand EC155 for £80 delivered from Ebay and have ordered the blocks and pin kit plus the waste water sender unit to enable wiring up a wiring harness for 12volt and 230volt cables, the fresh water cables I can mackle up from the wiring saved from the BT installation, also the EC51 led control module and data cable, new these would have cost £511 but doing it this way its cost £ 213. Once all these things have been accomplished I'll post further. Phil
 
Last edited:

Squiffy

Forum Member
I wish I was making another van Phil, you lucky so and so !
Oh Phil, I'm excited but daunted at the same instant, I'm still remembering my Sis in laws build, by the time I'd finished it I felt quite worn out and vowed that it was my last one hmmmm, the old arthritis has begun to creep in and my energy levels are not what they used to be 🤪. However needs must my daughter could not afford to get the van so called professionally built it would just be a ridiculous price and so I must soldier on but there is a certain amount of pride in proving to myself that I've still got the ware for all to complete another one,😝. Phil
 

Squiffy

Forum Member
Well, so far so good, tomorrow I'll put up some photo's of parts ordered and progress made. I've had a day off from the build due to sorting out my C1 medical and Asda optician eye test, all done now and posted off to the Gestapo DVLA, so now I wait and see. 😜. Phil
 

Squiffy

Forum Member
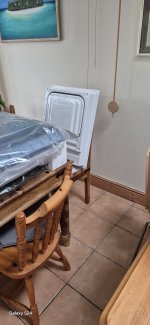
Off to the tip today to get rid of cardboard boxes, just so many of them it's a pity that some other form of protection isn't available.
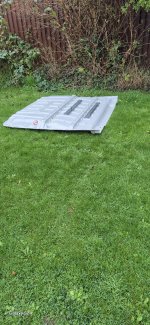
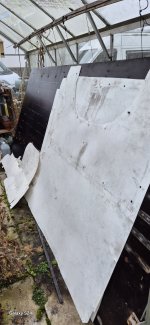
As I said here are some photos of the progress. The metal shelving has gone on Facebook reuse hopefully someone will want it. The bulkhead in the garden will go when the scrap metal guys call again usually they turn up atleast once a week.
The black flooring is marine ply fitted floor which I took up ready to insulate the floor and produce ducting channels for wiring and gas pipes, then I'll relay the floor ply. I'm going to do a floating floor style same as I did for my Sis- in-laws van, which seems to have been a success and doesn't seem to have moved either up or down or forward or backwards, my theory's that the insulation sheet was strong enough to support the floor on its own with just stringers across the door openings and either side of channels for pipes.
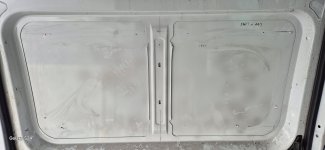
The other photos are of the van stripped out ready for the floor construction and window fitting.
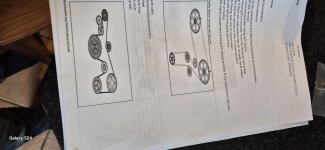
The photo of the cam belt timing and replacement instructions are from my old garage I'm still friends with the Andy who bought the garage off me 21 years ago, it seems like yesterday 🫣. He printed it off from his online workshop manuals as I had searched high and low for a workshop manuals for a Ducato 2.0 115hp and couldn't find anything at all, so Andy kindly printed one off for me as I intend to replace the cambelt and rollers as its 5 years old even though it's only done 90k. Phil
 

Attachments

  • 20241107_101844.jpg
    20241107_101844.jpg
    1.3 MB · Views: 52
  • 20241107_102247.jpg
    20241107_102247.jpg
    1.2 MB · Views: 50
  • 20241107_102219.jpg
    20241107_102219.jpg
    1.4 MB · Views: 54
  • 20241107_102121.jpg
    20241107_102121.jpg
    1.5 MB · Views: 41
  • 20241107_102106.jpg
    20241107_102106.jpg
    2.6 MB · Views: 51
  • 20241107_102043.jpg
    20241107_102043.jpg
    1.2 MB · Views: 44
  • 20241107_101949.jpg
    20241107_101949.jpg
    1.1 MB · Views: 50
  • 20241107_101913.jpg
    20241107_101913.jpg
    1.3 MB · Views: 49
  • 20241107_101906.jpg
    20241107_101906.jpg
    1.2 MB · Views: 48
  • 20241107_101858.jpg
    20241107_101858.jpg
    1.4 MB · Views: 50
  • 20241107_101851.jpg
    20241107_101851.jpg
    1.3 MB · Views: 47
Last edited:

Squiffy

Forum Member
Just as an aside the windows I've purchase off Ebay from Shield Auto Care, the windows were a lot cheaper than sietz dometic windows but on the surface looked similar and equivalent, when they arrived I have to say that having fitted many Sietz windows in the past, I am extremely impressed by the build quality of these Shield Auto windows and very modern look of them. I will of course give a running commentary of the process of fitting them, but it looks to be exactly like fitting a sietz 4. Phil
 

Squiffy

Forum Member
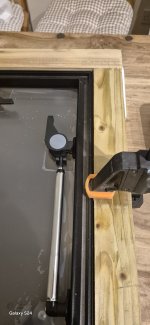
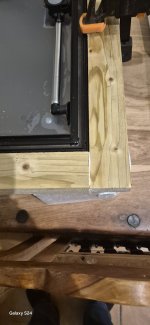
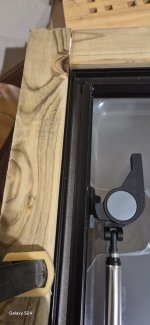
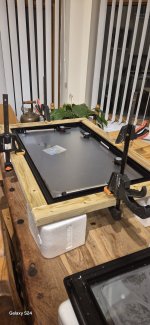
OK, I've now made up three frames to accommodate the three Shield auto care windows.
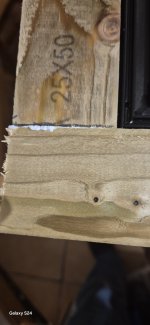
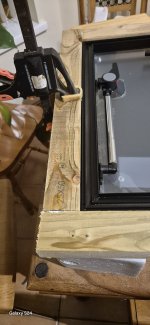
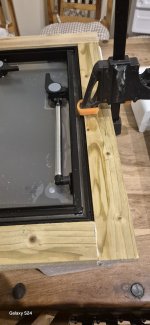
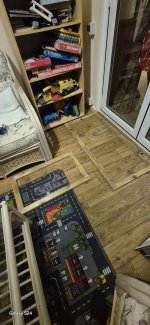
In the photo you can see that the pieces of 25x50mm batten are cut in such a way the I can adjust each piece so that I have about 1 to 1.5 mm between the window frame and the timber batten all round.
The way I cut the wood pieces allows for adjustment. I've just used "Sticks like shit"
From Evostick to glue the pieces together.
I leave them to set then I can remove them from around the window frame and I'm left with oblong wooden frames which are the exact size cut out for the particular windows, I can now use these to offer up to the van walls and sliding door inside the van to mark in each corner where I will then drill through each corner mark with a drill the size of my jig saw blade.
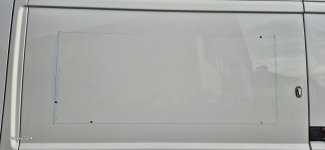
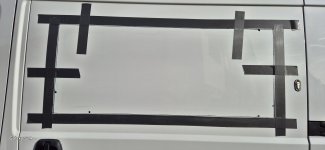
On the outside I now join up the drill holes so that I end up with a rectangle from drill hole to drill hole, once marked like this I'll then lay down some three inch masking tape either side of these lines to prevent the foot of the jigsaw from marking the paintwork. This I only do for the sliding door as its impossible to cut out the window aperture as the shape of the internal door prevents the jigsaw foot from following the line.
However the last few windows I've installed I've removed the foot and just used the roller guide of the blade to run around the lines drawn on the inside of the van wall and as the foot is removed it not only makes it more maneuverable but means as your cutting it from the inside the need for masking tape is not necessary.
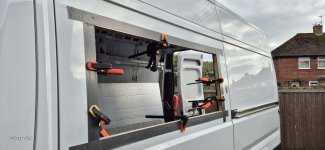
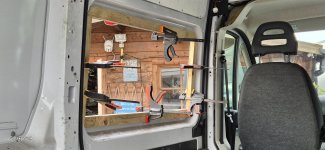
Once the panel is removed I'll then glue the wood frames I've made to thier respective cutouts and clamp them in place and allow to set, so you end up with a rectangular hole with a wood strengthener. Tomorrow I'll continue the process of fitting windows. Phil

Some photos of the frame process.
 

Attachments

  • 20241108_230512.jpg
    20241108_230512.jpg
    1.2 MB · Views: 43
  • 20241108_230508.jpg
    20241108_230508.jpg
    1.2 MB · Views: 44
  • 20241108_230518.jpg
    20241108_230518.jpg
    1.1 MB · Views: 42
  • 20241108_230522.jpg
    20241108_230522.jpg
    1.1 MB · Views: 45
  • 20241108_230528.jpg
    20241108_230528.jpg
    1.3 MB · Views: 42
  • 20241108_230535.jpg
    20241108_230535.jpg
    1.2 MB · Views: 47
  • 20241108_233328.jpg
    20241108_233328.jpg
    1.3 MB · Views: 47
  • 20241108_233405.jpg
    20241108_233405.jpg
    1.6 MB · Views: 47

Squiffy

Forum Member
Unfortunately today I had to concentrate on removing the fold up rear platform, what I thought was going to be a half hour job turned into 3/4 of a days work due to having to unpick the reverse sensors and the tow bar electrics. After which the six bolts holding the platform onto the tow bar put up a herculean fight.
I decided to remove the platform as when I used the van to go and collect 25mm celotex and wood batten, it made a horrendous knocking noise and rattle that wasn't evident while the bulkhead was in place and all the racking so it had to go, pity because it gave a sort of veranda area to the rear with the rear doors open. Phil
 

Squiffy

Forum Member
Once more into the breech dear friends, after a few days of doing odd jobs about the house and garden I'm back onto fitting these windows.
After I had marked up and measured the cut outs and measured them again the horrifying business of actually removing great swarths of panel from the van sides has started.
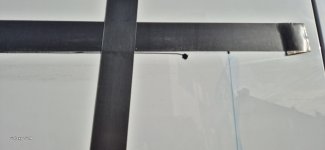
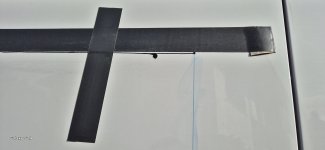
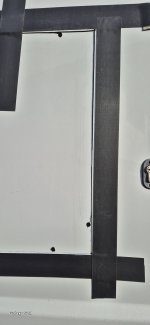
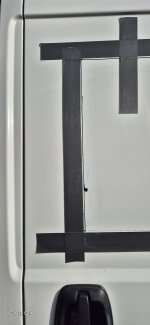
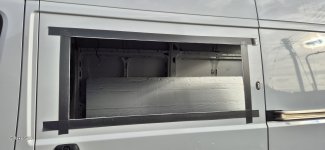
In the first three pictures on the sliding door it shows where I've marked it out on the inside for the cut out size and drilled an 1/8th inch hole through each corner so that from outside I can using a permenat marker draw a line from corner to corner.
I then lay in my case 2.1/2 inch gaffer tape along the outside of the line to stop the jigsaw foot scrapping the paintwork.
Then in various areas along the lines just inside them I drill holes large enough for the blade of the jigsaw to pass through. If your right handed put the hole closer to the right side of the top and bottom line and vise verse if your left handed.
Then continue to insert the jig saw and make the first cut along the top, having completed that put two pieces of tape across the cut and continue to cut up the left or right side putting another strip of tape on either side once the side is cut this is to hold the cut piece of steel in place once cut out and to stop vibration while cutting the bottom line. Now all cuts are completed remove the side tapes and swing the panel outwards on the top two tapes hold the panel and remove the hanging tapes, voile! You now have a rectangular hole in you sliding door.
The next job is gluing the premade wood frame to the back of the cut out, once the glue has gone off at this stage most folk would paint the raw edges of the cut out steel but my view is that I put enough adhesive sealant on the window seat so that it squeezes through over the top of the raw edge and covers it in anycase.
This is one occasion now where another person is required to press against the outside of the window once it's in place, so as to allow you to screw through the backing plate and pull the window snugly up against the outside skin, holding the window firmly in place. Once you have a screw in each corner your helper can leave the window and get you a large brandy to calm your nerves 😆. Go around the outside of the window frame with a paint cleaning wet wipe and wipe away any surplus sealant.
 

Attachments

  • 20241112_125244.jpg
    20241112_125244.jpg
    1.8 MB · Views: 38
  • 20241112_125306.jpg
    20241112_125306.jpg
    2.1 MB · Views: 34
  • 20241112_130558.jpg
    20241112_130558.jpg
    2.3 MB · Views: 33
  • 20241112_130746.jpg
    20241112_130746.jpg
    2.4 MB · Views: 33
  • 20241112_130750.jpg
    20241112_130750.jpg
    2.1 MB · Views: 33
  • 20241112_131256.jpg
    20241112_131256.jpg
    1.1 MB · Views: 42
  • 20241112_131506.jpg
    20241112_131506.jpg
    1.1 MB · Views: 37
  • 20241112_132228.jpg
    20241112_132228.jpg
    2.3 MB · Views: 36
  • 20241112_132427.jpg
    20241112_132427.jpg
    2.4 MB · Views: 38
  • 20241112_134905.jpg
    20241112_134905.jpg
    2.1 MB · Views: 42
  • 20241112_134922.jpg
    20241112_134922.jpg
    2.7 MB · Views: 38
  • 20241113_163747.jpg
    20241113_163747.jpg
    2.3 MB · Views: 41
  • 20241113_163804.jpg
    20241113_163804.jpg
    2 MB · Views: 43
Last edited:

Squiffy

Forum Member
By the by when I first put a 1100X450 window into a Ducato sliding door 11years ago I was told by the commercial builders at varius shows that it couldn't be done as it was too big to fit into the space but I went ahead and did it, i noticed a few years later at shows that 1100X450 windows were appearing in commercially built vans, not saying i was the first but certainly one of the first. Now for the the top skylights which I hope to do today.Phil
 
Last edited:

Millie Master

Forum Member
Phil, haven't you missed one exceptionally important thing out of your description of the work schedule, or am I wrong?

Surely after cutting the metal, surely the next vitally important job is to smooth the cut edges and then to thoroughly paint the edges?

But otherwise, I love all of your descriptions.

Phil
 

Users who viewed this discussion (Total:12)

Top