VW Crafter MWB Build

mb2tv

Forum Member
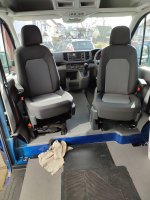
As promised, a thread about the build itself.
As next week is the build week for our new VW Crafter, we thought of starting gather items so that we can start work on it. went to Ikea and came back with bed beams and slates. Also came back with a kitchen sink that we liked.
We probably receive the van late October early November, which does not leave us much time before the winter.
First job will be to remove and seal all the plastic sides as they seem to leak water - not an issue if you leave it as it is but since we are going to insulate the van, we do not want any water coming in. then windows and roof vents.

For that - my first question - it seem that the 'go for' sealant is Sikaflex, there is Sikaflex 522 for external work, which comes only in white. There is also Sikaflex EBT+ which is also external and comes in some colours. Our van is not white, it is Blue so wanted to use darker colour. I have read the the Sikaflex EBT+ is similar product to the Sikaflex 522 and both can be used - does anyone here know anything about this?

I hope to cut the windows and maxxfan roof vents this year - I have seen that most people use a jigsaw for that. There is also a 'nibbler' - has anyone used such a tool? (for example this Nibbler ) the advantage as far as I can see is that it does not leave very fine filing after - all chunky bits which might be easier to clean. Any opinion on this?

Many Thanks
 

SquirrellCook

Forum Member
I think any good quality pu automotive mastic will be up to the job. With the max fans I used a butyl mastic for the bulk of the sealing only using pu mastic for the outer edge. This way, if you ever have to remove them you stand a chance.
The nibblers I’ve used shower everything in very sharp half moons. Also the paint will be damaged by the guide.
I think I’d be happier using a very fine blade in a jigsaw. Use strong tape each side of the cut. Go very slowly with oil on the cutting path.
When you reinforce the hole use a waterproof material. I used resin bonded ply. Buffalo board or the like.
Remember stainless screws corrode in mild steel.
If you get stressed, walk away.
 

Nabsim

Forum Member
When I was fitting my solar o contacted Syka tech people and they were extremely helpful. Ask them and you can’t go wrong 👍
 

DnK

Forum Member
For that - my first question - it seem that the 'go for' sealant is Sikaflex, there is Sikaflex 522 for external work, which comes only in white. There is also Sikaflex EBT+ which is also external and comes in some colours. Our van is not white, it is Blue so wanted to use darker colour. I have read the the Sikaflex EBT+ is similar product to the Sikaflex 522 and both can be used - does anyone here know anything about this?

EBT+ is a construction adhesive/sealant I've used for many years both in construction and on my motorhome and PVC. Its cheaper too than 522 and i'm pretty certain its just as good (it maybe even same stuff marketed differently).
 

Deleted member 12559

Another vote for jigsaw cutting out of apertures in steel panels. Tape for paintwork
protection as the shoe plate slides along.
For simple sealing (not adhesive/sealant) Sikalastomer 710 is much used it remains
long term plastic, (not elastic) good for mechanically fixed items such bolted or screwed
down rooflights, fans vents, anything that may later need removing eg to fix a leak.
Even amalgamates when gunning 710 new into existing 710 in my experience with
a bit of careful prepping.
Only available in white and can be a bit messy to apply.

For chrissake never use acid cure silicone near steel even if painted. If you really have
to then neutral cure.
 

Silver sprinter

Forum Member
Another vote for jigsaw cutting out of apertures in steel panels. Tape for paintwork
protection as the shoe plate slides along.
For simple sealing (not adhesive/sealant) Sikalastomer 710 is much used it remains
long term plastic, (not elastic) good for mechanically fixed items such bolted or screwed
down rooflights, fans vents, anything that may later need removing eg to fix a leak.
Even amalgamates when gunning 710 new into existing 710 in my experience with
a bit of careful prepping.
Only available in white and can be a bit messy to apply.

For chrissake never use acid cure silicone near steel even if painted. If you really have
to then neutral cure.
You say the 710 only comes in white. I have used it in black. It might have changed from then
 

Deleted member 12559

You say the 710 only comes in white. I have used it in black. It might have changed from then
Yes it now comes in black, last time I bought any it was any colour so long as it was white!
I have a half cartridge remaining from about 6 years ago it's still useable. It's quoted
as being anti sagging, but when you use it to bed a rooflight flange on say a corrugated
roof I'd say max. of 10mm. It will tend to pull away under gravity especially in the first few
weeks, so may need to tighten fasteners a little. Some rooflights are made of plastics
with waxy non stick properties I think the common Fiamma rooflights eg might be made
of Polypropylene. And some plastics rooflights have a moulding wax type release agent on them
so need to be degreased as it were. Right old minefield out there !
 

mb2tv

Forum Member
Had an update that the van is being built as we speak. No delivery date yet.
We bought the bed beams from IKEA, but was missing the hooks they are attached to as the are not sold by them as such. Contacted their customer service and now I have all the hooks I need.
I have also emailed Sika for advice, and they recommended using 521UV which comes in black as well. They said the EBT+ is not that good for this application.
The wait continues.
 

Millie Master

Forum Member
I tried Sika but didn't enjoy the experience so I then started to and continue to use Stixall.

The singularly most important thing when using any of these amazing adhesives is to make absolutely certain the surfaces being stuck are thoroughly cleaned with a suitable solvent.

As for cutting the holes in the van sides I have done it in 2 different ways. My first build was done using a jigsaw whilst at the same time, my wife held a powerful vacuum on the outside and I somehow (!) held another one at the cutting side, by doing it this labour intensive we found that most of the swarf was cleared away before it could damage anything.
The 2nd window installation on my nephews race van, we drilled large diameter holes at all 4 corners and then used a very fine cutting disc in the angle grinder. This was far, far faster, but the margin for error was miniscule!

The other very important thing to consider when cutting these holes is to ensure the cut out, jagged edged section you are removing doesn't suddenly fall to the floor. To overcome this problem, on the vertical side cut outs I drilled 2 central holes and inserted and clamped in some threaded bar that was used as a handle by the second pair of hands.
When cutting the holes in the roof, I again drilled a central hole and used a length of threaded bar, but on both the outside and inside I clamped a length of wood to each side which overlapped the hole to ensure it didn't suddenly drop through.
 

mb2tv

Forum Member
Well... It is here!!!

IMG_20211119_110229.jpg
IMG_20211119_110218.jpg
IMG_20211119_110210.jpg


In all it's blue glory!
Unfortunately, because of previous commitments I will not be able to do anything for a few weeks. I did drive it, and it drives very nice! I like it a lot!
 

mb2tv

Forum Member
It is about time that i will make a start.
Have been busy with lots of issues, but now about to start.
First job will be to remove the bulkhead, and draw the floorplan inside to make sure what we envisaged is possible and comfortable.
Have driven the van a bit and it is very nice to drive. Fuel consumption (empty) is ok. It has an auto gearbox (torque converter) but 1st and 2nd are changed within a few meters. Will probably make more sense when loaded.
Wish me luck!
 

mb2tv

Forum Member
Started the build!
First, I have removed the bulkhead and the floorboards, filled the diesel tank and went to weigh the van. Without people inside we are tipping the scale just shy of 2000kg (1980kg if you are picky), which is a good start i think.
First job was to fit the swivel base. Took longer than expected (which is expected...) as in the Crafter the handbrake needs to be dropped by 40-50mm. All done now.
Next is sound proofing and laying the design on the floor to finalize it. Then, off the the NEC in the hope to get some more ideas and hopefully look at items we need for the build.
 

Attachments

  • IMG_20220221_124554.jpg
    IMG_20220221_124554.jpg
    5.4 MB · Views: 207

wildebus

Forum Member
Looking good. Seen very variable reviews on both the swivels and the handbrake lowering kit on the Sprinters and think the Crafters still use the same sets, so well done for getting that all done (y)
 

mb2tv

Forum Member
Looking good. Seen very variable reviews on both the swivels and the handbrake lowering kit on the Sprinters and think the Crafters still use the same sets, so well done for getting that all done (y)
That was a job and a half... Suppose to take a couple of hours, took 2 days, though not full. I had to put up the seat about 20mm and lower the handbrake by about 30mm. There is no kit to do that, I have made a 'drop plate' from material i have around, with high tensile bolts. In that sense, there is no instructions, you are on your own. Also annoying that to do that you need to cut the plastic cover of the handbrake, and it is hit and miss, no template.
Lucky i have ordered the handbrake that does not stay up, once you out the brake on the handle drops back to the lowest state .
 

wildebus

Forum Member
With the lowered handbrake handle and the raised seat base, you might find this device of interest?
71ff8G6spkL._AC_SL1500_.jpg

I fitted this to my Ducato as that lever is pretty low (and also on the right side rather than middle and so I often used to forget about it - so this makes it a lot more obvious). I leave the little clip out and just drop the handle down out the way after lifting the handle.
 
Last edited:

wildebus

Forum Member
Some videos here may be of interest as well (although too late to be of help probably)

If I recall correctly, he actually gave up on the swivel plates and bought swivelling seats instead after a short time? (must admit, I fitted swivel plates to my VW T4 and took them off shortly after and after getting my VW LT, I bought seats with integral swivels instead of contemplating plates again. But having said that, the Ducato-based Motorhome I have now is fitted with Swivel Plates and they are very good.
 

mb2tv

Forum Member
I have seen the videos before. It is similar, not the same. The location of the bracket is lower, so needed to cut into the rubber floor in order to lower it. The picture is with the bracket i made, i had yo cut the top bolts for the mechanism to fit.
 

Attachments

  • IMG_20220219_110144.jpg
    IMG_20220219_110144.jpg
    4.6 MB · Views: 270

Sprinter 1 cup

Forum Member
Started the build!
First, I have removed the bulkhead and the floorboards, filled the diesel tank and went to weigh the van. Without people inside we are tipping the scale just shy of 2000kg (1980kg if you are picky), which is a good start i think.
First job was to fit the swivel base. Took longer than expected (which is expected...) as in the Crafter the handbrake needs to be dropped by 40-50mm. All done now.
Next is sound proofing and laying the design on the floor to finalize it. Then, off the the NEC in the hope to get some more ideas and hopefully look at items we need for the build.
Hay that looks very smart . Is that new raised flooring in the van and will the heater vents fit ?
1980 kg that seems heavy empty ! But £100 of fule will do that. Lol
Mines 3100kg and rising.
 
Last edited:

Users who viewed this discussion (Total:0)

Top