Quart into a pint pot!!!

GEOFF

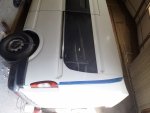
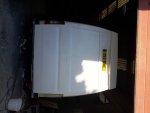
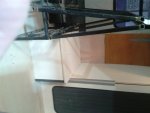
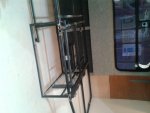
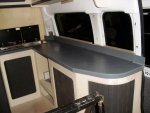
New forum - same project. As I stated in a recent post I have now started to make the furniture for my Maxus. The furniture is made of poplar ply which will be removed for painting.I will try to post a couple of photos. Geoff.
 

Attachments

  • 20190221_140555.jpg
    20190221_140555.jpg
    704.6 KB · Views: 911
  • 20190221_180412.jpg
    20190221_180412.jpg
    1.7 MB · Views: 969
  • 20190221_140756.jpg
    20190221_140756.jpg
    1.2 MB · Views: 842
Last edited by a moderator:

Millie Master

Forum Member
You said you were being kept busy Geoff when we spoke on the phone and now I can see why............. Could you possibly put up a 3/4 front view of your Maxus as I am sure there are quite a few of us on here don't know what one looks like?

Phil

ps. Glad to see your workmanship is well up to your normal truly excellent standards.
 

LibertyHall

Forum Member
Morning Geoff
Not only do we share a like for bonded glass😘 looking at your build a love for curves too. Amazing workmanship there to Geoff
Take care
Ken
 

Minisorella

Geoff, I love the tambour cupboard fronts and the contrast of light and dark. What colour are you going to paint the wood? It'll be a beauty when it's done (y)

Mind you, I was a bit worried about you putting your back out trying to manoeuvre around in the first photo... talk about dancing on the ceiling :ROFLMAO:
 

GEOFF

The internal colours will basically be dark grey for the doors and trims and light grey paint for the furniture. The soft stuff (seats & bed) will probably be mainly grey with a dash of bright red to brighten it up as I am using a bright red Russel Hobbs fridge in the space below the worktop on top of the wheel arch. The worktop will probably be fibreglass if I can find the time to make a mould. The WT colour would be a choice of white, L grey or D grey, but I think it will end up D grey. I bought some grey wood effect clunk/click vinyl floor boards which I shall lay when the furniture is out for painting. I did try to find some of my pictures from the other site, but seem to have lost them. I have taken a photo of the other Maxus minibus to remind you all of the good old BMC, BL.BLMH, Rover and LDV days. Geoff.
004.jpg
 

GEOFF

I cannot find my old photos, but I did look on the old forum and have found a couple of thumbnail prints which I will try to show for here for others. The pics are low resolution and do not enlarge very
20180216_091237.jpg
well. They show the new rear end and the large Heki rooflight fitted. I have now made external pods for the original rear lights bringing them out level with the back and making them removable to enable bulbs to be replaced from the outside. Geoff.
 

Attachments

  • 20180216_091340.jpg
    20180216_091340.jpg
    1.5 MB · Views: 863
  • 20180216_092042.jpg
    20180216_092042.jpg
    1.4 MB · Views: 925
  • 3534-a2bb81385d603ac755436bf3d185161b.jpg
    3534-a2bb81385d603ac755436bf3d185161b.jpg
    3.2 KB · Views: 781
  • 4638-673577ecc4dc01ac3d0448a1ca8e2b60.jpg
    4638-673577ecc4dc01ac3d0448a1ca8e2b60.jpg
    3.2 KB · Views: 808

Millie Master

Forum Member
Geoff, did you do the rear door conversion yourself, that is a brilliant way to make the van look even better and more unique.
Phil
 

GEOFF

Yes Phil, we made a mould and have made 3 single piece rear ends. There is no door ,but we could have made an opening panel however as the vans (Maxus) are not very big decided to to keep it solid. That panel is fitted slightly further back than original to give an extra couple of inches internal length at floor level and about 5 inches at the top. Every little helps when trying to get a "quart into etc". Geoff.
 
Last edited by a moderator:

GEOFF

Today I made a "boot box" which also serves as a support for the seat backrest when in the bed position. Sorry for the poor quality photos and the orientation (more contortions). Geoff.
 

Attachments

  • 20190226_141741 seat box.jpg
    20190226_141741 seat box.jpg
    426.2 KB · Views: 875
  • 20190226_142015 seat box.jpg
    20190226_142015 seat box.jpg
    454.7 KB · Views: 813
  • 20190226_162658 seat box.jpg
    20190226_162658 seat box.jpg
    669.6 KB · Views: 805

GEOFF

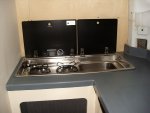
Made a mould insert for the smev combi sink/hod and took a moulding off it to make sure it fits (it does). Made a worktop mould and will fit the insert and hopefully get the worktop laid up tomorrow. I will post some pics next week if it works out OK. Geoff.
 

GEOFF

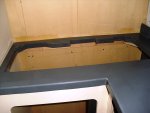
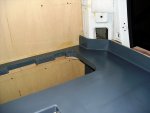
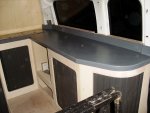
Worktop now made, trimmed and placed in position for a trial fitting. Two pics show the moulded cutout for the sink/hob. The moulding now just needs a bit of a clean up and "fettling". now that the WT is made the the next job is to remove the furniture and seat for painting and to lay the floor covering. Geoff.
 

Attachments

  • DSCI1993.jpg
    DSCI1993.jpg
    924.9 KB · Views: 783
  • DSCI1995.jpg
    DSCI1995.jpg
    955.2 KB · Views: 752
  • DSCI1998.jpg
    DSCI1998.jpg
    909.9 KB · Views: 836
  • DSCI2000.jpg
    DSCI2000.jpg
    1.2 MB · Views: 764
  • DSCI2002.jpg
    DSCI2002.jpg
    925.2 KB · Views: 743
Last edited by a moderator:

Millie Master

Forum Member
Amazing workmanship Geoff, you and your mould making it makes us mere mortals who only play about with timber look like right old dumb clucks!!
 

GEOFF

No chance of being done by Easter, at least not this Easter. Thanks for the nice comments, but using fibreglass for some things is not really very difficult. It can however be very messy which is why I tend to work on the design/patterns/reverse moulds and get the lads in my friends workshop doing the messy bits. Geoff.
 

GEOFF

Just a quick update - work stopped on the Maxus at present as I am trying to get the boat that I am building finished and afloat before the end of summer this year. Geoff.
 

GEOFF

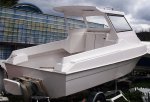
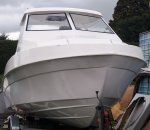
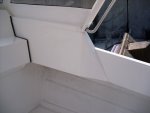
As it seems a bit quiet on the forum and I have nothing new happening with the Maxus, I thought I would post a couple of pictures of my boat project, an 18' fast fisher. The last two pics show the side grab rails and the side panels trimmed back. Geoff.
 

Attachments

  • DSCI2009.jpg
    DSCI2009.jpg
    401.5 KB · Views: 611
  • DSCI2012.jpg
    DSCI2012.jpg
    370.9 KB · Views: 634
  • DSCI2014.jpg
    DSCI2014.jpg
    376.4 KB · Views: 566
  • DSCI2030.jpg
    DSCI2030.jpg
    90.2 KB · Views: 654
  • DSCI2032.jpg
    DSCI2032.jpg
    103.9 KB · Views: 646

Millie Master

Forum Member
Hey Geoff you lucky old so and so that is one very nice looking craft..... Is it going to be fitted with an inboard outboard and if so hat power?

And, as and when you get her into the water where will you be intending to use her?

I, oh so greatly miss my boat that I used to keep down at Morston.

Phil
 

GEOFF

Hi Phil, the original design (I bought a set of moulds from the gang of 4 that made them and the bucks) was for either an inboard or outboard engine. We made the mouldings in Bourne and I altered the design to use a pod to mount an outboard motor. This enabled me to increase the deck space so whilst the boat is an 18 footer I was able to build a new higher screen and make a hardtop to give a semi - enclosed wheelhouse - remember - "a quart into a pint pot". I have aquired an older 125hp Mercury outboard so it should perform quite well. As we live in landlocked Lincolnshire initial flotation trials will be on the river Nene in Peterborough ( we have a mooring at a boat club), but I hope to trail the boat to the coast on occasions. I know what you mean about missing your boat - my beloved Fairline Carrera was sacrificed around 1986 to finance the purchase, restoration and conversion of an old stone village school into a habitable dwelling. Geoff.
 

Millie Master

Forum Member
Way back in the mid 1970's, my boat was of a similar design but slightly shorter in length but slightly wider of beam with a displacement hull, as for the engine mine was an outboard but I went for a low revving but quite large capacity Tomos 4 stroke that always ran like a dream. When tides allowed, I always loved going out in the very early morning to fish for dabs which I then brought back to cook for breakfast.

Oh memories!
 

GEOFF

Some time has passed since I last posted, but I have been trying to get the boat and trailer finished. The boat is currently at the canopy workshop awaiting its new cover, so as I cannot do any work on her (stupidly HE/SHE/IT to be PC correct) I have spent a bit of time stripping out the furniture,bed/seat ect. ready for sanding and painting. Geoff.
 

Users who viewed this discussion (Total:0)

Top