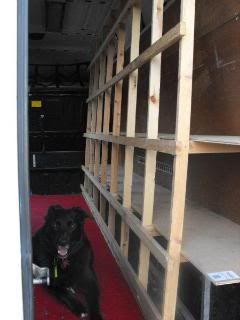
Ply lining

whitevanwoman

77W, Thanks for the offer of a loan but I have to admit being a bit of a Gadget Girl, and take quite alot of pride in having a tool kit that quite a lot of men have been impressed with :D even if my tool bag is pink...

So I'm as happy to go shopping for a decent power screwdriver as I am to go shopping for a new pair of shoes :raofl:
And then of course, hopefully I'll get the ply back on before the novelty of a new toy wears off.

I think I need to have a visit to B&Q, play the helpless female who wants a decent power screwdriver for her fella, get them to show me all the different ones and decide which is best and then come home and buy it cheaper online... ;)

:idea: unless it's a Wednesday and I can persuade a passing OAP to buy it with their 10% discount and I'll give them the cash....
 

Boots

Evening WVW,

You may be able to get a 'Yankee' screwdriver, about 18" long with a ratchet system so as you press the handle down towards the screw the screw is driven in so as you 'pump' the handle up n down the screw is quickly driven in, usefull when out n about with no mains electric etc.

Found second hand quite often at reasonable cost. I have a spare one you can have if you want. From your posts I think you are not that far from me @ Burton in Kendal 5mins from M6, J 35/6.

PM me to arrange if it's of any use.


Cheers


Boots
 

whitevanwoman

Evening WVW,

You may be able to get a 'Yankee' screwdriver, about 18" long with a ratchet system so as you press the handle down towards the screw the screw is driven in so as you 'pump' the handle up n down the screw is quickly driven in, usefull when out n about with no mains electric etc.

Found second hand quite often at reasonable cost. I have a spare one you can have if you want. From your posts I think you are not that far from me @ Burton in Kendal 5mins from M6, J 35/6.

PM me to arrange if it's of any use.


Cheers


Boots


I know what you mean I think, a bit like a ratchet socket set with a handle and different socket heads? but for screw heads instead. That sounds like just the job.

Thanks v much for the offer, there'll be beer in it for you, my friend :cheers:

You're just down t'road and I have to go down to Carnforth area in the next week or so to collect a battery, so could easily arrange to meet. I'll PM you later during the week when I know when I'll be able to head down that way. Thanks again.
 

ricc

a yankee screwdriver isnt the same as a ratchet. the yankee has an archimedes screw..as you push the handle towards the screw the bit rotates.. it can take a fair push to get the screw to rotate if its tight.

going back to screws ...all screws cut or tap their own thread, wood screws are relitavly soft cos they only have to bite into wood. the term "self tapper" is normally applied to hardened screws that will tap their own thread into metal. all traditional screws need a pilot hole.
however its now most woodscrews have sharp points which allows them to be used in soft woods without a pilot hole. the self drilling self tapping metal screws have a drill point on the end so they drill their own hole. just to confuse matters small bolts , like those that hold electric sockets are referred to as machine screws ...these have a parrallel thread ...the same all the way along the bolt... and need a pre threaded (tapped) hole.

it is possible to put a screwdriver bit in any electric drill with a variable speed trigger and sucessfully drive screws... crossheaded bit and screws is bettter than slotted. a drill/driver, usually cordless, has a variable torque control to limit the twisting power to prevent the screws going too deep below the surface. these do need a bit of push on the driver to keep the bit engaged in the screw head the real tool of choice is an impact driver.. its designed to screw screws and has a clever rotary hammer affair which really makes it easy... and often gets out impossible screws aswell
the 4volt electric screwdrivers are little more than toys.

for occasional use look on fleabay for a ryobi 18 volt drill driver with charger and a couple of ni cad batteries.... expect to pay arround 20 quid theres plenty on there.
if funds allow an impact driver is good if youre going to be driving a lot of screws, but they are noisy.....stick with ryobi cos all their current 18 volt tools use the same batteries ... my circular saw, angle grinder and reciprocating saw get a fair bit of stick.
lithium batteries are better than nicads but cost a lot more and you dont see them for sale used as often as the nicads.
ive got one lithium and about half a dozen nicads that have come with various tools.


P806 Ryobi 18-Volt 18V ONE+ Drill / Impact Driver Kit Nicad P100 Battery P236 | eBay
the linky gives a description of driver and drill....but dont buy from the states...it was just the first one a search threw up
 

Bigpeetee

a yankee screwdriver isnt the same as a ratchet. the yankee has an archimedes screw..as you push the handle towards the screw the bit rotates.. it can take a fair push to get the screw to rotate if its tight.

going back to screws ...all screws cut or tap their own thread, wood screws are relitavly soft cos they only have to bite into wood. the term "self tapper" is normally applied to hardened screws that will tap their own thread into metal. all traditional screws need a pilot hole.
however its now most woodscrews have sharp points which allows them to be used in soft woods without a pilot hole. the self drilling self tapping metal screws have a drill point on the end so they drill their own hole. just to confuse matters small bolts , like those that hold electric sockets are referred to as machine screws ...these have a parrallel thread ...the same all the way along the bolt... and need a pre threaded (tapped) hole.

it is possible to put a screwdriver bit in any electric drill with a variable speed trigger and sucessfully drive screws... crossheaded bit and screws is bettter than slotted. a drill/driver, usually cordless, has a variable torque control to limit the twisting power to prevent the screws going too deep below the surface. these do need a bit of push on the driver to keep the bit engaged in the screw head the real tool of choice is an impact driver.. its designed to screw screws and has a clever rotary hammer affair which really makes it easy... and often gets out impossible screws aswell
the 4volt electric screwdrivers are little more than toys.

for occasional use look on fleabay for a ryobi 18 volt drill driver with charger and a couple of ni cad batteries.... expect to pay arround 20 quid theres plenty on there.
if funds allow an impact driver is good if youre going to be driving a lot of screws, but they are noisy.....stick with ryobi cos all their current 18 volt tools use the same batteries ... my circular saw, angle grinder and reciprocating saw get a fair bit of stick.
lithium batteries are better than nicads but cost a lot more and you dont see them for sale used as often as the nicads.
ive got one lithium and about half a dozen nicads that have come with various tools.


P806 Ryobi 18-Volt 18V ONE+ Drill / Impact Driver Kit Nicad P100 Battery P236 | eBay
the linky gives a description of driver and drill....but dont buy from the states...it was just the first one a search threw up
I've used and abused my Ryobi 18v system for over 7 years and still going strong. As good as other very much more expensive kit.
 

whitevanwoman

a yankee screwdriver isnt the same as a ratchet. the yankee has an archimedes screw..as you push the handle towards the screw the bit rotates.. it can take a fair push to get the screw to rotate if its tight.

going back to screws ...all screws cut or tap their own thread, wood screws are relitavly soft cos they only have to bite into wood. the term "self tapper" is normally applied to hardened screws that will tap their own thread into metal. all traditional screws need a pilot hole.
however its now most woodscrews have sharp points which allows them to be used in soft woods without a pilot hole. the self drilling self tapping metal screws have a drill point on the end so they drill their own hole. just to confuse matters small bolts , like those that hold electric sockets are referred to as machine screws ...these have a parrallel thread ...the same all the way along the bolt... and need a pre threaded (tapped) hole.

it is possible to put a screwdriver bit in any electric drill with a variable speed trigger and sucessfully drive screws... crossheaded bit and screws is bettter than slotted. a drill/driver, usually cordless, has a variable torque control to limit the twisting power to prevent the screws going too deep below the surface. these do need a bit of push on the driver to keep the bit engaged in the screw head the real tool of choice is an impact driver.. its designed to screw screws and has a clever rotary hammer affair which really makes it easy... and often gets out impossible screws aswell
the 4volt electric screwdrivers are little more than toys.

for occasional use look on fleabay for a ryobi 18 volt drill driver with charger and a couple of ni cad batteries.... expect to pay arround 20 quid theres plenty on there.
if funds allow an impact driver is good if youre going to be driving a lot of screws, but they are noisy.....stick with ryobi cos all their current 18 volt tools use the same batteries ... my circular saw, angle grinder and reciprocating saw get a fair bit of stick.
lithium batteries are better than nicads but cost a lot more and you dont see them for sale used as often as the nicads.
ive got one lithium and about half a dozen nicads that have come with various tools.


P806 Ryobi 18-Volt 18V ONE+ Drill / Impact Driver Kit Nicad P100 Battery P236 | eBay
the linky gives a description of driver and drill....but dont buy from the states...it was just the first one a search threw up

Brilliant explanation and info - thanks very much.

And thanks to Bigpeetee for the endorsement - I shall go for a Ryobi 18 volt if I can get one within my budget of up to about £30. I didn't want to make the same mistake and buy another underpowered toy power screwdriver which, like I said, was no use except perhaps for putting together IKEA furniture.

You do realise I'll probably be posting asking for advice on how to use it properly once I've got it!
 

whitevanwoman

I've managed to completely remove the side ply lining on one side of the van now and its inside the house, drying off before being lined with silver bubble wrap.

Here's some pics of the damp area at the back of the Transit, in the area of the rear light cluster - you can see the nuts for the light cluster above the tunnel shaped hole in the vertical cavity which the light cluster is fitted into. There's a layer of 1" solid ply over the entire floor (one single piece) so there's no chance of lifting it to get better access. But it's pretty sodden in that far corner. No signs of dampness or moisture anywhere else behind the ply lining, just in that corner.

I think the dampness may either be coming in from around the light cluster or the other possibility which I have now spotted is possibly through the nuts holding the black plastic strip in place on the outside of the van. I've cleaned and dried the whole area now and am now waiting for it to start snowing or raining again to see if I can trace any moisture.

I'm going to have to leave the ply off for a couple of weeks I think, for the whole area to dry off which is a nuisance as I really want to get on with insulating, replacing ply and building the new bed / seat and other jobsy and get away for a short trip as I'm having withdrawal symptoms, have only spent 3 nights in it this year :mad2:

DSC_0219_zps2a865c7a.jpg


DSC_0213_zpsf4776c46.jpg


DSC_0217_zps18921fde.jpg
 

ricc

if you just want to do one job, aint bothered if the battery goes flat and can wait till tomorrow for it to recharge it may be worth a punt...especially if youre prepared to take it back and demand a new one under warrentee when it breaks.

if you can see ongoing work for it and might want other tools using the same batteries then go with the used 18v ryobi from fleabay .


i started with a 12 volt makita, had a 14v bosch as part of a job lot... sold the makita cos the bosch was a better drill... when i broke that after much thought i went with ryobi..
. ive now got 4 drills, impact driver, circular saw , jigsaw, reciprocating saw, sander, hedge trimmer, long reach pruning saw a chain saw, and strimmer along with half a dozen batteries.all bought used off fleabay.... a mornings hedge trimming will use all the batteries.

im still on the look out for a planer....sods law ill find one cheap bundled with another drill
 

jogguk

Any comments on this? It looks like a bargain at B&Q...

12V Cordless Drill Driver, VDD12


I would give this a miss.

Also I would not bother with any big 18v drill/driver either. A good make 14.4v would be ideal they have plenty of power for big screws and if you need to drill big holes in steel you have a tool already. There is a huge difference in the weight and physical size between 14.4v and 18v tools.

You will soon learn to curse a 18v drill when you have to lift it above chest height or when you're working inside cupboards and tight spaces or laying on your back under the van, compact tools are whats needed for cabinet work (trust me I used to be a cabinetmaker/ kitchen fitter).

Not all B&Q no name tools are rubbish. Last year they had a special deal 14.4v drill with three batteries in a moulded case a unheard of make called 'Site' which was identical to the Makita 14.4v model cost me about £46! I initially bought it for the batteries, but the drill performed as well as my Makita's.

View attachment 11468

You need to drill a 10/12mm hole here (depending if anything underneath in the way) to drain water away, can latter be plugged with a rubber grommet. Dry it up and water the back light with a watering can and look feel for water getting in. If dry water the roof by the gutter.


John
 

whitevanwoman

I would give this a miss.

Also I would not bother with any big 18v drill/driver either. A good make 14.4v would be ideal they have plenty of power for big screws and if you need to drill big holes in steel you have a tool already. There is a huge difference in the weight and physical size between 14.4v and 18v tools.

You will soon learn to curse a 18v drill when you have to lift it above chest height or when you're working inside cupboards and tight spaces or laying on your back under the van, compact tools are whats needed for cabinet work (trust me I used to be a cabinetmaker/ kitchen fitter).

Not all B&Q no name tools are rubbish. Last year they had a special deal 14.4v drill with three batteries in a moulded case a unheard of make called 'Site' which was identical to the Makita 14.4v model cost me about £46! I initially bought it for the batteries, but the drill performed as well as my Makita's.

View attachment 11468

You need to drill a 10/12mm hole here (depending if anything underneath in the way) to drain water away, can latter be plugged with a rubber grommet. Dry it up and water the back light with a watering can and look feel for water getting in. If dry water the roof by the gutter.


John

thank you, helpful advice :cheers:
 

whitevanwoman

Leak update...

I jet washed the van today and spent considerable time forcing soapy water into every possible nook and cranny within 3 feet of the nearside rear light cluster, then checked inside and found a small amount of soapy water (maybe a spoonful) in the bottom of the side panel, which would normally be behind the ply lining. I still couldn't tell exactly where it was coming from but I'm not sure now that it is coming from the light cluster and think that it may be the seam joining the side panel to the rear vertical column which contains the light cluster and/ or the clips holding the black plastic bumper strip on or the clips / nuts holding the black door slide housing onto the side panel.

I think I will follow Jogguk's advice and drill a small hole through the floor to allow the water to drain away (I've checked underneath and I think this will be ok) and also for the metal to dry out completely and will use Capt Tolley Crack Cure and Sikaflex on every single join, seam, nut, bolt etc which may feasibly be the source. Then another jet wash to see if that has solved the problem.

Do I need to plug the hole or can I leave it open? It's going to be covered up by insulation and then the ply replaced which I'd like to get done this weekend so that the van is usable again, and I don't really want to have to remove the ply again in a week or 2 to bung the hole with a rubber gromet.
 

jogguk

Leak update...

I jet washed the van today and spent considerable time forcing soapy water into every possible nook and cranny within 3 feet of the nearside rear light cluster, then checked inside and found a small amount of soapy water (maybe a spoonful) in the bottom of the side panel, which would normally be behind the ply lining. I still couldn't tell exactly where it was coming from but I'm not sure now that it is coming from the light cluster and think that it may be the seam joining the side panel to the rear vertical column which contains the light cluster and/ or the clips holding the black plastic bumper strip on or the clips / nuts holding the black door slide housing onto the side panel.

I think I will follow Jogguk's advice and drill a small hole through the floor to allow the water to drain away (I've checked underneath and I think this will be ok) and also for the metal to dry out completely and will use Capt Tolley Crack Cure and Sikaflex on every single join, seam, nut, bolt etc which may feasibly be the source. Then another jet wash to see if that has solved the problem.

Do I need to plug the hole or can I leave it open? It's going to be covered up by insulation and then the ply replaced which I'd like to get done this weekend so that the van is usable again, and I don't really want to have to remove the ply again in a week or 2 to bung the hole with a rubber gromet.

Leave the hole. Or couild you push a rubber grommet in from the outside?

John
 

whitevanwoman

Could possibly plug from outside, won't know for sure till I drill the hole, but am tempted to leave the hole as ventilation.
 

Viktor

I think I'd leave the hole but paint it well so it doesn't act as a rust starter and then just keep an eye on it.
 

whitevanwoman

Me and good old Captain Tolley have found the source of the leak :banana:

I squirted Capt Tolley's Crack Cure along every single possible place where water might possibly be getting in and by a process of elimination and checking to see if it was coming through on the inside, I eventually sussed that it was coming from here (the area is marked by a square box in red felt tip on the photo)...

DSC_0239_zps6ea5f898.jpg


Here's a couple of pictures of the inside showing the Capt Tolleys (a kind of bluish white patch in the middle of the rust patch just below the nut and bolt for the rear light cluster) coming through the seam between the side panel and the back panel

DSC_0244_zps9c02c070.jpg


DSC_0243_zps9f969db6.jpg


Unfortunately its too cold for Sikaflex at the moment but as soon as the temp rises above 5C, I'll be out there with the Sikaflex. In the meantime, I might just cover the seam with tape as a temporary measure to keep out the snow which is forecast for this weekend :mad2:

I've drilled a hole through the bottom of the panel (well, actually I discovered that I was drilling through a rubber bung which had been painted over and sealed with white silicon, I thought it was strange that the drill went through so easily) but there's another sealed box underneath that so it doesn't give direct access to the outside. But even so, it should help ventilate it a little and as it's been dry here today and I've had the van doors open all day, it's beginning to dry out.

So now I can move on with finishing the insulation and replacing the ply (after a trip to B&Q or Wickes tomorrow for self drilling / self tapping screws and a decent power driver) so that I should be able to get away in the van next week as planned, although I will probably have to remove the ply again in a few weeks just to make sure that the Sikaflex has done the job. Edit : and also, as suggested, to get as much of the rust sanded off and the whole area painted to help stop the rust from spreading.

I've used up all my stock of sheep fleece (very surprising just how much I've needed - there's about 6 sheep in my van!) so I'll have to finish off with rock wool which I'll get tomorrow. Hopefully that plus silver bubble wrap will do the job, it might not be ideal but it'll be better than nothing which is what I've had for the past year.

Then it'll just be the other side ply to insulate but I might leave that till the summer when I can empty the contents of the van outside Iyou can hardly move in my house at the moment for tools, elec extension cables, insulation, van bedding and other contents, ply lining etc ) as that will be much more tricky as there's a wooden frame along the whole of that side of the van

DSCF5520.jpg
 
Last edited by a moderator:

oldish hippy

Forum Member
BEFORE YOU PLY LINE paint the inside of the van where you think the waters coming in then let it dry then plaster with vaseline or grease on top of the paint and it will encourage the water not to hang around dont forget to paint both side of the hole you drill as you will be exposing metall to the elements
 

whitevanwoman

BEFORE YOU PLY LINE paint the inside of the van where you think the waters coming in then let it dry then plaster with vaseline or grease on top of the paint and it will encourage the water not to hang around dont forget to paint both side of the hole you drill as you will be exposing metall to the elements

I need to get the ply back on this weekend as I'm away in the van next week and it'll still be too damp to paint the inside of the van where the leak is, but as the ply will be screwed back on rather than riveted, I'll be able to take the ply off again in a couple of weeks, once it's dried out completely and will then paint it. Vaseline is a good idea - thanks :cheers:
 

n brown

Forum Member
check out these prices before giving b and q anything. iwould get the 32mm and a thousand screws sounds a lot,but it means you can go mad with them !
 

Users who viewed this discussion (Total:0)

Top