My Overland Camperbus Conversion

wildebus

Forum Member
A lot of this I have posted on a couple of other Forums as a 'as-it-happens' build thread, but I thought I would post my Conversion here. However, I thought it might be of interest to separate the conversion into specific areas that might be of interest to potential - and maybe experienced as well - self-builders :geek:

I'll start off by introducing the vehicle and some general targets for the conversion ....


My intention is to make a decent conversion and to do everything where possible myself. And also to challenge the norm and do it 'my way' - so many of the things I will be doing may be seen as unusual or 'wrong' because they are not the typical way things are done in a Motorhome or Campervan! :p
Maybe some of the things will not work as I plan or expect - but in those cases, I will share with you the failures :oops: as well as the successes :love:


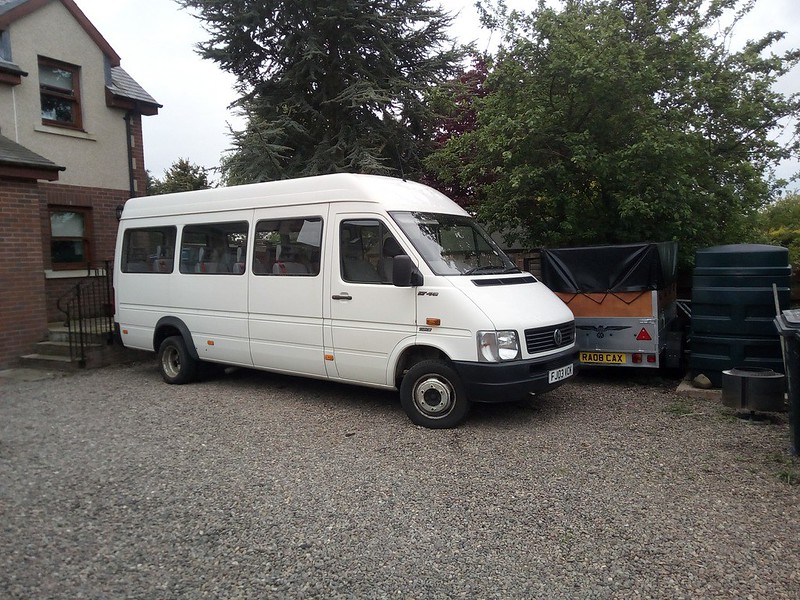
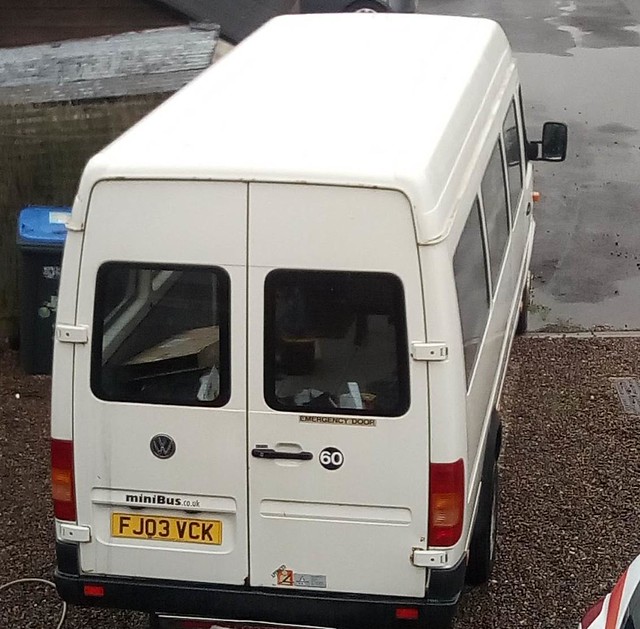
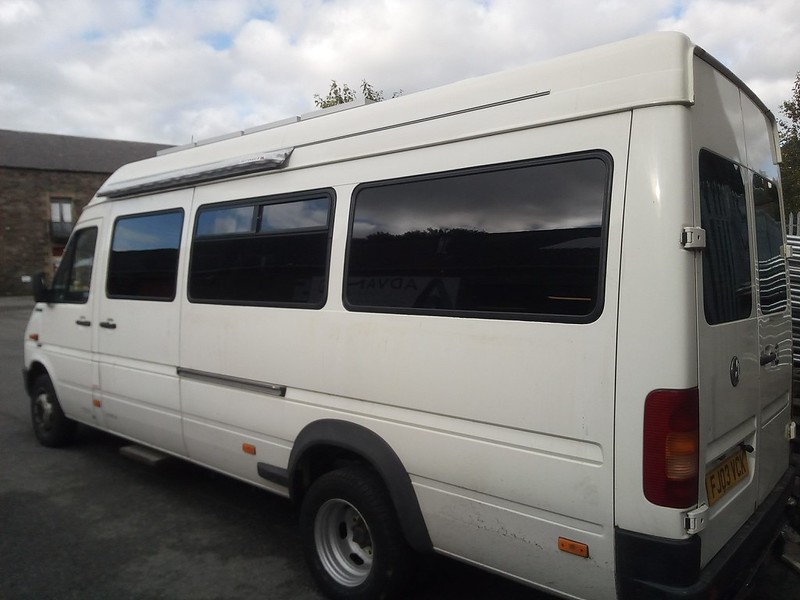
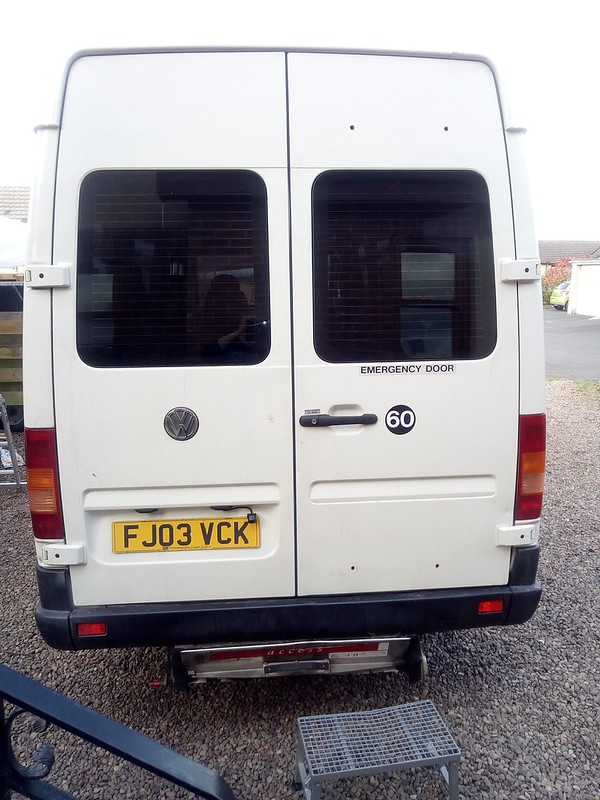
This is the base vehicle.

ParkedUp
by David, on Flickr
It is a 2003 VW LT46 LWB with just 125,000 Km recorded and fitted with the 2.8L 158BHP engine, which is renowned to be the best engine in the LT Range (y)

It is a 16 Seater Minibus that started life as a 'Skoolie' in the Service of Nottingham County Council. As such it has has a fairly good life in terms of servicing and I have a long summary of the various work that has been carried out provided to me by the Council workshops.

The MOT History shows a good record as well. Prior to me viewing the vehicle, the only fail was a main beam bulb had failed back in 2010.
The Van did fail the MOT on the test I had requested to be carried out prior to buying as a condition of purchase - but that fail was the old 'excessive play' fault that Sprinters and LTs often get incorrectly failed on, so not really a fail (but the seller replaced the parts as he was not aware of the Mercedes foible in this area).


So in Summary it looked like a good platform for my conversion :cool: More will follow.
 

LibertyHall

Forum Member
That’s the beauty of a self build we all do things our way to suit our needs. Making mistakes is part of the process!! As is the sleepless nights trying to sort them out:sneaky: take care
Ps Muttley was also a minibus
 

wildebus

Forum Member
The 'Office'

Whether it be a Camper, a Car or just a van, I like the front to be nice and tidy, so the first thing I addressed when I got the LT was to clean up and update the front.


Seating (1 - Bases)
The LT came with standard seats - which meant a double passenger seat up front. I wanted a pair of single seats, preferably with Armrests, and they needed to swivel so they would form part of the living space. Changing the front double seat for a single would also mean getting a new single seat base as well.
Single Passenger Bases for Sprinters/LTs can be quite expensive as they are not very common place. I had two other options ...
1) A LHD Drivers Seat Base. This would fit perfectly but there would be the handbrake mount projecting out into the centre aisle.
2) A RHD Drivers Seat Base. This woud match all the front mounting bolt holes but the rears would be wrong. This would also have the handbrake mount of course, but in this case would protrude out to the door, so less of an obstacle.

Being second-hand parts, prices will of course vary, but to give some ideas, a RHD Passenger Base (the ideal option) would be around £200; the LHD Drivers Base was around £80; and the RHD Drivers Base (the most common in the UK as every Sprinter and LT has one) was around £40.
I opted for the RHD Drivers Seat Base :)

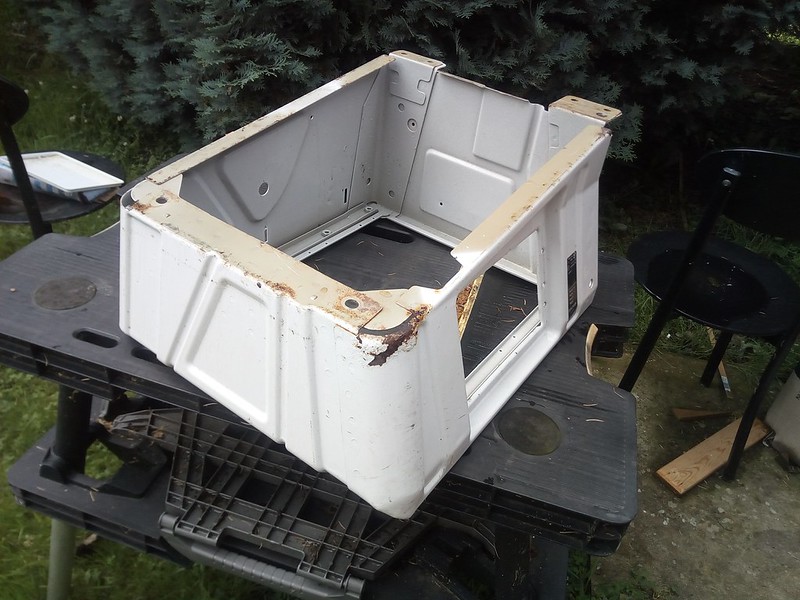
Base was solid enough but a bit scrappy...

Sprinter Drivers Base
by David, on Flickr

I thought these white bases look a bit industrial, so thought I would do a little bit of painting :cool:

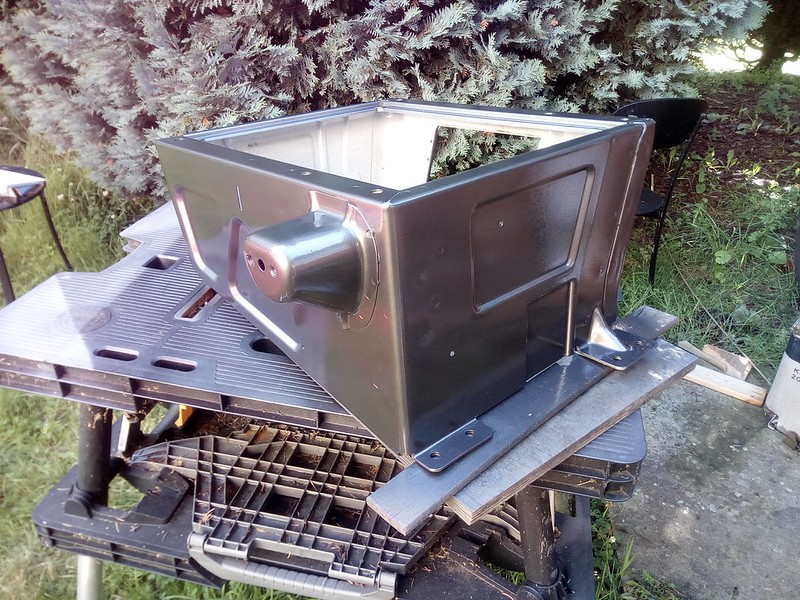
This is the original Drivers base, resprayed in Anthracite. The colour chosen as it was what I happened to have available in a pot :D , but also I planned on getting an Anthracite coloured cab mat so they should work nicely together :)

Respraying Base - 3
by David, on Flickr

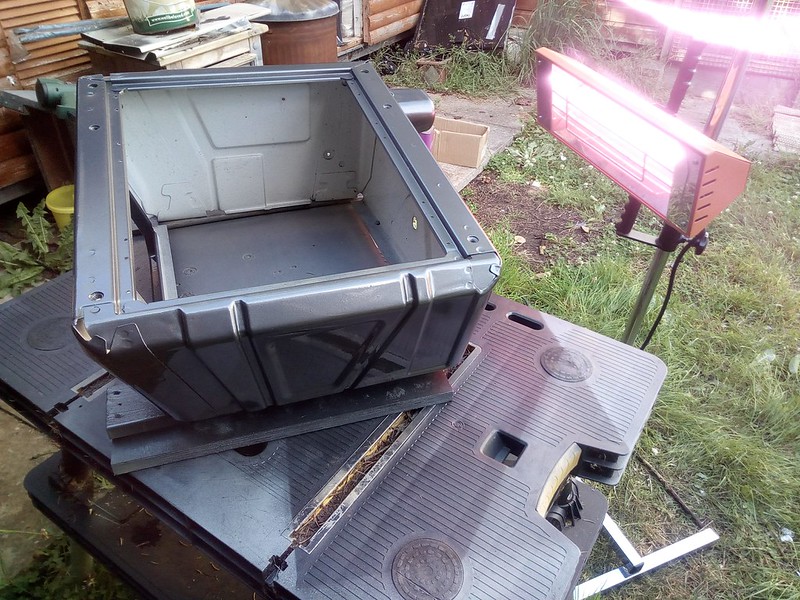
And the other drivers base with the colour coat drying off under an IR Lamp.

Respraying Base - 1
by David, on Flickr

Laid on the clear coat and just waiting for it to harden up before fitting into place.
Resprayed Bases curing by David, on Flickr

Pleased with the colour and while a minor tweak, I think leaving the bases as was would spoil the interior once conversion done, so a worthwhile mod :geek:

I mentioned that the RHD Drivers Seat securing mounts at the rear are not in the right place - this is because the mounts are offset in a mirrored way. It was a simple matter to adapt however - on one side of the base I just had to drill out two holes in the base to use the existing floor bolt holes and on the other side I used the existing holes and used industrial-grade self tapping bolts into the floor so these are very well secured indeed.


Cab Floor

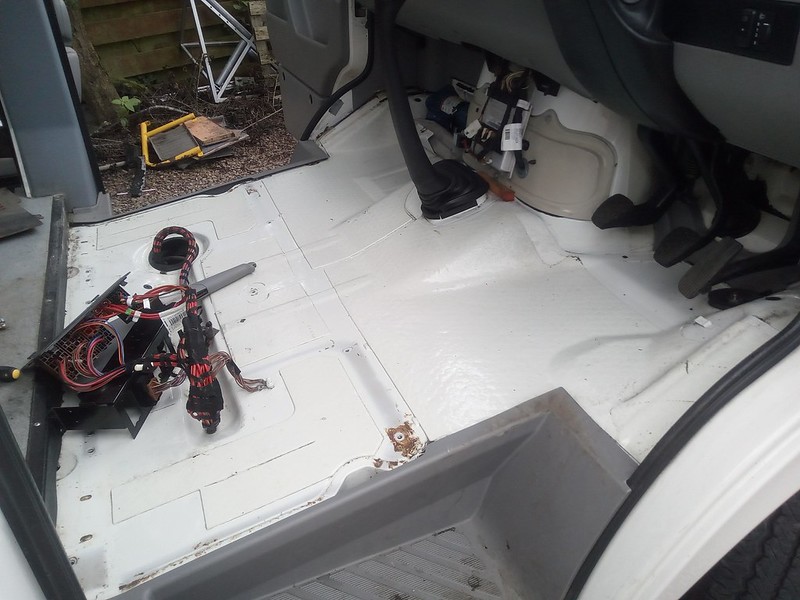
The cab was pretty mucky, so while the Seats and Bases were out being titivated, I stripped out the lower trim and mat and gave it a good clean

Cab Stripped
by David, on Flickr

Trim back - G101 did a good job on this (y)
And Floor Mat Back - this was a bit tougher as likely the first time it had a wash in 14 years :poop: But using some strong wheel cleaner, and then my Autosmart Vortex Pressure Cleaner, it came out not looking bad

Trim and Mat Refitted
by David, on Flickr
Not looking new by any means, but it has zero dirt left on it :p

And then the freshly painted seat bases get bolted down and handbrake reattached :cool:

Seat Bases Refitted
by David, on Flickr
(After this photo was taken I did actually relocate the Wiring from the Drivers Seat area to the passenger Seat Base as I knew I would be wanting that area free and clear for a future addition :geek: )

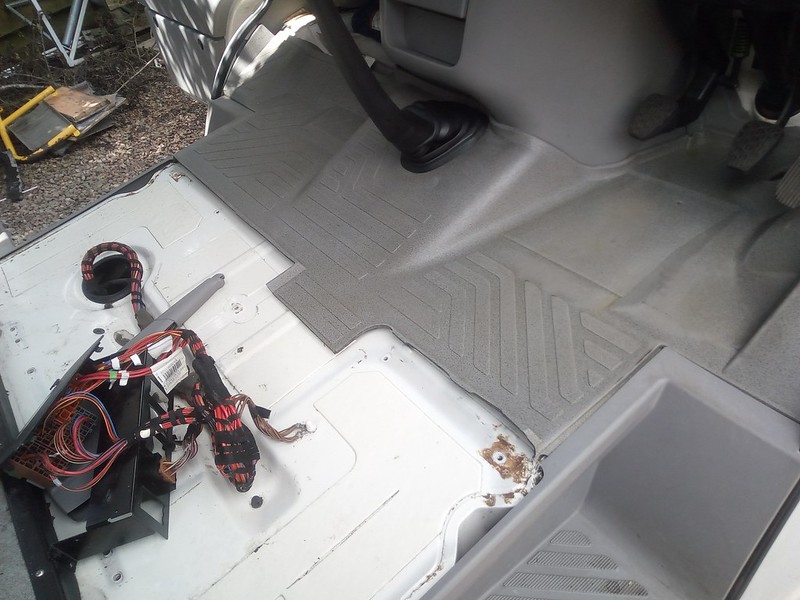
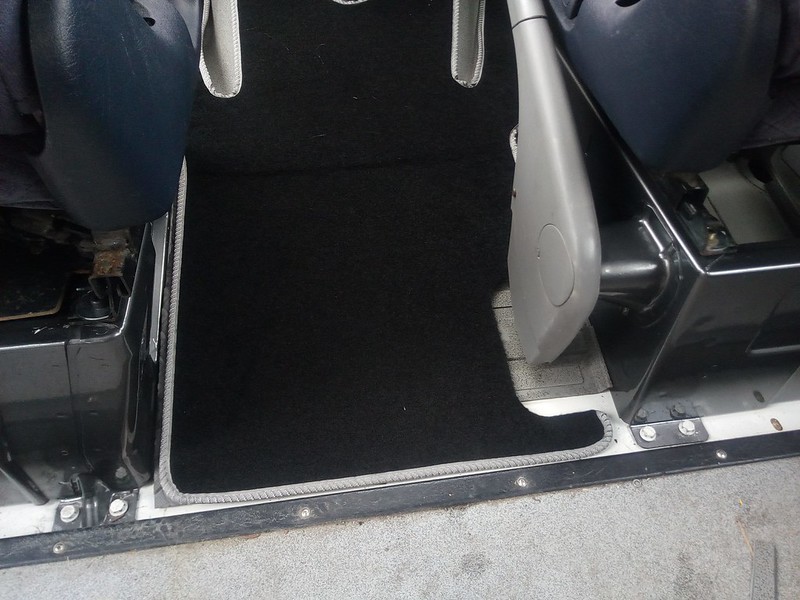
I bought a custom fit floor mat for the Mk 1 Sprinter/VW LT specifically with a pair of single seats

Front Portion.

Front
by David, on Flickr

Passthrough Section.

PassThrough
by David, on Flickr

This was an excellent purchase at just £15 and is super quality.


Seating (2- Seats)

Similar to the seat base options, the 'ideal' option would be to get a VW LT Single Passenger Seat, and a pair of Swivel Plates for the pair of front seats. This is, however, the most expensive option by a considerable margin. And in addition, from previous experience, I knew fitted swivel plates would raise the seat height to a position that was likely to annoy (they had this effect on a previous conversion on a VW T4).
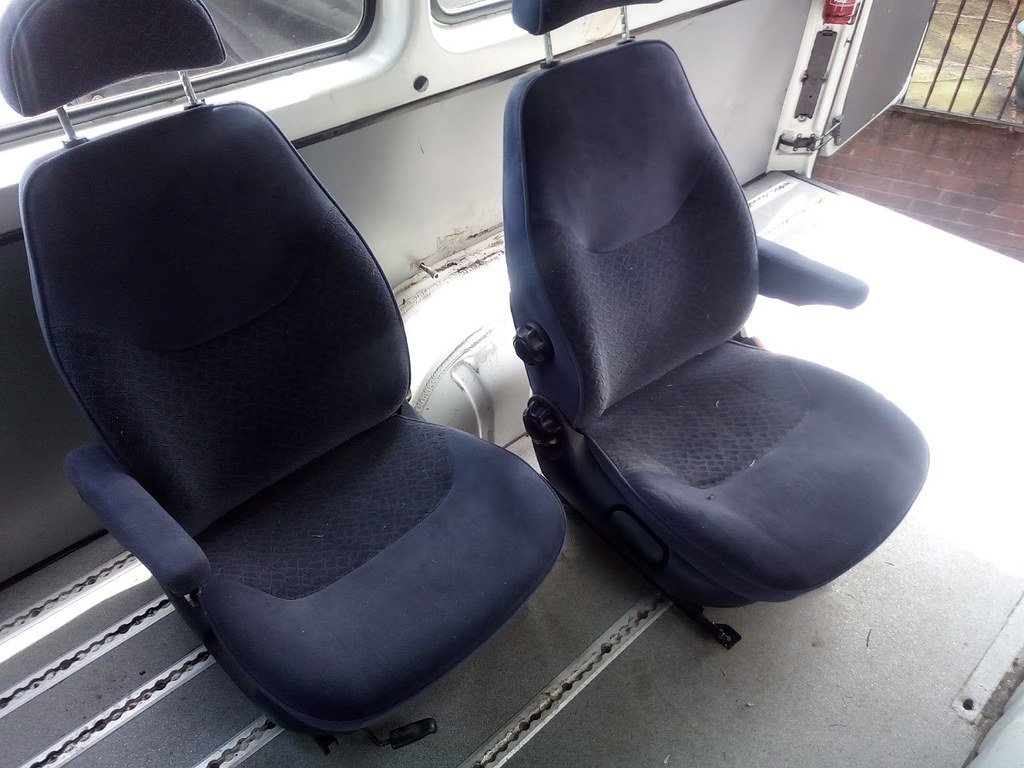
Doing some research, I found a good option was the Ford Galaxy (and their twins, VW Alhambra and VW Sharon) Front Seats. These usually offered the typical comfort of good quality car seats, plus the benefit of inner Arm Rests (after having 'Captains Seats' on my last two VW Campers, this was a must :cool: ) AND integrated Swivel Functions.
I kept an eye on eBay for reasonably priced Galaxy seats in a usuable condition and as luck would have it, shortly after my quest, at a VW Festival I was trading at, the chap in the stand next to me was selling a pair of Galaxy Seats with all the features I wanted, in excellent condition for just £120 for the pair! Needless to say I snapped them up :D

These are the seats I bought before I valeted them

Galaxy Seats
by David, on Flickr

And fitted into place after a go with the Autosmart Vortex

Cab Seating Sorted
by David, on Flickr
The only adaption I needed to do to the Seats to make them fit was to slightly enlarge two mounting holes and then use larger washers.


Dash Area

I fitted a very nice Alpine Head Unit that I used to have in my VW T4 but took out before I sold just in case I needed a single-DIN unit again.

LT-Alpine
by David, on Flickr
I also ate my own dog food of course ;) (in other words, installed it with one of my Drive/Camping radio looms so I can use without the keys in the ignition :D )
And next to the 3-way Drive/Camping switch is a USB port socket extension so I can easily plug in a USB Memory stick into the radio.

Along with the new radio I have fitted brand new Alpine 10cm 2-way Speakers in the dashboard to replace the originals as well as a pair added for the rear mounted above and just to the rear of the cab.


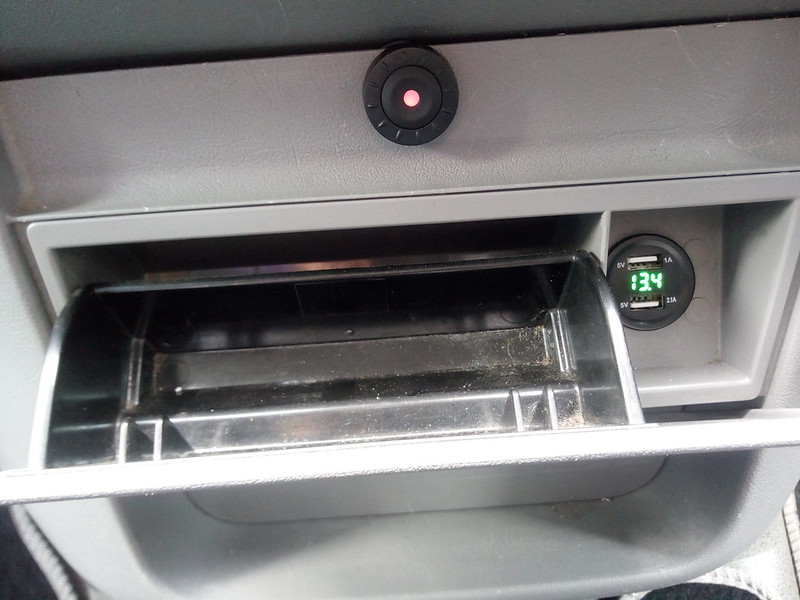
Apart from the Radio, I also have a Dashcam which is installed with the control box inside the glovebox and the camera fixed by the windscreen mirror. This comes with a "Save Recording" button (shown in photo below) that puts a lock on the current filmed section when the button is pressed (if there is an incident you want to make sure is not overwritten).

Interior Additions
by David, on Flickr
As well as that, you will see in the photo above that I replaced the normal Cigarette Lighter with a combo 2 x USB + Voltmeter socket for both easy access for phone charging and a easy way to glance at what the starter battery is upto without having to use the monitor system (more of which in a later post ;) )
 
Last edited:

Millie Master

Forum Member
This all makes for a very interesting and captivating read, thank you Dave for going to so much trouble when putting this very important post up.

Do you by any chance have any drawings of your build?

Phil
 

wildebus

Forum Member
This all makes for a very interesting and captivating read, thank you Dave for going to so much trouble when putting this very important post up.

Do you by any chance have any drawings of your build?

Phil
Hi Phil,
My plan for this thread is to seperate by category/theme so if someone in the future wants to look for something specific on my build it will be (or at *should* be) in a specific post addressing that area.
So the answer is yes (but I don't tend to bother with CAD-like drawing programs like Sketchup, I use graph paper to draw out), but they will be shown along with the post about the layout :)
 

wildebus

Forum Member
External Tidy Up

The Minibus was fairly tidy when I bought it, especially considering it was a 15 year old commercial vehicle, but there was still both room for improvement and remedial work required.


Roof

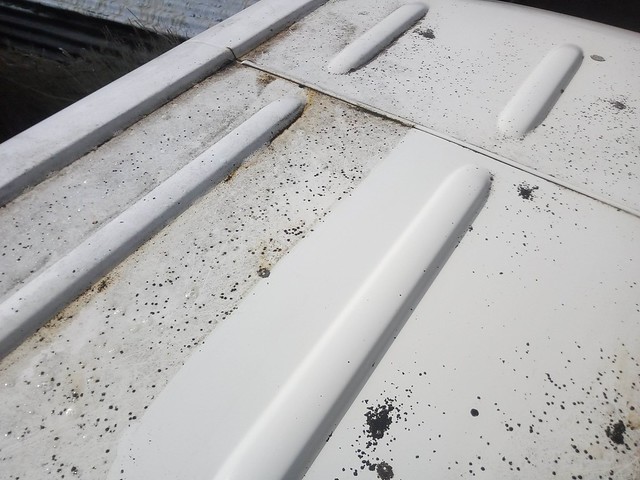
Like many large (and small for that matter) vans, the roof has been neglected. In fact, I'm not sure if the roof had actually ever been washed before on my LT? This is typical of the entire roof...

LT - Dirty
by David, on Flickr

Two separate things - one is the general grime which needs washing off, but the other is all the black spots/drops that are covering the roof. The photo above shows the roof before any cleaning, and the photo below shows the roof after a "normal" clean i.e. what you would do to wash a very dirty vehicle...

Roof Speckles
by David, on Flickr

I tried various products to save some elbow grease (it's a blooming big roof to do!) and found the only thing that really sorted out the spotting was Autosmart G101. This is a brilliant product and almost always comes through for me. This is a before & after shot ...

LT - BeforeAfter Closeup
by David, on Flickr

Now it worked and worked well, but it was still hard work. Had to give up half way done on the first day after it started tipping down (the G101 needed to dwell for it to work and the rain was just washing it away instantly). So after Day 1 and about 60 minutes of heavy duty cloth work ...

LT - BeforeAfter Full
by David, on Flickr

Resumed next day in between rain showers and finally after abour 4 hours, and another 60 minutes of actual cleaning, the top was finally done!
LT - Clean Roof by David, on Flickr
Still got the sides down to the gutters to wash properly at this stage but that can be done without clambering on top thankfully.

It was important to get the roof cleaned and checked out pretty early on as the conversion plans involve a fair bit of roof 'furniture'


Windows

This Minibus started life as a standard Panel Van and was sent to Minibus.co.uk to be converted. As well as other work, they removed the bulkhead and cut out the apertures and fitted all the side windows (I suppose this was cheaper than Notts CC buying an LT with Factory Side Windows? :unsure: )

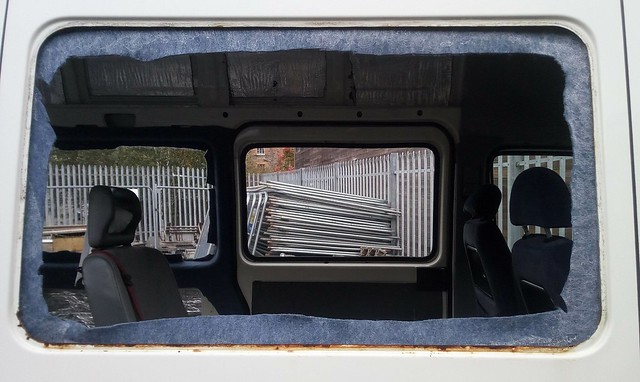
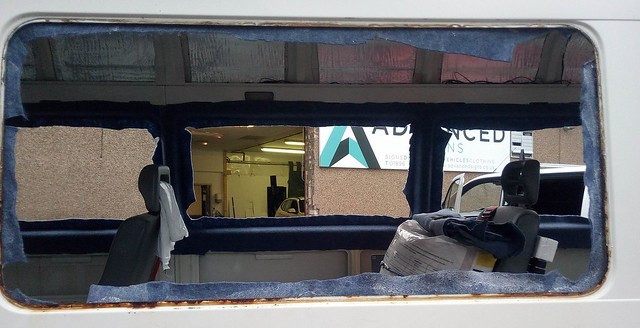
When I first looked at the LT, I could see some rust staining around the lower part of the window reveal, so I knew I would have something to work on when the windows were removed for tinting, but TBH I wasn't quite expecting what I saw :eek: (and if I knew what I would see, I would not have done the internal window carpeting at this stage :( )

So this is one of the windows that showed the most staining ...

OSF - Window Out
by David, on Flickr

and the worst one on the other side ...

NSM - Window Out
by David, on Flickr

Now these photos were taken after I cleaned up all the staining that sat on top of the paintwork, so what you see here is 100% genuine rust!
I guess after 14 years, I shouldn't have been too shocked but it is what it is.
On the first photo you may be able to see an actual hole and that explains a nice rusty stain line inside the panel. At first I thought it has actually rusted all the way through, but on closer inspection, I am pretty sure the hole was done when the windows where originally fitted and this was a mishap cut by the person cutting the window opening and letting his saw/grinder slip, as it was too sharp and clean.

Oddly, a couple of windows had more rust at the top then the bottom - I suppose it is how the rubber insert allows water to flow?
Using Hammerite Krust to stabilise and 'convert' the rust seemed to work quite well and over a year on I have not seen any reoccurance of rust streaking.

Here is a shot with the Windows back in place

Post-Tint
by David, on Flickr
(The windows were refitted after being tinted)


Rear Doors

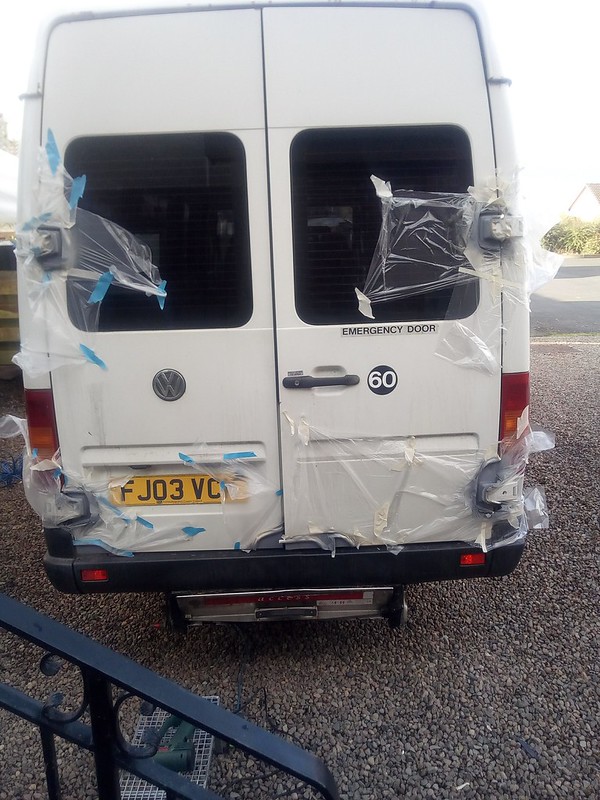
Had some minor rust around the rear doors - hinge area and door bottoms.
I have never set out to make this a pristine vehicle. My objective is to make it into a solid Campervan which will last a good time, but if there are marks and dents, so be it - so the slight dent in the bottom of the door doesn't worry me at all, but sorting the rust is a another matter.

Treated the rust and primed it ready for the colour coat

Rear Doors Primed
by David, on Flickr


Rear Repaint
by David, on Flickr

There was some other minor areas I needed to fix up and repaint. For example, one of the front doors had some distortion by the hinge (I am guessing the door had gone too far forward at some time?) so I used some body filler to smooth the profile to mask it (as said, looking for a decent looking vehicle, not immaculate) and there was a dent in the roof where I assume someone had forgotten they were driving a tall van and hit a height barrier. Originally I was going to push the dent out, fill it, spray it etc, but in the end I just treated the surface rust and resprayed as the dent was not noticable anyway and the final finish will make it totally invisible unless pointed out :devilish:


Wheels

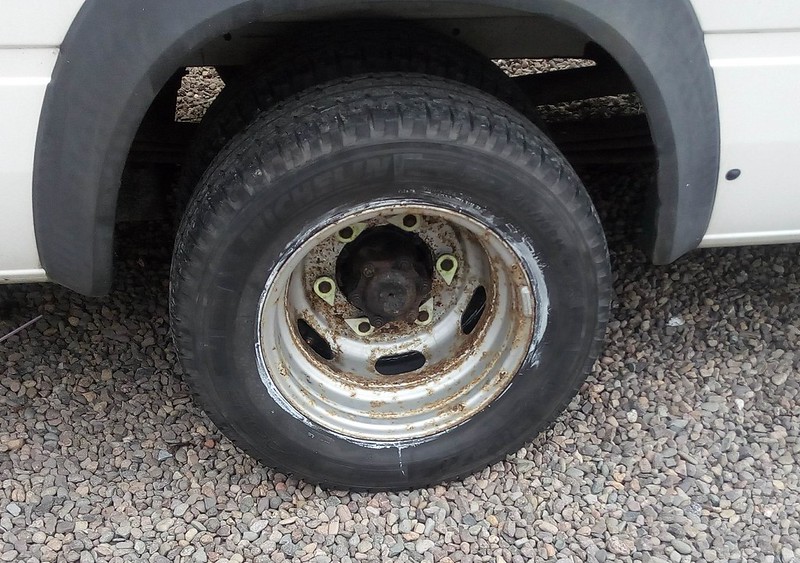
The Wheels on the LT when I bought it were very ugly and probably the worst apect cosmetically of the whole van.

This close-up of the wheel after I had the tyres replaced shows the state they were in

LT Rear Wheel
by David, on Flickr

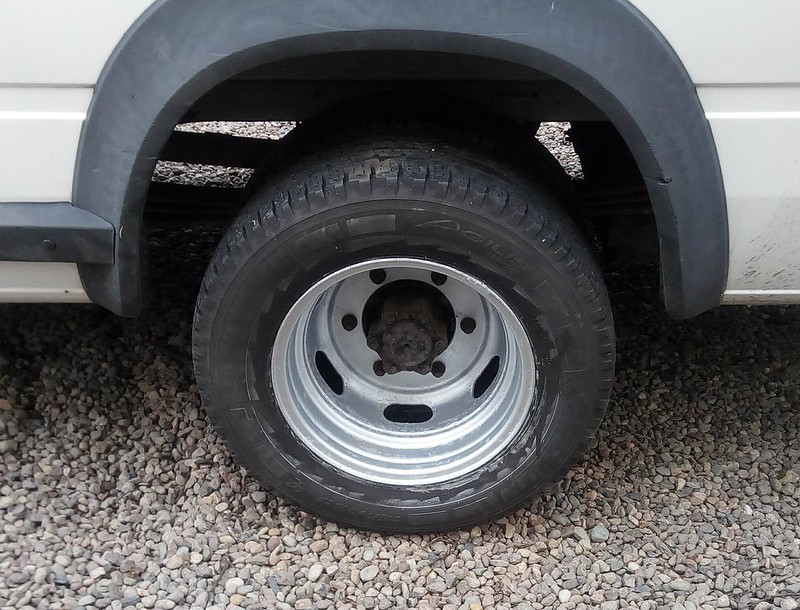
I didn't think it would look much better, but I gave the wheel a bit of a sand and painted it just to see

LT Rear - After paint
by David, on Flickr
Well, if you step back around 10 yards, wait until dusk and have a bit of grit in your eye, they DO look better :D

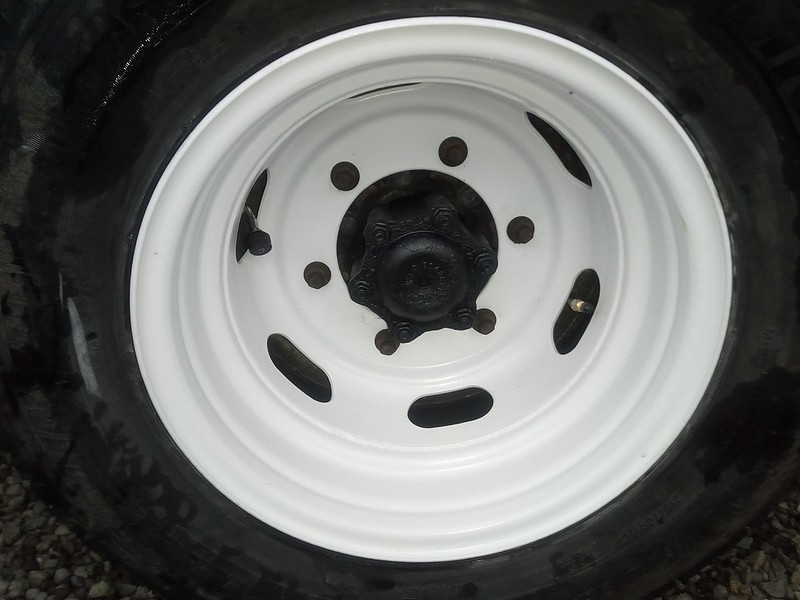
The amount of effort it would take to sand these back and repaint is not worth it, so I just bit the bullet and got these

LT Rear - White
by David, on Flickr

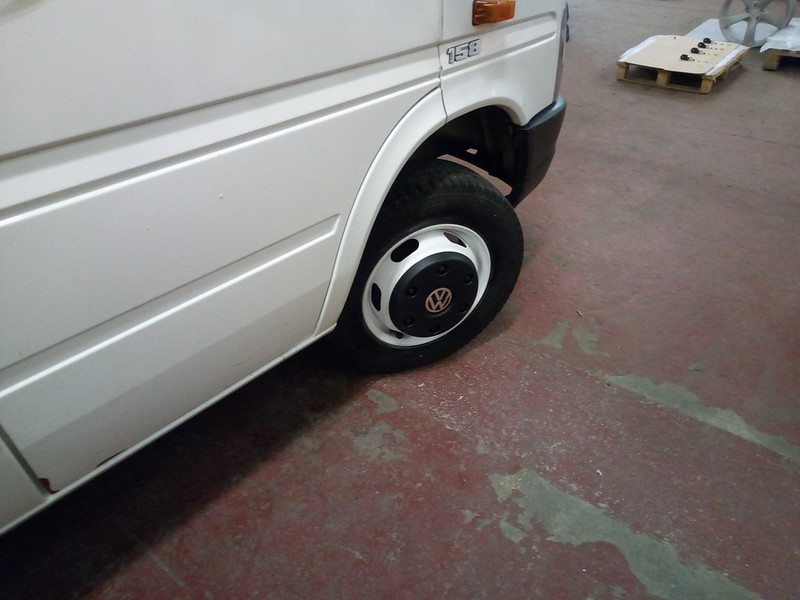
And at the front also added the Genuine VW Wheel Caps and ditched the faded yellow nut pointers

LT Front - White
by David, on Flickr

Now I did look for new wheels as fancied going for 16" instead of the 15" wheels fitted as standard, but was unable to find any, so instead, I drove my van to a local Powder Coater and we took off the wheels for him to take to a media blaster first and then he coated them in the Ivory White you see above.
I think it makes a massive difference to the appearance and will suit the final look (to be revealed) nicely


During this time, I had a full service and look over carried out by my local garage and they reported back that the van was very solid and in excellent condition underneath which is always good to hear :p


That is about it in terms of the external tidy up. It doesn't complete the final look of the Camperbus (that comes later) but it means that I can get on with the conversion on a good base.
 

Millie Master

Forum Member
Dave; way back in my caravan days I always used to write that the most overlooked and generally unloved part of any caravan was the roof...... And yet people used to complain about leaking skylights, cracked mastic in the awning rails and black streaks all over their caravan sides.

It is exactly the same with our vans, the roof is the singularly most ignored aspect of our vans!

As for me, religiously twice a year I will thoroughly clean, examine and then polish the roof to a far higher level than I ever do the sides. Doing so allows me to examine the condition of the mastic or silicone around the skylights and awning/drip rail, the condition of the solar panel and the condition of every single other item up there.

It's a pain to do it, but by-hek I then know everything is OK up there.
 

wildebus

Forum Member
Interior Design

The Van is a VW LT LWB High Roof. Taking the Internal Measurements, we have the following space to play with (note these are rounded to easy numbers to mentally work with, not to the nearest mm).

Length: Total is 5200mm
4300mm from Rear Door to Cab Threshold; 900mm from Cab Threshold to Dashboard Front (where all the buttons are, not the windscreen)
Width: 1750mm

This is width at waistline. The sides close in from that point as you go upwards (I have not built much above waistline but this point is significant)
Height: The Height from the Built-up Floor to the Ceiling panels is around 5' 10" (sorry, still think imperial when it comes to height!). I cannot stand fully upright when inside, but it is not uncomfortably low.


General Ideas

Clarence is designed as a 2 person campervan :cool: :)
When I use it by myself, I would tend to park 'wherever' - wildcamping with no facilities, festival fields with portaloos or full-blown campsites. When with my OH, it has to date been at organised locations - Festivals for short term where the awning and safari room gets deployed, and longer stays are likely to be at campsites with facilities (She is not keen on the 'wildcamping' idea).

Another key purpose I have for the Camper is when I want to carry stuff without always having to use a trailer. I go to Festivals with a 4.5M x 3.5M Gazebo, a whole bunch of tables and boxes full of stuff and I wanted to be able to carry all that stuff without impacting on the living space as much as possible (in my T4 and T5s, the whole lot was crammed full even when using a trailer!). So the design needed to address that need as well.

Another requirement for me was a permanent bed. Working these Festivals is actually quite hard work (at my age, anyway :sick: ) and when I had both the T4 and the T5, making up the bed at night didn't take that much time, but crawling around shifting bedding and distorting my body paid me back the next morning :eek:, so a bed to fall into was a 100% must. (y)


Layout

After looking at a lot of vans, living with mine with temporary tables, etc I settled on a "low-line" build with no floor-to-roof construction, with a unit height of 900mm.
What this made me decide is that a permanent shower room takes up too much room for the benefit it gives, especially when the way the sides come in as you go up. I marked up layouts in the van with tape and cardboard and just didn't like the claustrophobic feeling a Central Showroom gives in the narrow space.
The true is same of storage units, so I am currently just using nets for bits and pieces but I do plan on building some high slim cupboards that don't encroach too much into the space. :)

The Layout finalised on

Clarence Layout
by David, on Flickr


Bed Area

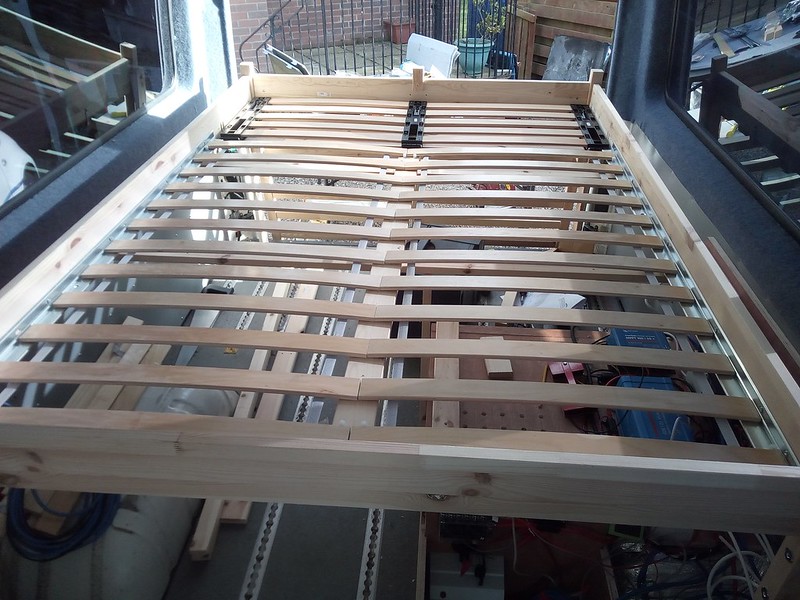
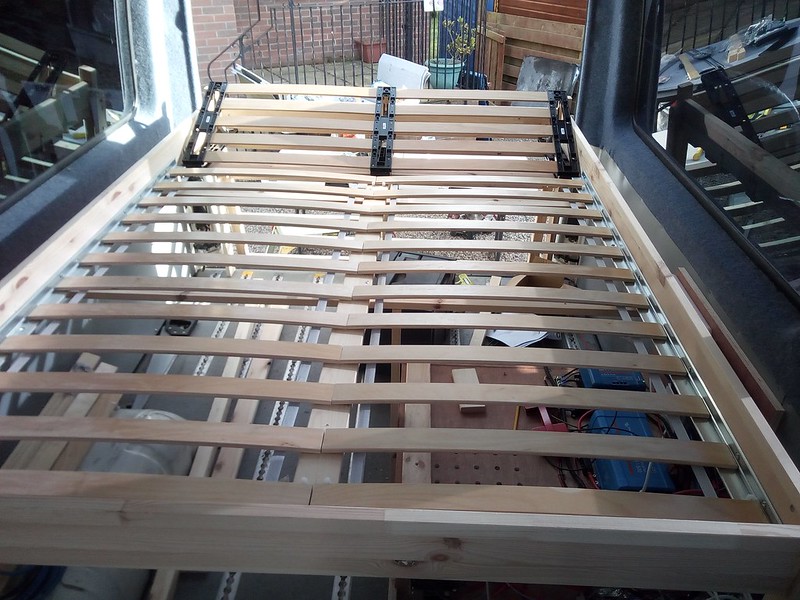
As mentioned, I wanted a permenant bed. To make life easier and simplier, I used an off-the-shelf bed frame from IKEA and extended the legs to raise it up to provide a 'garage' underneath.

This is what the Frame looks like all fitted

Camper Bed
by David, on Flickr

I didn't use the standard IKEA metal centrebar but uses a 1x4 plank insead, running most of the length and with additional side and bottom supports.
The slat support runners were cut short as well, so the IEKA slats end after 12 slats rather than the full 17. This is to make room for a funky extra ...

The Bed will also be used as a bit of a chill-out lounge for watching TV or surfing the internet, etc, so I decided to add in a Headrest system from Froli. This picture shows it raised up

Camper Bed - Raised
by David, on Flickr

This increases the height by upto 17cm (the default is 21cm, but I lowered this entire section in the frame so when the headrest was flat, the slats in it would be flush with the rest of the bed slats).
It is a very well made product I think and it works a bit like a deckchair where you pull up the top a little and it raises up and clicks into place. Pull up again, and raises some more and clicks into place. There are 5 different positions (including FLAT) and this is the clever bit ... pull up the 5th time and it drops flat (y) so no need to go round to the back and release anything like some other tilting systems.
Link to the system here - https://www.grasshopperleisure.co.uk/froli-retrofit-headrest-11743-p.asp

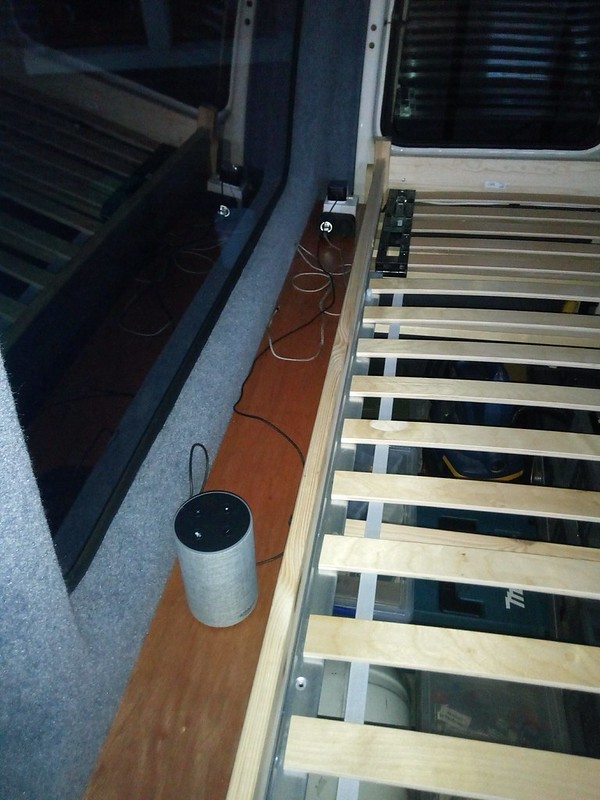
The bed frame is for a 190cm x 135cm bed, so I have gaps between the bed and the sides. This was always intentional as I wanted to keep the bedding away from the windows and potential damp. Also I like - just like at home - to have a place next to the bed to put a drink, leave the phone by, or magazines, a book or whatever. So I fitted a pair of long shelves ...

Shelves
by David, on Flickr
These have been just plain brilliant! :love:

At the head end on both side I fited some power options - on the DC side got a 12V Socket and a pair of USB sockets, so ideal for phone and tablet charging. And on the AC Side, got a 13A Socket (actually fused at 3A) on both sides. These will be handy for Laptop Charging, as well as other uses as needs be. For example the photo shows an Amazon Echo plugged into one side and my Router and Wi-Fi Booster plugged into the other side. I expect one socket could get used a fair bit to run an electric blanket as it will be so easy to just switch on and off. :sleep:

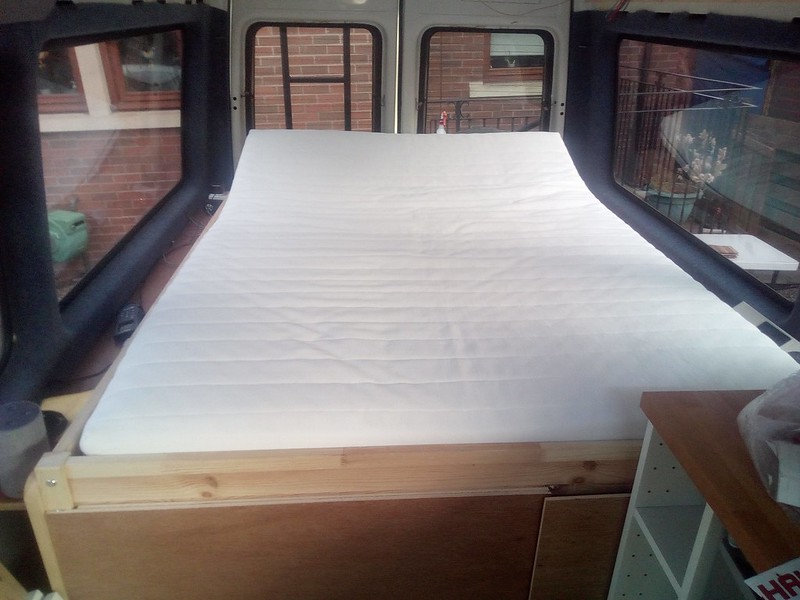
And then the [IKEA] Mattress unrolled and put on the bed

Mattress fitted
by David, on Flickr
Bit of a test drive and really pleased with the raised head section - very comfy. Not sure if will ever bother dropping it!


Storage Cupboard

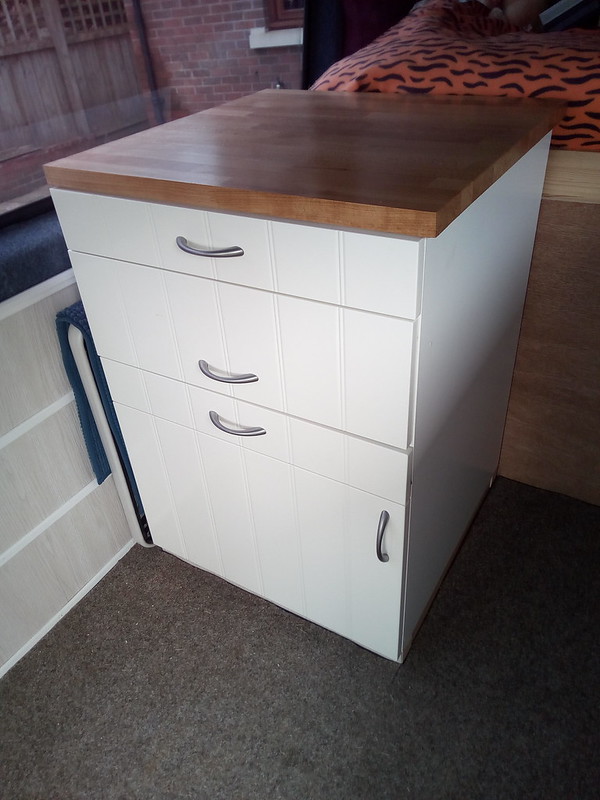
So the Cupboard on the offside

Mystery Cupboard?
by David, on Flickr
This has been fitted slightly offset away from the wall to allow storage of the removable table at the side (with a bathmat to keep in snugly in position).

It is an IKEA Kitchen Unit with a bit of tweaking only really evident when you open the doors...

WC Cupboard!
by David, on Flickr
The Bottom half stores the Portapotti. Not for use here, but a place to keep it out the way, stop it tipping over, etc. We have a Shower tent that is put outside in the Safari Room which we put the loo into, but try to avoid using it generally. Back of the compartment is a storage section where I can keep paper, toilet chemicals and the like and to the left is a general storage area for cleaning and bathroom products. And finally on a small shelf above I have room for slim things such as a Laptop, trays and whathaveyou.
In the middle is a Drawer - not yet worked out what that should be used for but it will be handy for something no doubt.

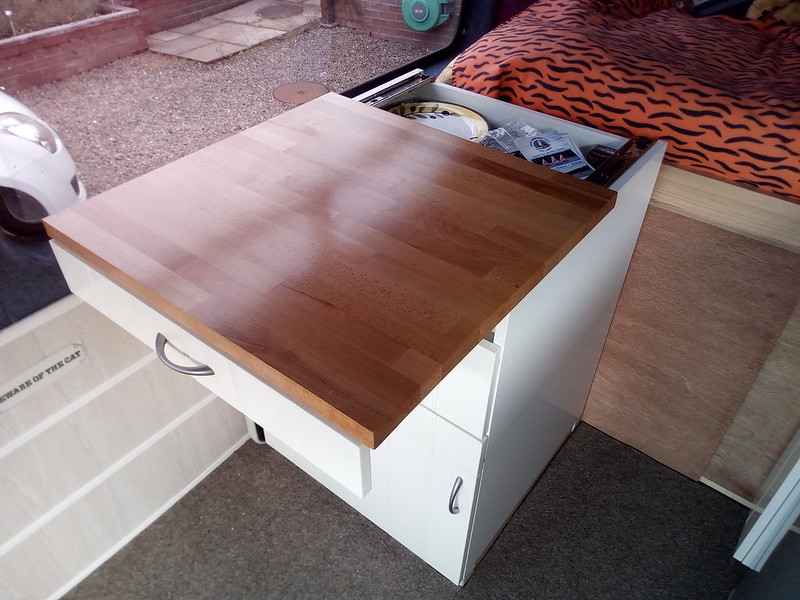
The top looks like a drawer but is actually a pull to a top loading chest area

Ottaman
by David, on Flickr
Handy extra worktop area as well of course and with the deep storage in there filled it with loads of random stuff right now.


I hope this was of some interest. I will do separate posts about the Galley Kitchen and the Under Bed Garage area
 

wildebus

Forum Member
The Garage

Previous post showed the general floor plan and covered the bed and one cupboard. This one will cover what the space under the bed is being used for.

Battery Box and Electrics Station

Note: I have made some adjustments since some of these pictures were taken, but the essence of the setup has not changed.

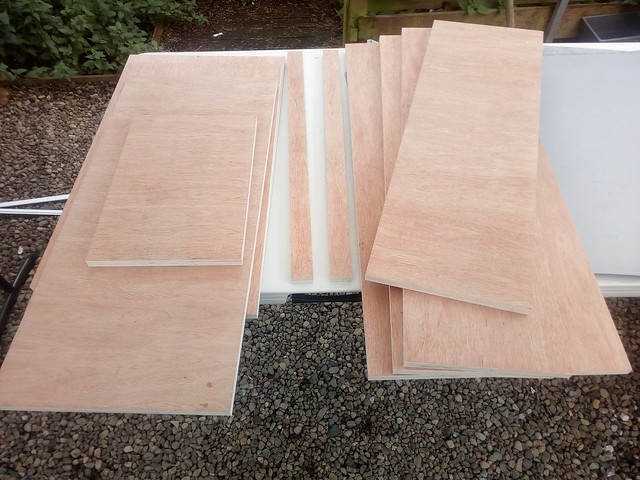
So I had this pile of plywood

Boards
by David, on Flickr

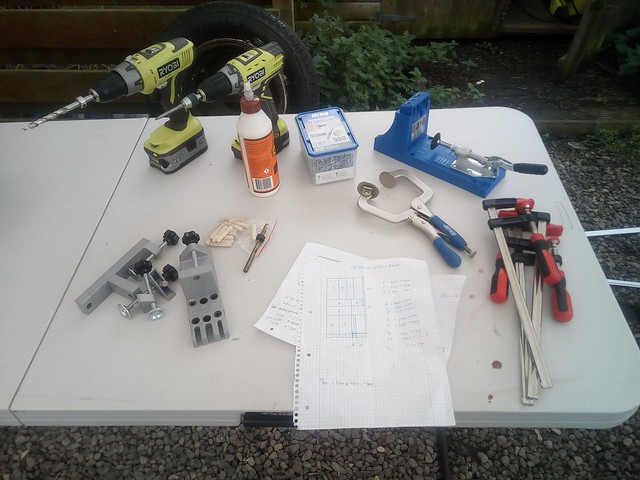
And I had this selection of tools and stuff, plus a rough sketch

Tools
by David, on Flickr


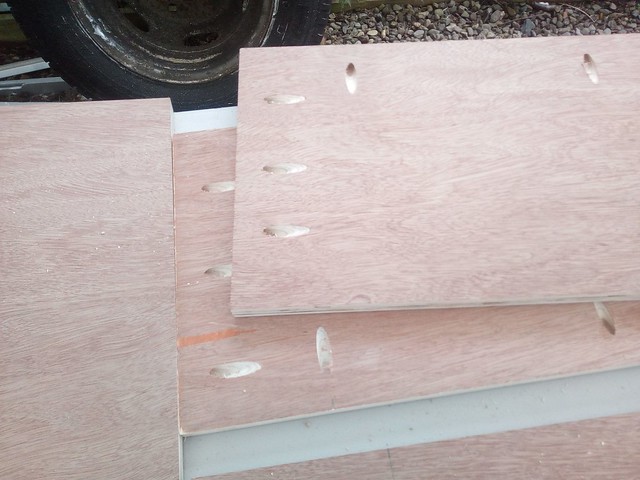
First thing to do ... drill the pocket screw holes in all the right places. This is a couple of the boards after prepping. I am using the Kreg K4 Jig and it is so quick and easy AND precise to use. Way better then freehand drilling and screwing I reckon

Pocket Screw Prep
by David, on Flickr
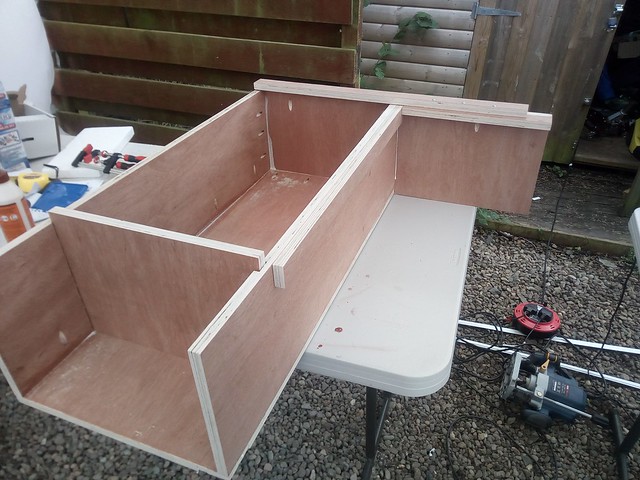
I also routed out a couple of channels for a board to drop in (this will be clearer in the next photo :) )

Work in progress

WIP
by David, on Flickr
Using wood glue as well as the pocket screws to secure the boards. I don't think the glue is necessary for strength, but I think it may be beneifical to prevent any creaking.

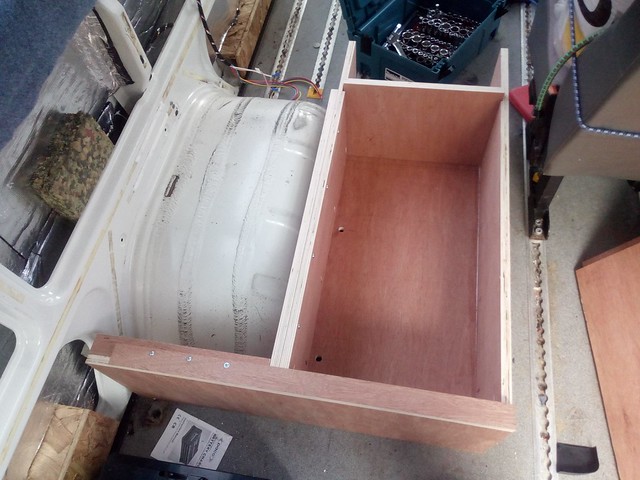
And my construction mostly completed and offered into place

Will it fit?
by David, on Flickr

The board to the left of the battery section basically sits over the wheel arch

Wheel Arch
by David, on Flickr
This is used to layout and secure all my various electrical components such as Inverters, Solar Controller, Battery Charger, etc that I don't need to generally access once installed to give a super clean installation.

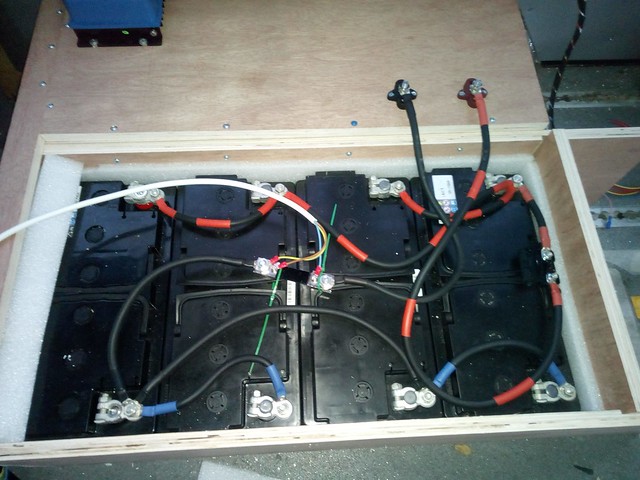
My heavy duty battery box, holding a bank of 4 110Ah AGM batteries

Battery Box
by David, on Flickr
The box itself is secured to the chassis via a pair of large M8 bolts into the floor
Above the batteries in the photo you can see a pair of post terminals - these are the main feed terminals into the battery bank, so basically nothing else will enter the enclosure there.
The cabling is 25mm and is configured to have every individual battery in the bank balanced - every battery has a short and a long cable to the power takeoff point, and taking the +ve from the Top Left and the -ve from the Bottom Right ensures both the charge in and the draw out will be balanced to each battery equally :)

This is an initial setup I had but has now been been updated witrh different products (more on that in the "Electric" Posts)

LT Leisure Electrics
by David, on Flickr


Garage Drawer

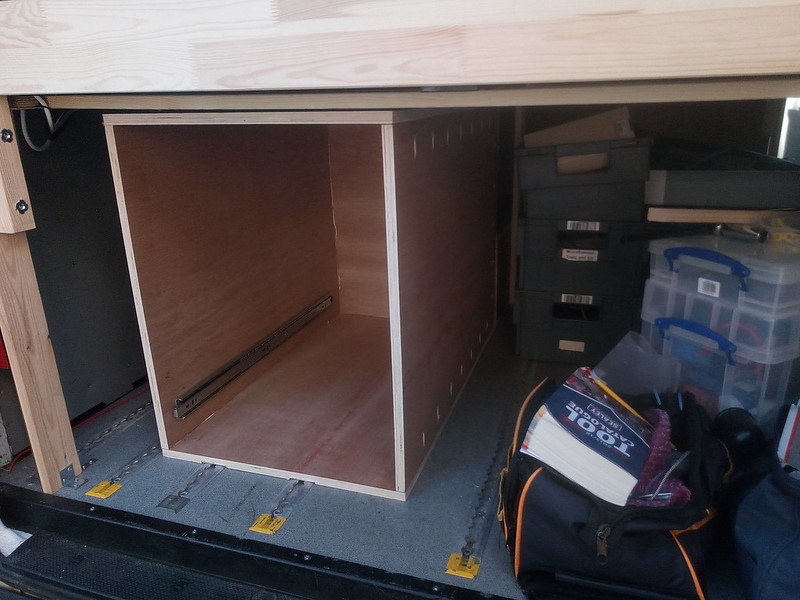
So there is this large storage space under the bed ... aka "The Garage".
A fair portion of that space is taken up by the 440Ah battery bank and associated Power Device. But to the right of the battery box there is a 6' long space and behind the box is a 3' space.

I want to keep the long space available for - well, long things, but decided to organises the 3' space.
I get fed up with having loads of stacked boxes and searching for stuff and moving boxes out the way to get to the ones behind. Plus as you drive, the boxes all move around which is not ideal.

So the space to organise ....

Garage Space
by David, on Flickr

Did some careful measuring as space is a premium and didn't want to block off any space if I could avoid it.

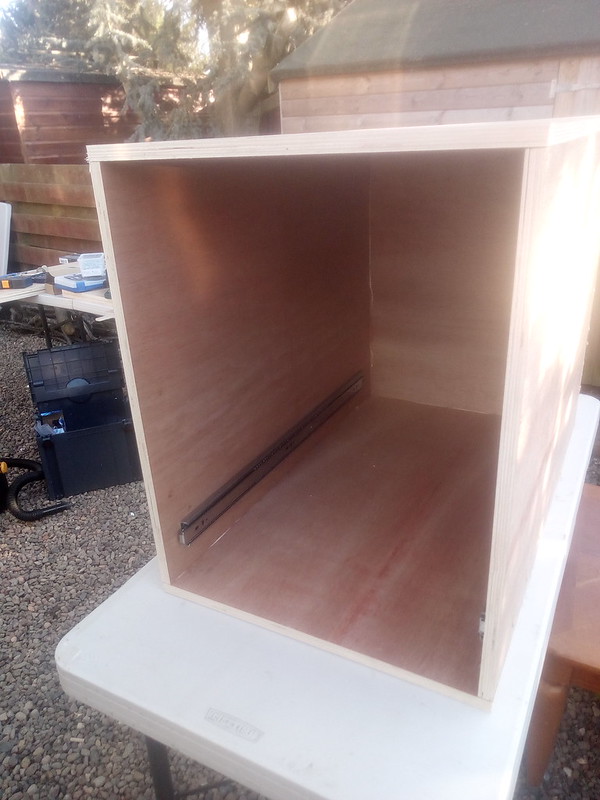
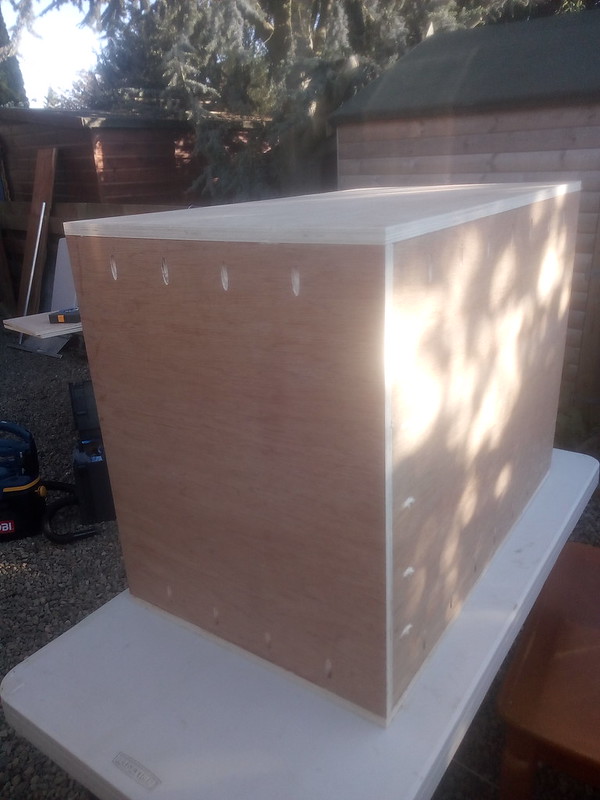
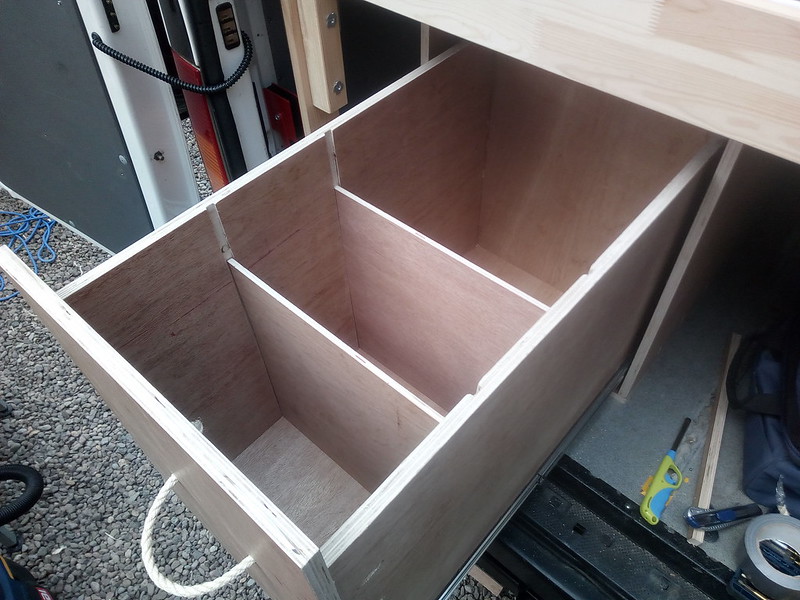
Built a box.

Drawer
by David, on Flickr

Maybe went a bit overboard with 18mm Ply and a ton of pocket screws plus glue

Drawer
by David, on Flickr
but didn't want this to shift around and twist from driving

Fitted into the Space

Drawer
by David, on Flickr
The size was worked out to allow access to the narrow section to the left of the carcass. That space is ideal to store stuff like the internal and external thermal blinds soo they are out the way but fully accessible.

Next step - Drawer to go into the housing

Drawer
by David, on Flickr
Built to be practical rather then decorative so didn't worry too much about exposed pocket screws and edges. I might paint it at a later date.

Routed in some slots inside so I have drop in drawer dividers depending on what is in the drawers

Drawer
by David, on Flickr

Now there is some space wasted by having a drawer cabinet (around 100mm - 4" across is used up by the wood and around 50mm (2") amount used up height wise and depth wise) and the weight factor as well, as I used thick heavy-duty ply, but I'm hoping the benefit of an organised space and ability to keep stuff easily accessible will outweigh that :)

Part 2 Follows
 

wildebus

Forum Member
The Garage (cont)

Previous post showed the Battery Box and Drawer. This post finishes off the garage build.


Offside Wheel Arch

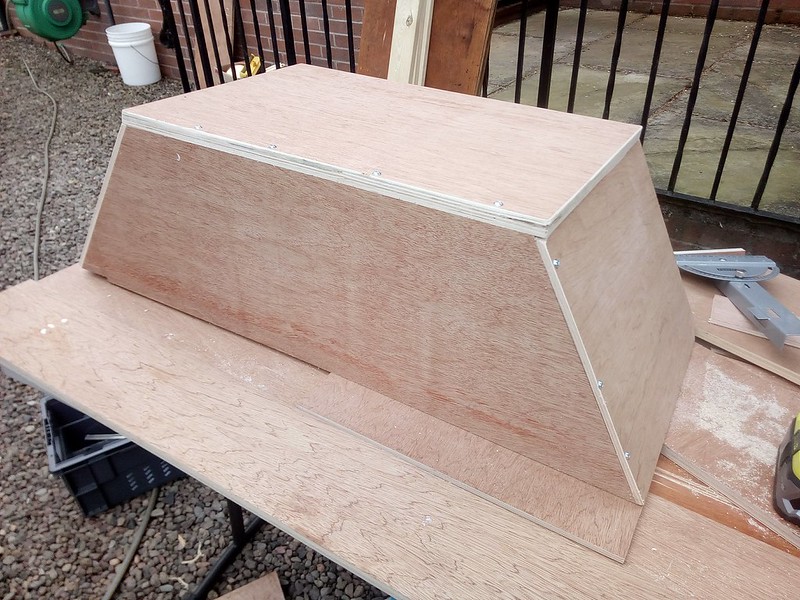
To use as addition securable storage, also built a wheelarch cover for the other side.

Arch Cover
by David, on Flickr
The LT46 has ENORMOUS Wheel Arches!

Fitted in place

In Place
by David, on Flickr
(This photo predates the installation of my Fresh Water System)


Final Construction

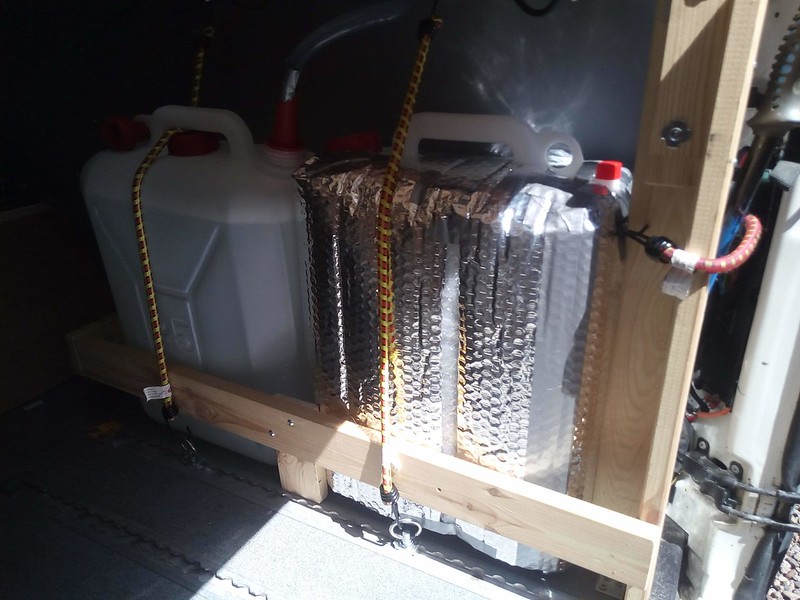
The last main bit of construction in the garage was around securing the Fresh Water containers.

I bought a pair of 25L carriers to go in the back of the camper. I had toyed initially last year the idea of an underslung fresh water tank but decided quite quickly that removable ones had a number of definate advantages (can take out easily to clean, easy to fill up virtually anywhere without a hose, simple to replace when they get old and smelly and also a lot, lot cheaper then underslung).

Wanted to come up with a method that makes the containers simple to remove but also secured in place.

Water Storage
by David, on Flickr
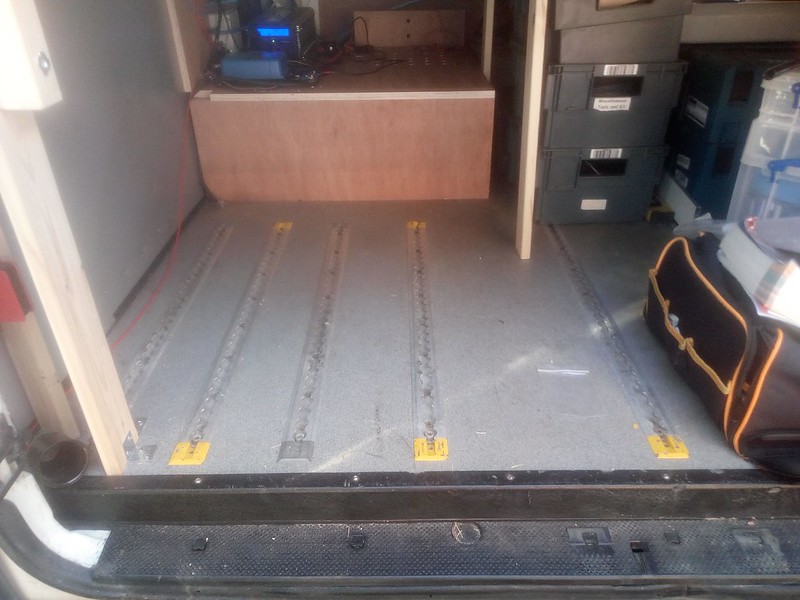
The bungee with loading ring on the track is actually sufficient to keep it secure, but I added the lower wooden 'fence' mostly to protect the containers against other things in the 'boot' crashing into them if they shifted around.
Just need to work on the plumbing here [This will be covered by a separate post]


And the Finale - In Use

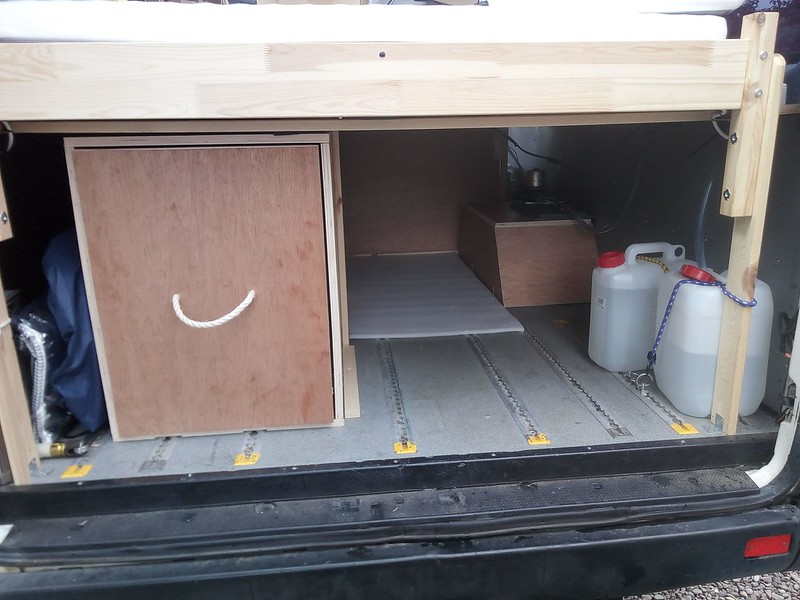
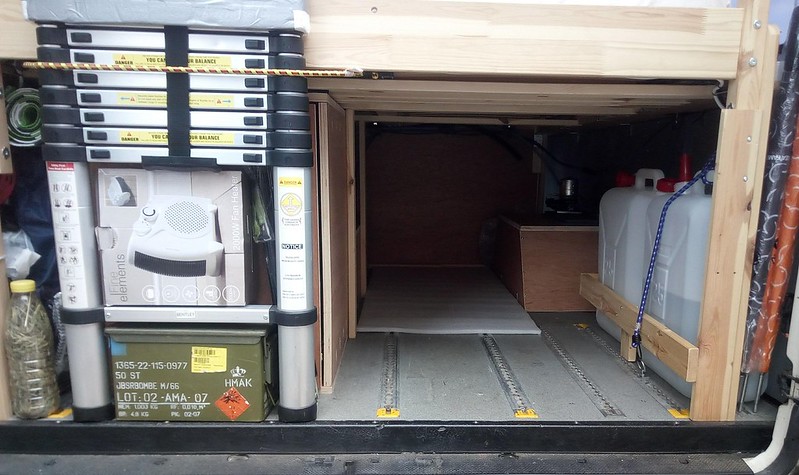
The boot is pretty well sorted out now

Boot Space
by David, on Flickr

Ammo box contains all the awning pegs, hammer, storm straps, etc.
Extending ladder secured in place with a bungee. The heater in the picture actually lives in the large drawer behind the ladder and is my "hookup heater".
To the left is the cab window covers (internal and external), matting, mud grip boards and the like
To the right is the long (6 foot) boot area which I can use for my Screenhouse and Fiamma Awning, plus things like the kayak if I don't want to deflate it fully.

So that is what the garage looks like when NOT in use, but this is what the garage often looks like ...
I've done VW Festivals for a few years and gradually been upsizing from a VW T4, to T4 with Trailer to T5 LWB and Trailer to T5 LWB and bigger Trailer until now with Clarance. Decided to see if we could loose the Trailer this time and fit everything inside!
We just (only just, mind) managed it ...

Garage TOTALLY full
by David, on Flickr


I do intend to add some curtaining to cover the garage area up when I initially open the door for added privacy and security.
 

wildebus

Forum Member
Water System

Thought I would just do a quick summary of the Water System I installed as it is 90% in the garage area.


Water System Overview

This is the actual system

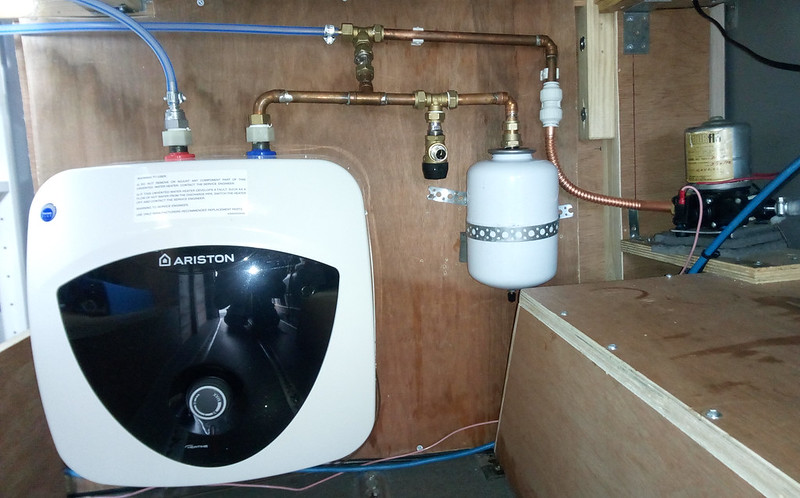
Plumbing
by David, on Flickr
(since this picture I have insulated the pipework)
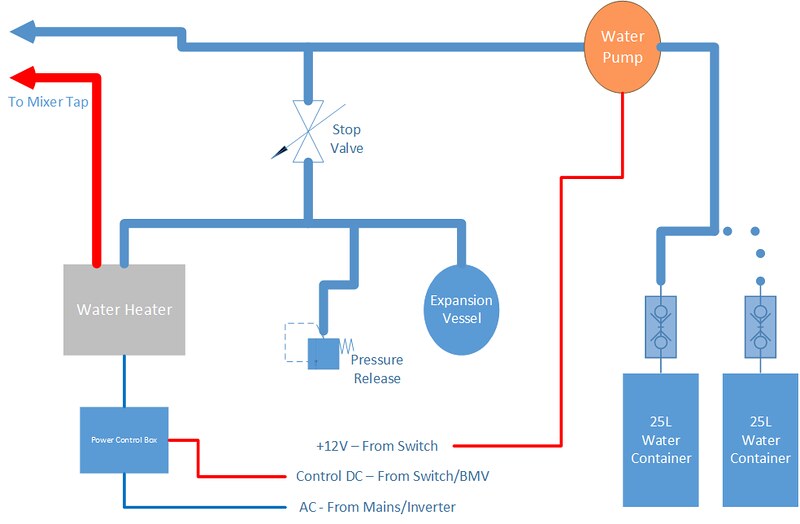
I used standard plumbing products (copper pipe, yorkshire fittings, etc) with 12mm plastic pipe running to the mixer tap in the kitchen and a flexible copper pipe from the Shurflo Pump.
I added a stop valve to the pipework going to the Heater and Expansion Vessel so that can be isolated if need be. The Expansion vessel takes care of any increased pressure in the Water Heater and there is also a Pressure Release Valve for safety purposes. This can also act as a manual drain cock if required.
I am using simple hoselock connectors as quick connects to the Water Containers (shown below)

Cover In Place
by David, on Flickr
The two containers (each 25L) are totally seperate and I manually connect between the two as required. This makes it easy to just lift out a single container and carry it to a filling point if there is no hose handy.
For waste (grey) water, I have an underslung container of just 25L fitted at the rear by the tow bar which matches quite well with the 50L water capacity I think.


Water System Conceptual

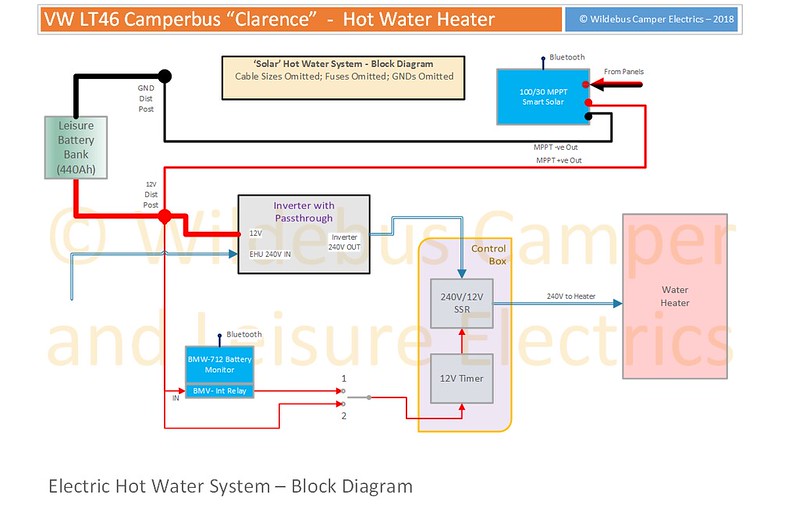
The system is very simple, with the only slightly unusual part being the Water Heater is powered either by Inverter or Hookup


Clarence Water
by David, on Flickr
The Water Pump is auto-start by pressure and is powered via a switch in the kitchen so can be kept off it required.
The Water Heater is controlled by some custom wiring - signified by the "Power Control Box" in the diagram above.

The diagram below shows more detail regarding how the Water Heater power is setup

Clarence - Hot Water System V2
by David, on Flickr

Still fine tuning the way the heater power starts and stops but seems to work nicely.
 

wildebus

Forum Member
Electrics

Electrical System Conceptual

Clarence was designed from the outset to have no plumbed-in Gas Supply or Tanks. This was a very concious decision :geek:

I need Clarence as a occasional workshop and overnight alternative to a B&B as well as a recreational vehicle.
As a Workshop I need access to off-grid power for tools; As an RV, I need access to the usual amenities. It makes sense to me to use the electrical power that I would need for a workshop as an alternative to gas when used for recreation.

When I made the decision to go 'all-electric', I also decided to "challenge" the idea of using Campervan & Motorhome products. These tend to be much more expensive than the Household/Domestic (NOT 'Dometic) alternatives, so if I can save money that way, I will do :p


Electrical System Overview

As I have built and used Clarence, I have revised and fine-tuned the Electrical Distribution System to suit my needs better. The following represents the configuation as of January 2019 and no doubt will change further as time goes on :devilish:

There are four key areas in the Setup -
  1. Energy Sources
  2. 12V Power Distribution
  3. 240V Power Distribution
  4. Power Monitoring
I will go into more details on the different aspects of the Electrical Setup in later posts. In this post I will just give an overview of the different parts

1. Energy Sources

I have all the typical Electrical Energy Sources in Clarence:

BATTERY
Clarence is fitted with 4 x 110Ah/C100 (95Ah/C20) 12V Leoch AGM Deep Cycle Batteries. These are installed in Parallel to give a total capacity of 440Ah/C100 (380Ah/C20). These Batteries are designed to take up to a 60% DoD (Depth of Discharge) occasionally with no adverse effects, but my target is to never go below 50%

SOLAR
Clarence has 4 x 100W Mono PV (Solar) Panels permanently installed on the roof. These are arranged in a Series+Parallel configuration for maximum flexibility and connect to a Victron MPPT Solar Controller

EHU (ELECTRICAL HOOK UP)
Clarence has a 16A MK 'Commando' Plug (the industry standard blue 230V Connector used in Campers and Motorhomes) fitted underneath the van. This allows for either Grid Connection from the Mains (so Home or Campsite Hookup); or Generator Connection if off-grid but in need of a Power Boost

ALTERNATOR/SPLIT CHARGE
Clarence is fitted with both a VSR (Voltage Sensing Relay) and a B2B (Battery-to-Battery) Charger. I can switch between the two depending on what my requirements are. More details in a later post :sneaky:

The Energy Sources are touched on in the diagram below, but more in a later post.

2. 12V Power Distribution

I will give more info on the setup and the approach and rational in a later post, but this is the general diagram for the 12V side of the system.

Clarence - 12V System and Monitoring
by David, on Flickr

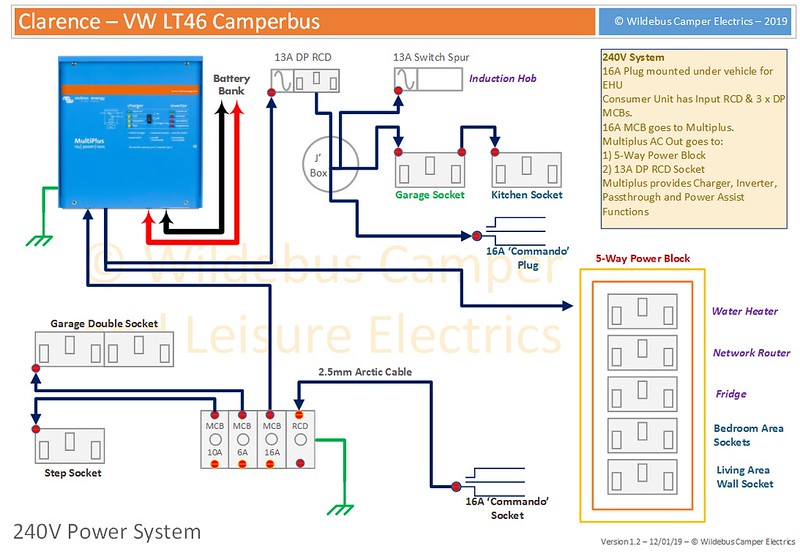
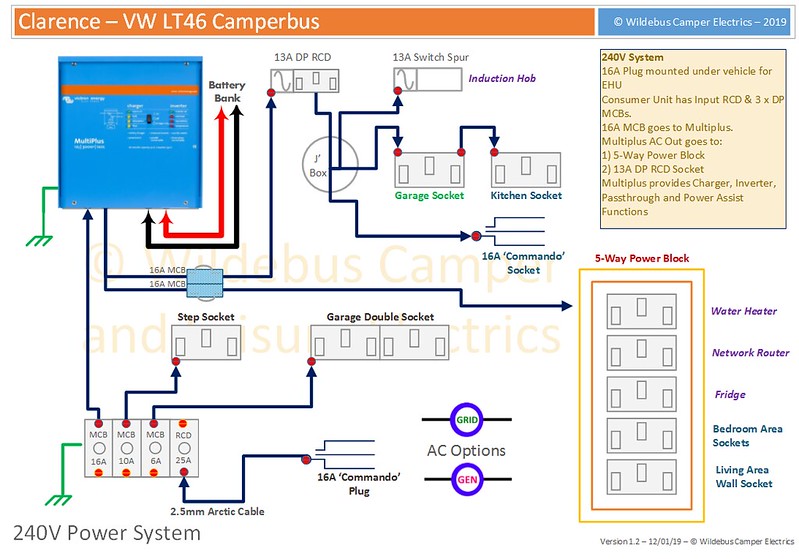
3. 240V Power Distribution

As with the 12V System, I will give more info on the setup and the approach and rational in a later post, but this is the general diagram for the 240V side of the system.

Clarence - 240V System
by David, on Flickr
Where a specific device is noted next to a socket, that socket is dedicated to that device, otherwise it is available for general use e.g. Laptop Charging, Kitchen Applicances, Tools, etc.
Some Sockets are only available when On-Grid/Generator, but others (the majority) are available both On and Off-Grid.


4. Power Monitoring

I have a near-full Electrical Monitoring Setup based around the Victron Product Suite. With this setup I am monitor all aspects of the Electrical System remotely via the Internet.
I say 'near-full' because the one aspect I cannot directly seperate is the Split Charge setup, but as that will only be active when I am in the vehicle and the engine is running, that part is not that critical.
Some details are show in the diagram in 2. above, but more info on the setup and detail of the Monitoring and what it does will again be in a later post.


So that is the Overview. More details will follow
 
Last edited:

wildebus

Forum Member
Electrics - Details

1. Energy Sources

I have all the typical Electrical Energy Sources in Clarence:

BATTERY
Clarence is fitted with 4 x 110Ah/C100 (95Ah/C20) 12V Leoch AGM Deep Cycle Batteries. These are installed in Parallel to give a total capacity of 440Ah/C100 (380Ah/C20).

The picture below shows the basic inter-battery cabling

Battery InterConnects
by David, on Flickr
The cable lengths and connections have been specifically setup so each battery is electrically an identical distance from the -VE PLUS +VE Battery Bank Feed Points (the "Connect" points) so are all balanced.
The cabling in the photo is old and since this I have replaced the 25mm2 interconnect cables with 50mm2 cables and feed cables from the "Connect" points to the distribution points are now 70mm2 cables.


SOLAR
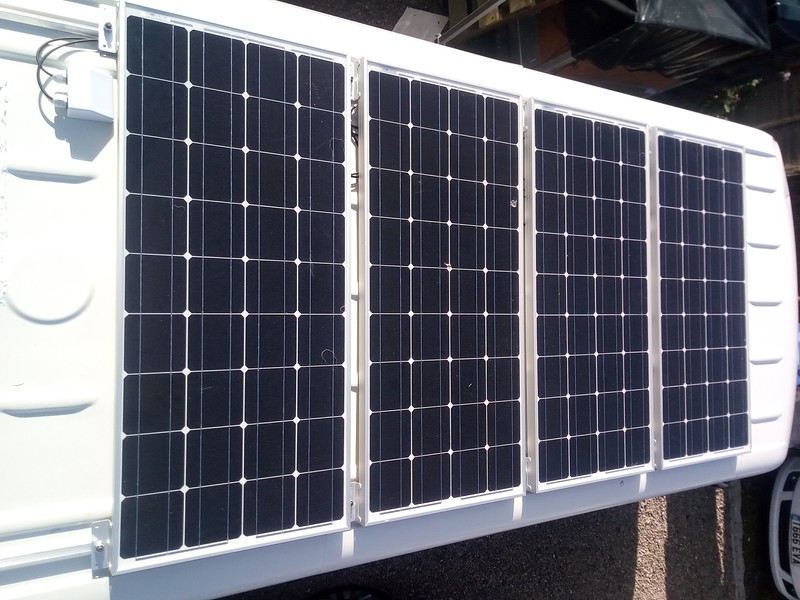
Clarence has 4 x 100W Mono PV (Solar) Panels permanently installed on the roof. These are arranged in a Series+Parallel configuration for maximum flexibility and connect to a Victron MPPT Solar Controller

The picture below shows the 4 Panels mounted on the roof

PV Panels
by David, on Flickr

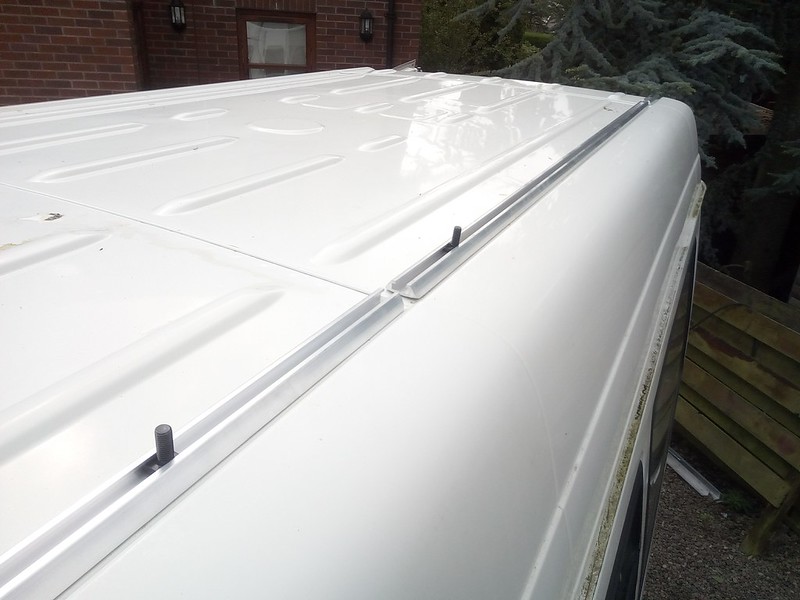
The First Generation Sprinter/VW LT (T1N Model) does not have a roof rail option so I used some seat tracking positioned in the rain gulley and secured with 3M VHB Tape plus some countersunk bolts with spreaderplates under the roof for extra security; then using captive bolts to secure the panels (and any other items for that matter).

Roof Tracking
by David, on Flickr

To connect the Panels to the Tracking, I used the Renogy "Z Brackets" with modifications in the mounting holes and on the panels to suit the fixing method. I used these brackers as they provide support underneath the panel whilst raising the panel up a few mm. This last point is important as the extra height allows the panel to clear the centre of the roof (this is convex like on most panel vans)
Entry Box routing
by David, on Flickr
The Picture shows the pair of cables going into van through the roof via a cable box secured down with more 3M VHB Tape.

EHU (ELECTRICAL HOOK UP)
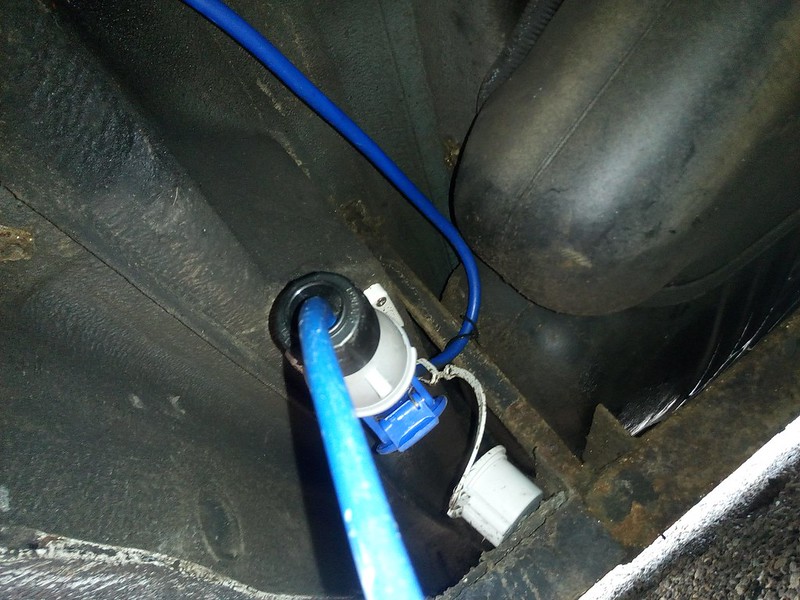
Clarence has a 16A MK 'Commando' Plug (the industry standard blue 230V Connector used in Campers and Motorhomes) fitted underneath the van. This allows for either Grid Connection from the Mains (so Home or Campsite Hookup); or Generator Connection if off-grid but in need of a Power Boost

Not the most exciting photo - this is the Surface Mount 16A Plug for hookup with lead attached. It also has a cap to keep the connectors clean.

16A In
by David, on Flickr
I added some protective conduit once happy with this positioning


ALTERNATOR/SPLIT CHARGE
Clarence is fitted with both a VSR (Voltage Sensing Relay) and a B2B (Battery-to-Battery) Charger. I can switch between the two depending on what my requirements are.

Initially I had a basic 100A VSR installed but decided to fit a 40A B2B Charger for better quality charging. The VSR can actually be better in some circumstances if raw power is required (say if I have the inverter running when driving to run the Hot Water), so I added a control circuit to allow me to easily select between the two options
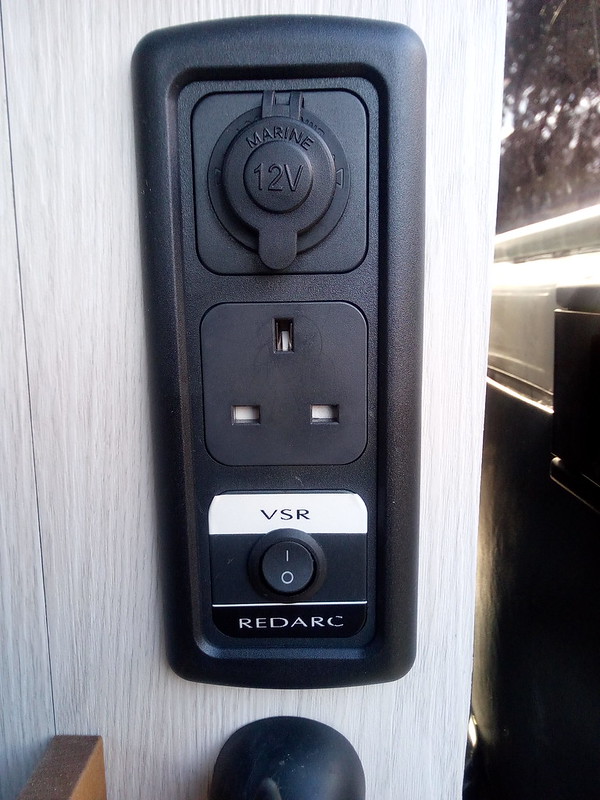
The photo below shows the actual switch, which is a simple on/off switch

Added Charger Switch
by David, on Flickr
The previous posts shows the wiring diagram for this but a brief explanation for the wiring if it might help?
I added a 5-pin 40A 12V Relay and I have pin 30 and Pin 86 connected to a +ve Source; Pin 87a (which is often left unused and is the NC - Normally Connected - Pin) is connected to the B2B Chargers 'source select' wire. When this 'source select' wire has a +ve signal, it enables the B2B feature (when no +ve signal it works as an MPPT Solar Controller, but I have no panels connected to it);
The switch actually switches through a ground signal - so when the switch is open, pin 87a has 12V on it and this tells the B2B to turn on when it detects an enabling voltage on its input.
When the switch is closed, the relay enables (as pin 85 is grounded) and the 87a pin is open circuit so has no power and the Charger is no longer working in B2B mode; plus the VSR now has its ground wire grounded so will turn on when the input voltage rises to 13.2V
Using this method it is easy to use a low-current switch to control which high-current Split Charger I want to use.
 

Millie Master

Forum Member
Very thorough and detailed installation Dave, most especially the way you have attached the solar panels................... One word of caution though, the image of the underside of your van, can I spot some of the tell tale stains of the dreaded tin munching monster?
Phil
 

wildebus

Forum Member
Very thorough and detailed installation Dave, most especially the way you have attached the solar panels................... One word of caution though, the image of the underside of your van, can I spot some of the tell tale stains of the dreaded tin munching monster?
Phil
Not any more. That is on a step that was added as part of the Minibus conversion and got ripped off on a verge when I took evasive action last December.
 

trevskoda

Forum Member
Great job.
Wheels are best shotblasted then primed with epoxy 2 pack & finished with polyurathane 2 pack.
Taking a cable through the roof is best done using a boat deck gland which can be bought on ebay cheap
deck g a.png
 

wildebus

Forum Member
Electrics - 12V Distribution

2. 12V Power Distribution

So basically Clarence for DC Power has a 12V system throughout the Leisure Side and the Vehicle Side.

Quick note on Charging - This is achieved via Solar using the Victron MPPT 100/30 Solar Controller - This supports upto 440W max of Solar; Alternator Charging via 100A VSR or 40A B2B (discussed in previous post); or 240V AC via Victron Multiplus, which provides a technical maximum of 120A of charging. I have set it up to have a maximum of 95A, which represents a C/4 Charge Rate (or 25% of the capacity per hour) - this rate is of course only close to being met when the batteries are below around 80% (when they are in Bulk aka CC (Constant Current) mode). This can be used either via a Grid Connection (upto 16A connection, but selectable via Control Panel) or Generator (this connection I have preset to 7A max input to match the 1700W Briggs and Stratton Generator I have)

This is the general diagram for the 12V side of the system.

Clarence - 12V System and Monitoring
by David, on Flickr

The diagram above is a detailed conceptual diagram showing the key items.

There are a few 12V FuseBoxes.
1 - 12V 6-way Fusebox (shown on left): This is a light duty supply and is fitted by the battery box and is used to provide power to the monitoring and communication devices (so +ve connection to Shunt, voltage sense to Multiplus, +ve to battery sense, power to Raspberry Pi and power to internal garage lighting).
This has been fitted purposely before the Master On/Off Cutoff Switch so if I want to turn off all the van using that Switch, I can still provide monitoring services and light to work on the system.

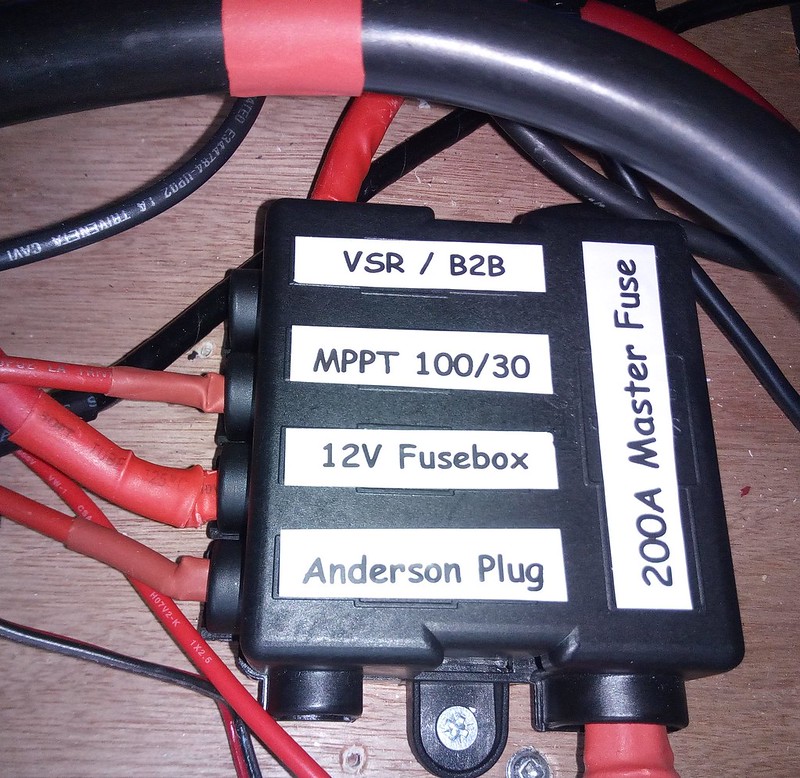
2 - 12V System FuseBox: This is used as a medium duty supply and connects the various charging and main 12V Devices FuseBox together and to the battery. The Diagram above shows the logical connections and the photo below shows how they are laid out in practice.

Mid-Current Fusebox
by David, on Flickr
I'll just mention the "Anderson Plug" Connection ... I have external Battery Boxes that I want to use in Gazebos and Marquees at Shows. I have fitted these boxes with Anderson-type plugs and the same plug on a fused connection in the garage area. This allows me to easily get a relatively high (so fast) charge into the boxes when preparing before hand or driving to shows.

3 - 12V 12-way Distribution FuseBox: This is where the various 12V circuits for traditional Campervan use get distributed from. So things like various USB Sockets, 12V Sockets, Awning Lights, TV Point, etc.

3a - 12V 4-way Kitchen FuseBox: For cable simplicity I have a little 4-way Fusebox that supports a few controller-related items such as external Fridge fan and temp monitor device, water heater timer controller and a couple of extra items.


Battery Power to the 12V Distribution

As mentioned, this is via the Master On/Off Switch

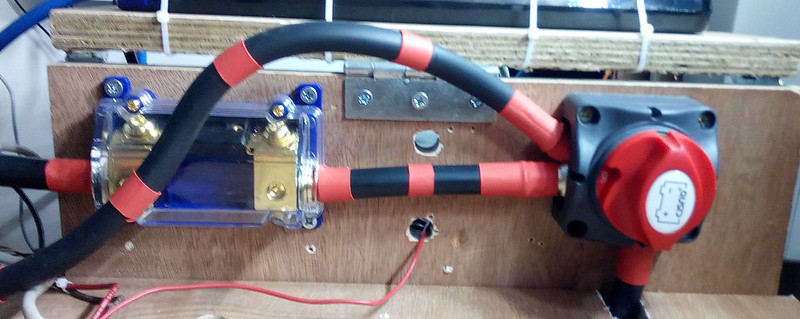
400A Fuse and Master Cutoff Switch
by David, on Flickr
The thick 70mm2 cable to the Fusebox in the photo above is for the Multiplus. This will be how the 240V Charging power will get to the batteries of course.
The other thinner (50mm2) cable goes to the System Fusebox shown in the previous photo.

That pretty well covers the 12V setup - it is pretty typical to any other Motorhome or Camper, but just with a few tweaks. Any questions or comments, just shout :)
 

wildebus

Forum Member
Electrics - 240V AC Distribution

240V Power Setup

I said the 12V Distribution System in Clarence is pretty typical of the average Motorhome in essence. Well, the 240V System is probably not quite in same Category :cool:
I have a fair amount of 240V AC devices in my Campervan - primarily as I did not see the vaue in paying a premium for 12V versions of the same products, be it a Compressor Fridge or a Laptop Charger.
I need the Electrical capacity I have in order to be able to run power tools occasionally, and when I am not needing to do that, I may as well utilize the battery power I have for recreational purposes (if I were to turn it round the other way, I would need to find Gas-powered Circular Saws, Jigsaws, etc. Ummmm.... :unsure: )
So hence the focus on Electricity (as well as having no desire to have large gas tanks and gas pipework - a personal choice).

Below is my current setup.

Clarence - 240V System
by David, on Flickr
(This diagram is the same as the one in the Electrics intro posted previously but with some added detail)

I do tend to adjust and adapt as I go along, but essentially it is the same conceptually as when I first built Clarence.
Where a specific device is noted next to a socket, that socket is dedicated to that device, otherwise it is available for general use e.g. Laptop Charging, Kitchen Applicances, Tools, etc.
Some Sockets are only available when On-Grid/Generator, but others (the majority) are available both On and Off-Grid.


The 240V Heart

Taking the parts in turn, I guess the heart of the 240V system is the Victron Multiplus 12/3000/120-16 unit.
To explain the numbers, 12 means it is a 12V DC system; 3000 is the power of the Pure Sine Wave Inverter, rated in VAs - this is equivalent to 2400 Watts; 120 is the rating of the Mains Charger output in current i.e. 120 Amps; and 16 is the maximum input current possible from external mains e.g. EHU
a 2400W Sine Wave Inverter and a 120A Battery Charger is pretty good, but it has another trick up its sleeve as well - it has a feature called 'Power Assist'. What this does is if there is a load greater than the Hookup can deliver, the Multiplus will automatically make up the difference using the inverter. This is very handy in a Motorhome or Camper when using a campsite hookup that is limited in power (or if using a generator) as you can switch on a higher power device without worrying that the EHU supply will trip due to overload. For example, if you are on a 6A hookup, that can only deliver a maximum of around 1400W, so without a Power Assist feature, you would have to avoid turning on any devices >1400W.
This screenshot shows what I mean

CCGX - MP3000 - Inverter On (Assisting)
by David, on Flickr
Here there is a demand of nearly 2kW but the grid can only provide 1317W due to limitations on the hookup, so the Multiplus is making up the difference from the batteries via the inverter (720W here as the inverter is only around 85-90% efficient)

Previously I had all the devices running off an Inverter so I would be pulling full power out the battery and then the battery charger would be replenshing the battery but at a much lower rate than the use.
This method certainly works but with the Multiplus the whole process becomes much more efficient when hookup is available.
With a maximum of 16A input from hookup and a 2400W inverter, the Multiplus can deliver over 6000W of power (and nearly 10kW peak). Not that I will be needing that I think but it does mean should the water heater come on when the Induction Hob is being used, everything will work without anything tripping :D
Is it a cost effective product? well, if you price up a top quality 2500W Pure Sine Wave Inverter, plus a 120A Battery Charger you will see the answer is pretty well yes.
What about comparing the key AC Devices I am using with the Multiplus with Gas or 12V DC options (so avoiding the Inverter requirement )....
A 3-way large Fridge is around £1100 or more, and a 12V DC 90L fridge will be around £800 or so - my AC Fridge was £170;
A Gas Hos is around £200 - My AC Induction Hob was £20
A Gas Hot Water Boiler is around £250 or so - my AC Water Heater was £90
So even without any other need for AC Power (which as explained earlier, I do), adding the Multiplus in the setup and using AC Devices is actually cheaper than fitting Gas devices. The addtional battery power to support the use of these devices is less than the cost of installing a gas tank setup, so IMO is cost effective even without the need I have anyway for AC power tools.
Of course other peoples experiences may be different and their requirements lead them to another solution, but for mine, the Electric setup is one that matches my current needs.

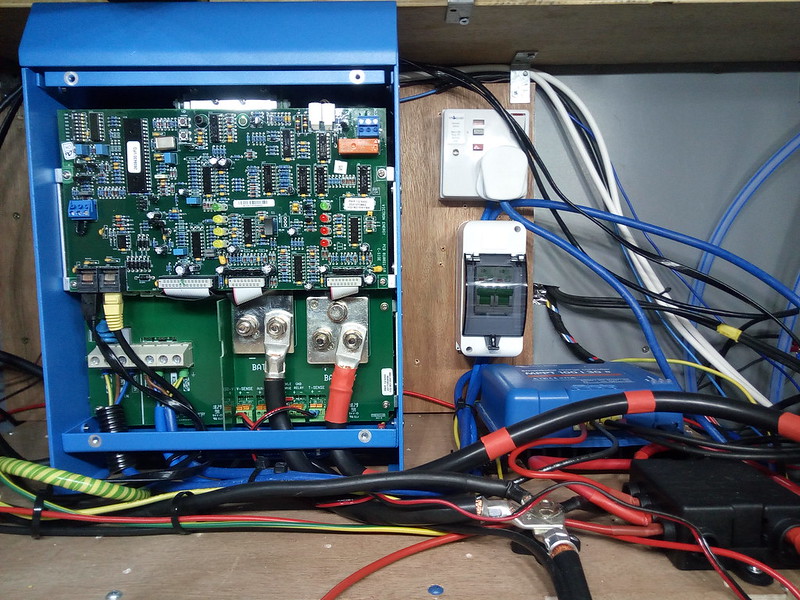
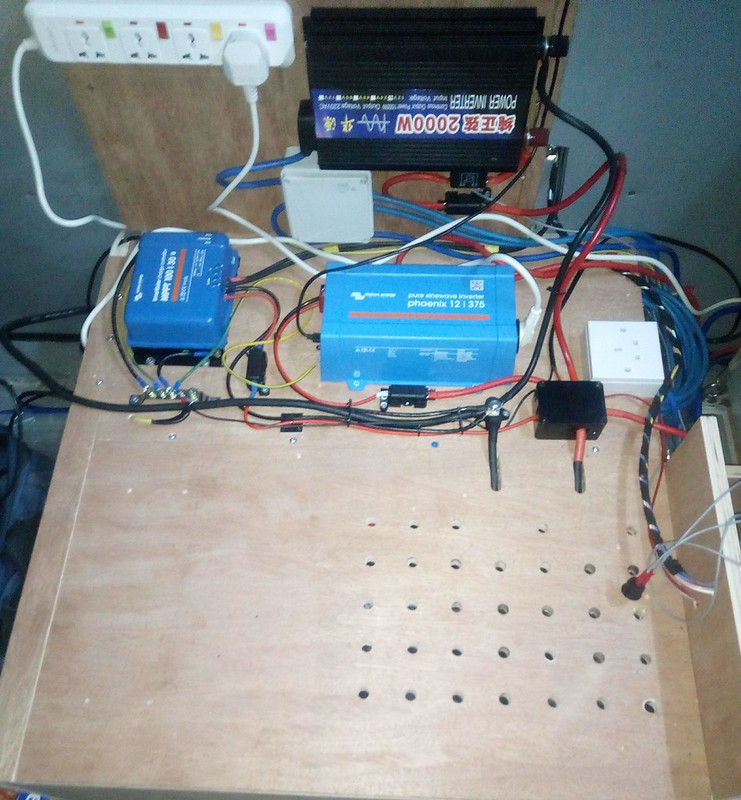
This is what the Multiplus looks like with the cover off

Multiplus and assorted Gear
by David, on Flickr
The connections left to right are AC In, AC Out, and -ve and +ve Battery Terminals (the manual recommends 2 x 50mm2 cables for -ve AND +ve for cable lengths upto 5 Metres. As my cable length is under 1 Metre, I opted to use a single 70mm2 cable instead, especially as my heavy AC use is typically intermittant and short
The other connections are a pair of RJ45 (like network cables) Ports - one goes to a Control Panel and the other to the Raspberry Pi;
a Voltage Sense - this is connected with a pair of wires (I used 1.5mm to minimise losses) connected to the battery bank and is used to compare the 'real' battery voltage with that read at the thick battery terminals (which will change according to the load on the cable) and so lets the Multiplus adjust voltage levels as need be;
and a Temp Sense - this goes to a temperature sensor bolted to one of the batteries -ve terminals and allows the Multiplus to tune the charging voltage to the battery temperature (the colder the battery, the higher the voltage it can charge at).


240V Distribution

Taking a look at how the 240V is distributed now.

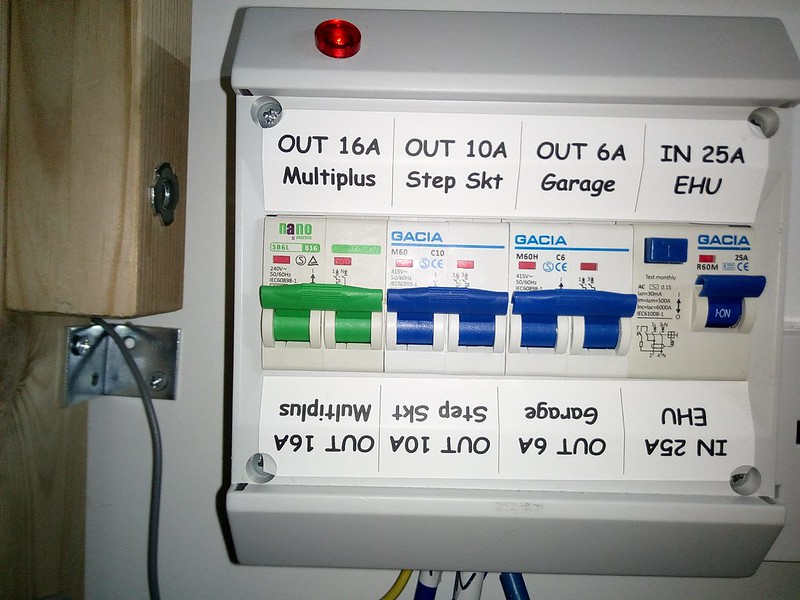
There is a Consumer Unit that takes incoming 240V from the EHU (Grid or Generator) and does the initial distribution

3 Way Consumer Unit
by David, on Flickr
The RCD is the initial incoming unit and is connected to the 3 MCBs. These MCBs are all Double-Pole (this means when the MCB is turned off or trips, it isolated BOTH Live AND Neutral wires for added safety). The Blue 6A and 10A go to dedicated sockets (see schematic at the top of the post) and the 16A Green MCB feeds the Multiplus.

Coming out of the Multiplus, there are two cables, each going to their own 16A MCBs; then one going to another RCD (as this will also be feeding an external socket) and the other to a multi-socket power block

Multiplus Outlet CU
by David, on Flickr

The RCD circuit is used for the Induction Hob, Kitchen Socket and the external socket, plus a spare socket in the garage area; The non-RCD circuit is used for the Fridge, Water Heater and general sockets for miscellanous devices.

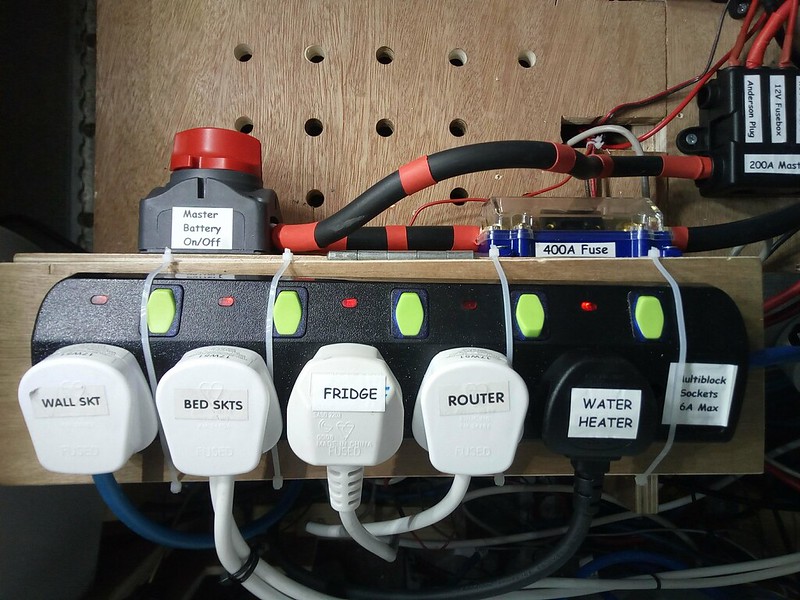
AC Multiblock
by David, on Flickr
The 400A Fuse in this photo above is the supply fuse between Master On/Off Switch and Multiplus as a Catastrophic fuse (this circuit should never pull more than around 230A maximum)
 

Users who viewed this discussion (Total:0)

Top