wildebus
Forum Member
Previously, I posted about a 12DC Hot Water System I was trying out. This worked pretty well but I could not find a suitable water container that would allow transportation without spillage and insulation to avoid too much heat loss.
My investigations led me to the following setup ....
originally published @ https://www.wildebus.com/blog/produ...ater-heater-part-1-installation-and-plumbing/
I wanted on-tap hot water in Clarence, my Campervan Conversion, but I don’t have – or want – on-board plumbed in Gas, and I didn’t want to fit an expensive Eberspacher water heater, so took a similar approach to this that I have done with other aspects of the build.
That is to repurpose domestic products for Campervan/Motorhome/RV use, just like I have done with the 240V Fridge and the 240V Induction Hob.
I was looking for 12V DC options initially, but while I got close, I couldn’t find a solution which ticked all the boxes , including for transportability and heat insulation. So decided to go AC, utilizing the powerful inverter I already have to be able to run the kitchen appliances.
This first part describes the basic heater and kit and the plumbing side.
Part two will go into detail on the electrical side on how to make the heater more Camper-Friendly
Part One
The Heater is an oversink semi-on-demand Water Heater by Ariston. It has a 2kW Heater Element and a 10L Water Tank in an insulated housing. This is the installation in my underbed ‘garage’ in Clarence.
 Clarence Water System by David, on Flickr
This is a Pressurised & Unvented Heater, so alongside the actual Heater itself, I fitted a Pressure Release valve that automatically opens at 6BAR (the heater is rated to run between 1 – 3.5 BAR). These pressures will be virtually impossible to actually reach in a camper, but the valve also acts as a drain tap so is still handy to have (and it came with the heater anyway, so may as well use it!)
Along with the pressure release valve I have a small expansion vessel of just 2L. Again, similar to the PRV, The heater is unlikely to get to a pressure where an expansion vessel is a requirement, but as well as working as a ‘safety net’ it also provides a way to feed a small amount of water through the tap without the pump running, which is handy at nighttime, as the pumps can be rather noisy.
Talking about pumps, the entire hot and cold water system is fed via a pair of 25L water tanks with a Shurflo on-demand pump to send the water through.
The final bit of the underbed system is the stop-valve that can isolate the hot water heater plus peripherals from the basic cold-water supply.
Both hot and cold supplies then go via 12mm JG flexipipe to the Hot+Cold Mixer Tap in the Galley Kitchen.
(Pipes will get insulated in a little while - I want to monitor various joints first before they get covered up).
Part 2 (electrics) to follow.
My investigations led me to the following setup ....
originally published @ https://www.wildebus.com/blog/produ...ater-heater-part-1-installation-and-plumbing/
I wanted on-tap hot water in Clarence, my Campervan Conversion, but I don’t have – or want – on-board plumbed in Gas, and I didn’t want to fit an expensive Eberspacher water heater, so took a similar approach to this that I have done with other aspects of the build.
That is to repurpose domestic products for Campervan/Motorhome/RV use, just like I have done with the 240V Fridge and the 240V Induction Hob.
I was looking for 12V DC options initially, but while I got close, I couldn’t find a solution which ticked all the boxes , including for transportability and heat insulation. So decided to go AC, utilizing the powerful inverter I already have to be able to run the kitchen appliances.
This first part describes the basic heater and kit and the plumbing side.
Part two will go into detail on the electrical side on how to make the heater more Camper-Friendly
Part One
The Heater is an oversink semi-on-demand Water Heater by Ariston. It has a 2kW Heater Element and a 10L Water Tank in an insulated housing. This is the installation in my underbed ‘garage’ in Clarence.
 Clarence Water System by David, on Flickr
This is a Pressurised & Unvented Heater, so alongside the actual Heater itself, I fitted a Pressure Release valve that automatically opens at 6BAR (the heater is rated to run between 1 – 3.5 BAR). These pressures will be virtually impossible to actually reach in a camper, but the valve also acts as a drain tap so is still handy to have (and it came with the heater anyway, so may as well use it!)
Along with the pressure release valve I have a small expansion vessel of just 2L. Again, similar to the PRV, The heater is unlikely to get to a pressure where an expansion vessel is a requirement, but as well as working as a ‘safety net’ it also provides a way to feed a small amount of water through the tap without the pump running, which is handy at nighttime, as the pumps can be rather noisy.
Talking about pumps, the entire hot and cold water system is fed via a pair of 25L water tanks with a Shurflo on-demand pump to send the water through.
The final bit of the underbed system is the stop-valve that can isolate the hot water heater plus peripherals from the basic cold-water supply.
Both hot and cold supplies then go via 12mm JG flexipipe to the Hot+Cold Mixer Tap in the Galley Kitchen.
(Pipes will get insulated in a little while - I want to monitor various joints first before they get covered up).
Part 2 (electrics) to follow.

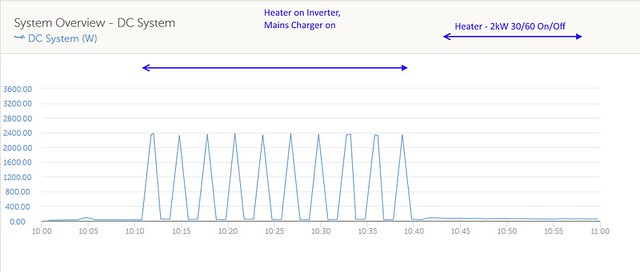
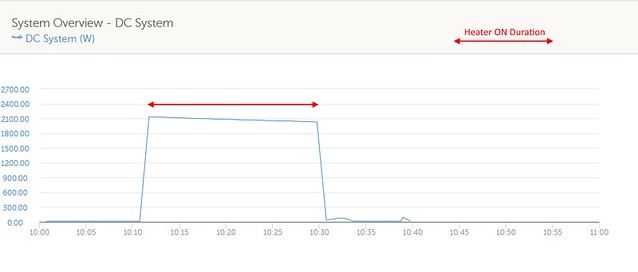 WH-2kW-Watts
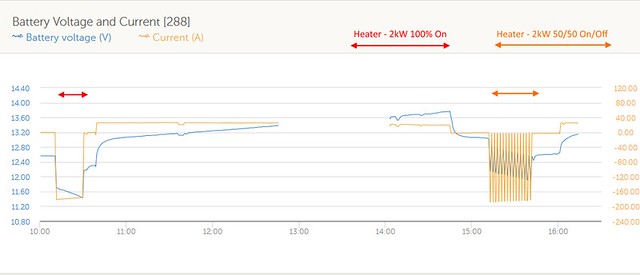
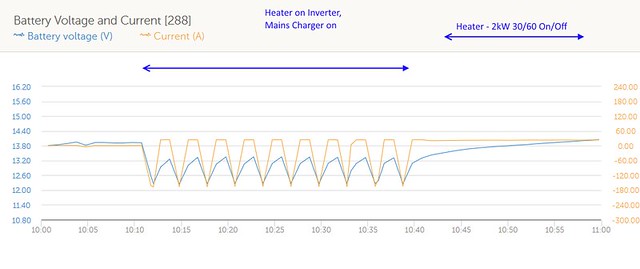
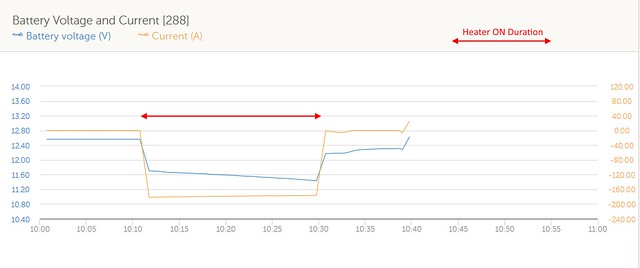 WH-2kW-VandC
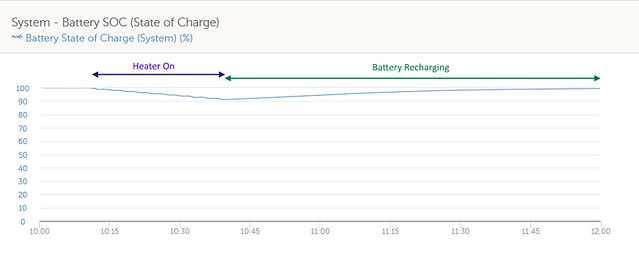
 WH-2kW-SOC
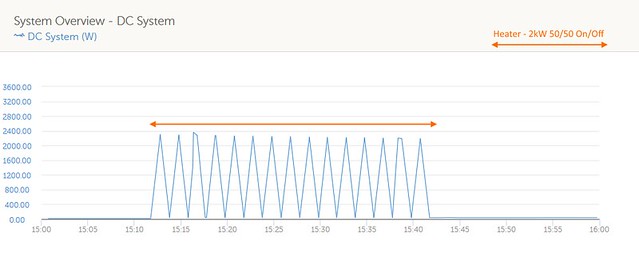
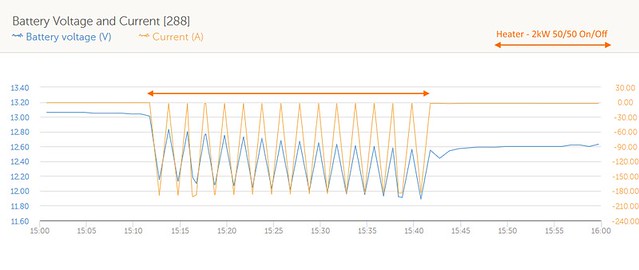
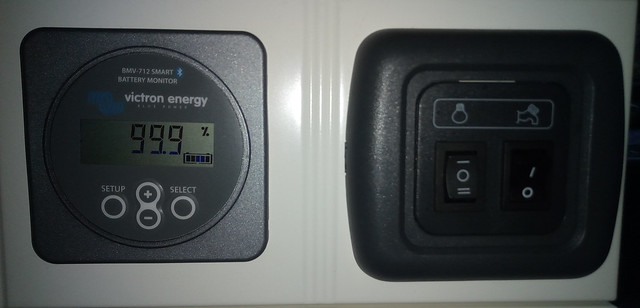 BMV & Water Switches
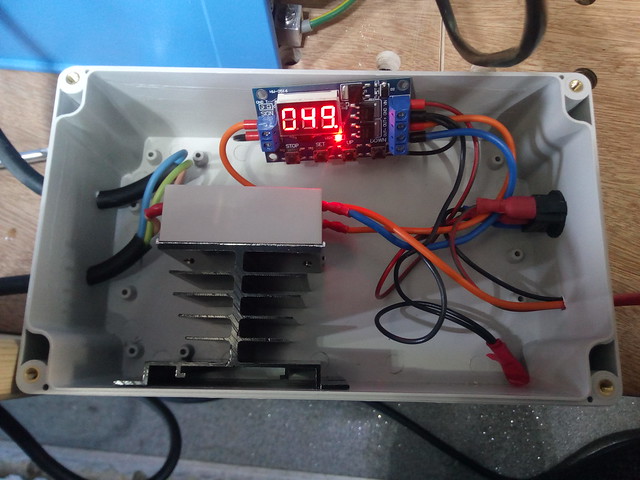 Control Relay Box