boneheaddread
That is just beautiful .
Hi thanks for the likes and comments

That is just beautiful .


") I hope one day to do a conversion myself, but perhaps on not such a large vehicle.
I hope one day to do a conversion myself, but perhaps on not such a large vehicle.

nice job on the slide out front . check inside the front drums . on 2 of these i had the leading brake shoe rubbing against the inside of the drum. the first one actually cut the drum off . the cure was an extra beehive spring


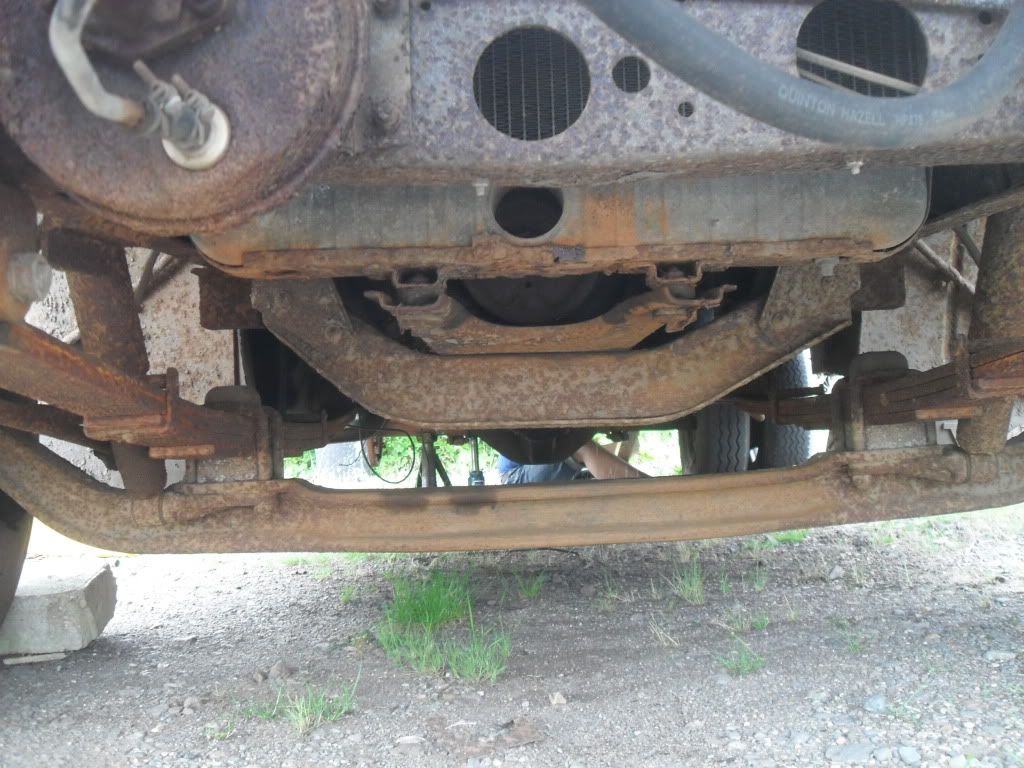
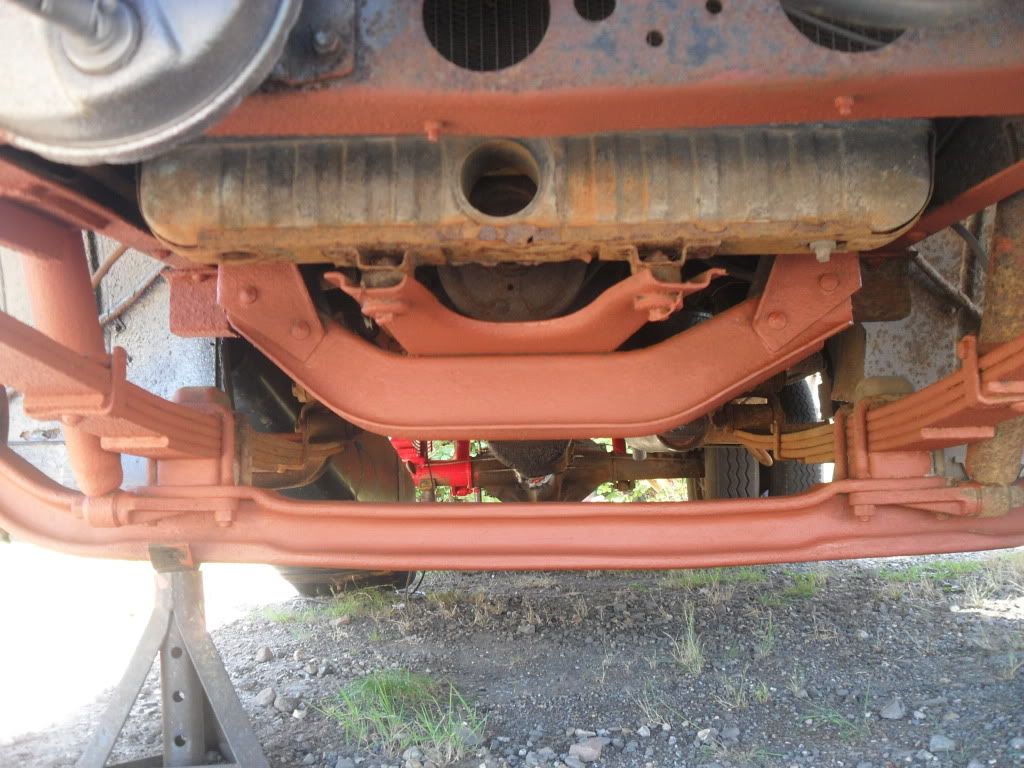
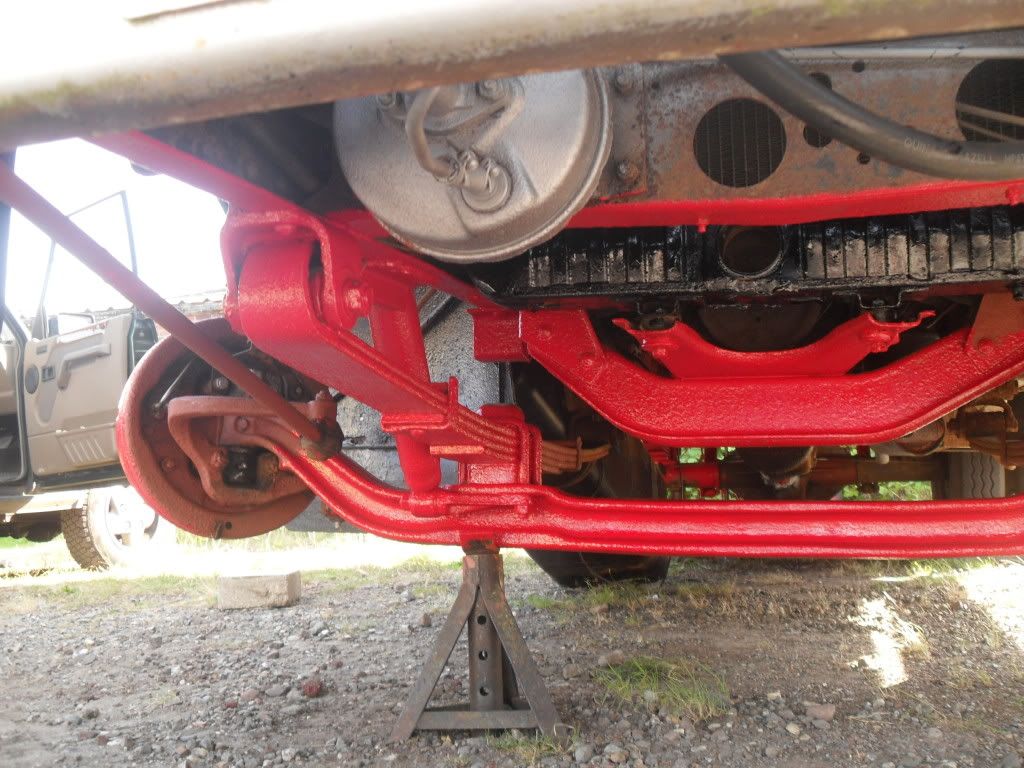
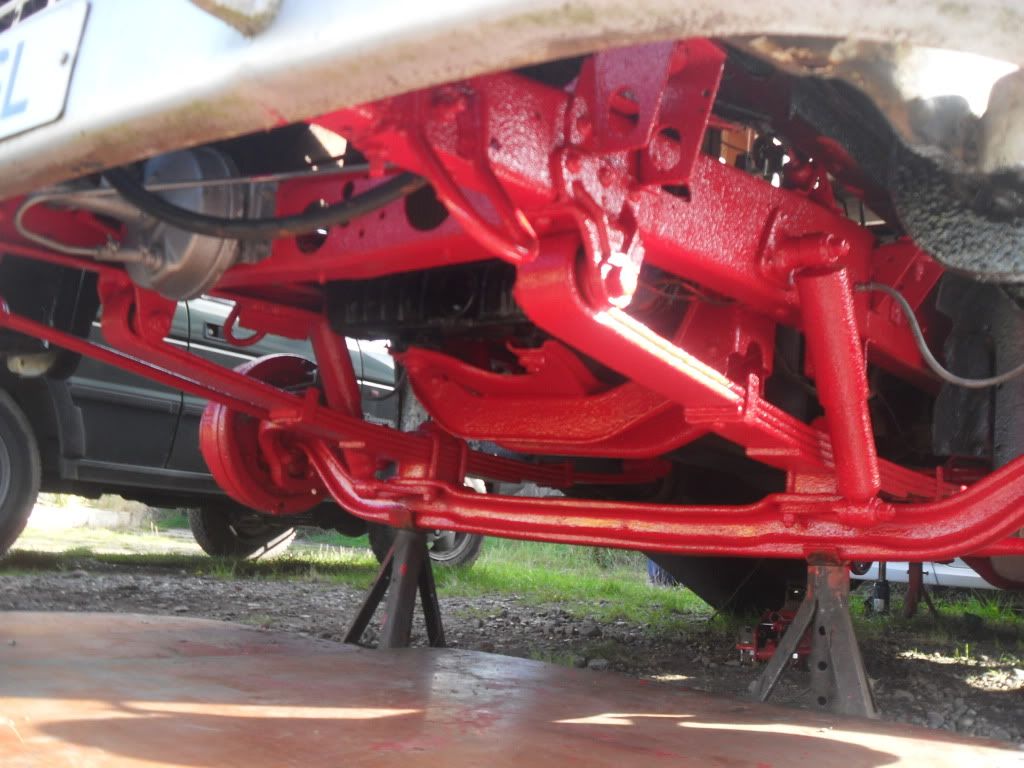
Right so the jobs in order were going to be
1 underneath , chassis, brakes , tyres, wiring, and running gear as there is no point spending ages converting a truck on a crap running gear
2 inside
3 outside
so my partner and myself spent around 20-30 hours wire brushing the chassis back of all oil grease rust ect , followed by 2 coats of red oxide and then 2 coats of post office red synthetic enamel paint , newish tyres where needed , wheel cylinders, brake shoes and a complete back end rewire ( no dodgy bad earths ) to complete underneath
a few before and after photos
[URL=http://s602.photobucket.com/user/boneheaddread/media/SDC14273.jpg.html]
 [/URL]
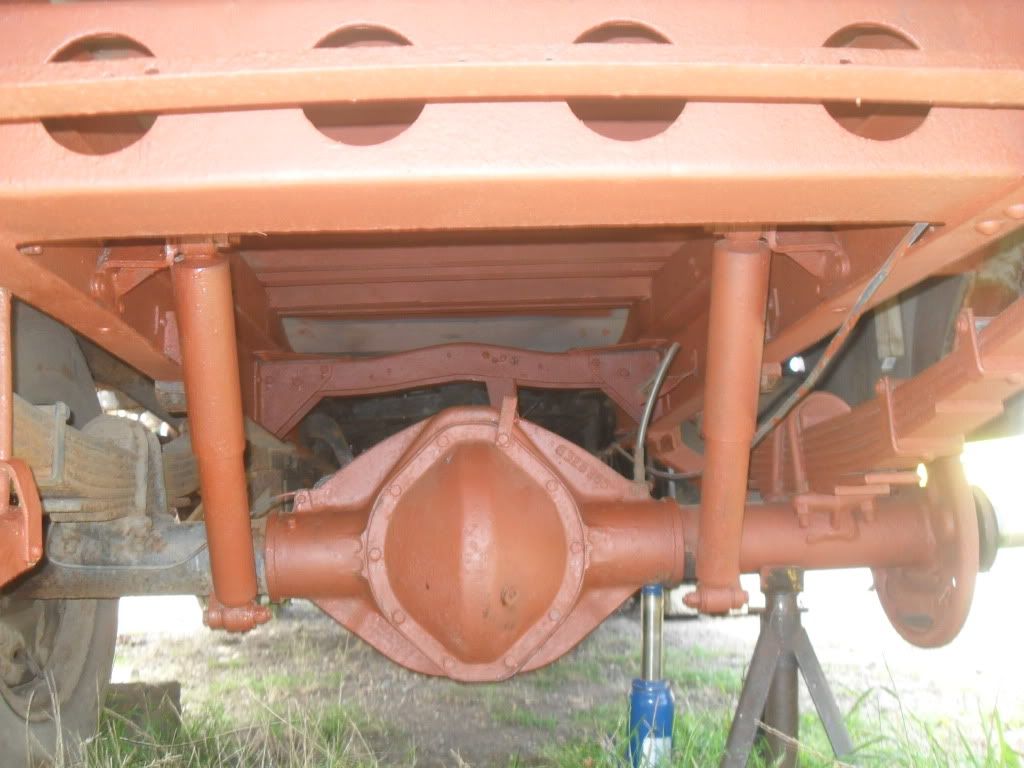
Unless its shoot blasted and 2 packed epoxy zink rich primed it will rust very soon though you are going the right way with things & love the pickys,good luck.
Ps 2 pack acid etch for alloy wall sides not red oxide.
Been 3 years now and unders are still fine
Well done then,do keep it well looked after the old girl will give you many happy hrs return & more fun than a of the shelf wobbly box.
I have noticed that if I dont drive the truck for a week or two , the front drivers shoes do tend to stick on for a few miles
Thanks for the tips , I will etch prime the outside before I paint with a top coat , but I have always hand cleaned and painted chassis in the past , I am a bit old skool in my work , like to do things by hand and the old ways
Bloomin' 'eck Trev you're posh aren't you, fireplace OUTSIDE the house, a ruddy great boat in yer garage and your very own Bushmills vat.


funny you should mention that ,i found my old cf front brakes could tend to drag a little first thing , they were also dogs to keep in balance aswell ,but thats drum brakes for you .. i did notice that yours has the later instrument pod and steering wheel , i dont suppose your going to change them for the earlier ones,i did like the look of them ,thats of course if you can still get them ,could be rare . wasent the bedford tk very much on the stamp well cab styling that is of the international trucks in america , mind you the cf was styled very much on the chevvy vans .


