Sprinter switch removal

Nabsim

Forum Member
I have been trying to remove a dashboard switch in my Sprinter based van but can’t feel it releasing. So far I have been using strips of old credit card like I used to do with my Vauxhall’s without any joy.

I do have the instructions for dismantling the dash but that seems a bit ott just to get at the back of the switch. Has anyone successfully removed this and if so how?

I don’t know if location makes any difference (doubt it) but if so they are to immediate left of the steering wheel before the drivers vent

84A0AE06-99F3-46E0-8550-94394BD4DC3E.jpeg
 

wildebus

Forum Member
I am presuming you need to get to the left switch to put it the right way round :)

I can't find the workshop manual but I *think* there is a little tab at the bottom that you push up to release the switch and then pull it forward. I would use a small electrical flat blade screwdriver to do this.
I think the wood trim may be making access a bit trickier to get a lever in (I don't think a credit card will help here)
 

Nabsim

Forum Member
I have been trying on the sides, will have a go at the bottom tomorrow 👍

was the right hand one I want to pull to swap the d+ for a permanent live and see what happens :)
 

wildebus

Forum Member
Remember of those two switches in the photo , one is upside down, so if the tab is on the bottom, then one (I think the LHS one) would have it on the top as you look at it).
 

Nabsim

Forum Member
Remember of those two switches in the photo , one is upside down, so if the tab is on the bottom, then one (I think the LHS one) would have it on the top as you look at it).
Yes you are correct David, I am guessing whoever fitted them did it to remind you to turn one off when the other is on but no idea really. The left hand switch it an additional to turn on the Eber D4 in the back of the van and the right hand turns on the Eber water heater to warm the engine more quickly when engine is running.
Unfortunately neither led works in these two switches, if they come out easily when I try I May put them both the same way but I am not ocd lol
 

Nabsim

Forum Member
Brilliant David, pushed thin screwdriver blade of my Leatherman in the bottom of the switch and levered slightly and switch came out enough for me to lever gently on sides and full release :)

While I was at it I put the left hand switch right way up as I know it will aggravate your OCD if I need to post pics again lol

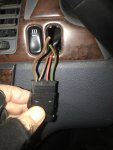
The switch actually has four cables connected to it but two are just tails a couple of inches long and only two are connected, (two on other switch also) so thats probably why no leds working. Left switch out while I double check what should be connected, plus its now gone dark, then I will see if permanent 12v will allow water heater to be run without ignition
 

Nabsim

Forum Member
Next question David :)

This is the circuit diagram for the switch that has been used, I need to double check which pins have been used but as only two wires am I right in saying its got to be pins 3 and 7, (the switch does turn on the heater when operated)?

If I am replacing the d+ with a permanent live what do I need to connect to get the led to illuminate when switch is turned on?

1583433668936.png


IMG_4831.jpg
 

wildebus

Forum Member
I see two wires have been chopped there. The brown would almost certainly have been a ground and you need a ground wire for a switch light to work, and I suspect that will be why the light is not working (there is no way a switch can illuminate with just an in and and out).
I would connect that brown tail on the switch to ground and see if the switch lights up when switched on. That will confirm that is the ground. If so, then you just need to make a proper ground/0V on that pin when you repurpose the other pins for your new use.

NOTE: the above is an educated guess. Before you connect anything get a meter on the wires and check that when on or off, there is not a direct short from one of the other wires to the brown wire just in case they have used wierd wiring!
 

wildebus

Forum Member
What I like to do for your kind of requirement is to replace the standard switch with a 3-way switch - so you can essentially have the device (whatever it may be) on either Automatic mode (so controlled by D+ in your situation), OFF regardless, or ON to override.
For example, added the 3-way (next to the round USB) to my van in the photo below

LT-Alpine
by David, on Flickr
I used a round switch but you can get rectangular 3-ways that would fit nicely into a blank switch.
 

Nabsim

Forum Member
On the Sprinter forums they said about fitting an additional switch and a relay to do what you mention in a three way. To be honest though they lost me as it ended up with 5 relays but i already have a lot of what they were doing fitted as standard
 

wildebus

Forum Member
You can use multiple relays and multiple switches but generally not needed. A couple of people do what I do with my 3-way switch to control the radio with a bunch of relays but it really is not needed (and if you are controlling a high-current device which uses more than the switch can handle (around 10A or so typically), then a single relay in the right place is all you should need.
 

Nabsim

Forum Member
Well, after some fun and games today I now know why the left hand switch was mounted upside down. When you switch off it turns the Airtronic in the back on, had me thinking I was cracking up, been turning it off at the 801 controller for a few hours only for it to come back on. After I put the switch the right way up last night I had it turned on lol

Presumably this is because it’s a second switch in circuit. Doesn’t matter, I can live with it but may turn the switch upside down again but will see.
 

SquirrellCook

Forum Member
I don't know if it's possible with the Merc switch, but sometimes it's possible to remove the switch face and reverse it.
 

Users who viewed this discussion (Total:0)

Top